The first version of Flight Simulator shipped in 1980 for the Apple II and, amazingly, it was in 3D! That was a remarkable achievement. It’s even more amazing when you consider that all of the 3D was done by hand, the result of meticulous calculations and low-level pixel commands. When Bruce Atwick tackled the early versions of Flight Simulator, not only were there no 3D frameworks, but there were no frameworks at all! Those versions of the game were mostly written in assembly, just a single step away from ones and zeroes that flow through a CPU.
When we set out to reimagine
Flight Simulator (or Flight Arcade as we call it) for the web and to demonstrate what’s possible in the new
Microsoft Edge browser and EdgeHTML rendering engine, we couldn’t help but think about the contrast of creating 3D then and now – old Flight Sim, new Flight Sim, old Internet Explorer, new Microsoft Edge. Modern coding seems almost luxurious as we sculpt 3D worlds in WebGL with great frameworks like
Babylon.js. It lets us focus on very high level problems.
In this article, we’ll share our approach to one of these fun challenges: a simple way to create realistic looking large-scale terrain.
https://www.youtube.com/watch?v=xyaq9TPmXrA
Note: Interactive code and examples for this article are also located at:
http://www.flightarcade.com/learn/
Modeling and 3D Terrain
Most 3D objects are created with modeling tools, and for good reason. Creating complex objects (like an airplane or even a building) is hard to do in code. Modeling tools almost always make sense, but there are exceptions! One of those might be cases like the rolling hills of the Flight Arcade island. We ended up using a technique that we found to be simpler and possibly even more intuitive: a heightmap.
A heightmap is a way to use a regular two-dimensional image to describe the elevation relief of a surface like an island or other terrain. It’s a pretty common way to work with elevation data, not only in games but also in geographic information systems (GIS) used by cartographers and geologists.
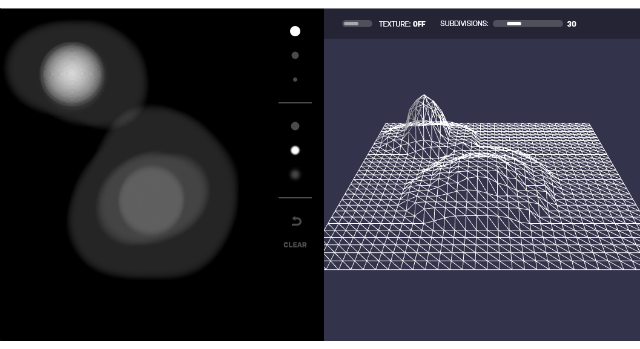
To help you get an idea for how this works, check out the interactive heightmap below.
Try drawing in the image editor and then check out the resulting terrain.
 Try the interactive demo here.
The concept behind a heightmap is pretty straightforward. In an image like the one above, pure black is the “floor” and pure white is the tallest peak. The grayscale colors in-between represent corresponding elevations. This gives us 256 levels of elevation which is plenty of detail for our game. Real-life applications might use the full color spectrum to store significantly more levels of detail (2564 = 4,294,967,296 levels of detail if you include an alpha channel).
A heightmap has a few advantages over a traditional polygonal mesh:
First, heightmaps are a lot more compact. Only the most significant data (the elevation) gets stored. It will need to be turned into a 3D object programatically, but this is the classic trade: you save space now and pay later with computation. By storing the data as an image you get another space advantage: you can leverage standard image compression techniques and make the data tiny (by comparison)!
Second, heightmaps are a convenient way to generate, visualize and edit terrain. It's pretty intuitive when you see one. It feels a little like looking at a map. This proved to be particularly useful for Flight Arcade. We designed and edited our island right in Photoshop! This made it very simple to make small adjustments as needed. When, for example, we wanted to make sure that the runway was completely flat, we just made sure to paint over that area in a single color.
You can see the heightmap for Flight Arcade below. See if you can spot the “flat” areas we created for the runway and the village.
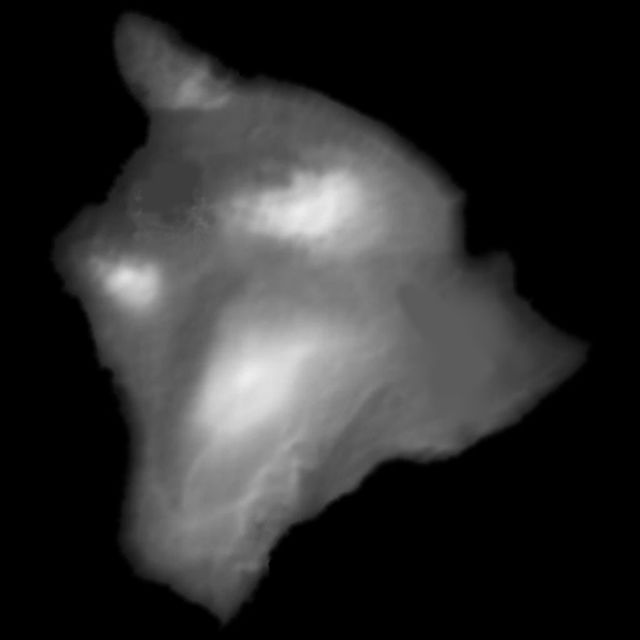 The heightmap for the Flight Arcade island. It was created in Photoshop and it's based on the "big island" in a famous Pacific Ocean island chain. Any guesses?
 A texture that gets mapped onto the resulting 3D mesh after the heightmap is decoded. More on that below.
Decoding the Heightmap
We built Flight Arcade with
Babylon.js and Babylon gave us a pretty straightforward path from heightmap to 3D. Babylon provides an API to generate a mesh geometry from a heightmap image:
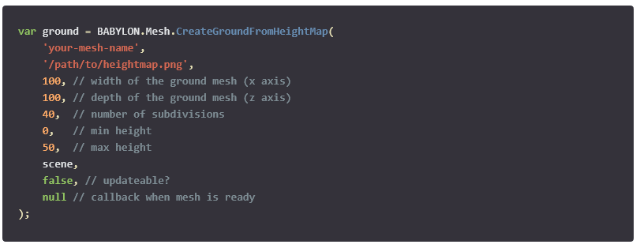
The amount of detail is determined by that subdivision’s property.It’s important to note that the parameter refers to the number of subdivisions on each side of the heighmap image, not the total number of cells. So increasing this number slightly can have a big effect on the total number of vertices in your mesh.
| 20 subdivisions |
= |
400 cells |
| 50 subdivisions |
= |
2,500 cells |
| 100 subdivisions |
= |
10,000 cells |
| 500 subdivisions |
= |
250,000 cells |
| 1000 subdivisions |
= |
1,000,000 cells |
In the next section we'll learn how to texture the ground, but when experimenting with heightmap creation, it's useful to see the wireframe. Here is the code to apply a simple wireframe texture so it’s easy to see how the heightmap data is converted into the vertices of our mesh:

Creating Texture Detail
Once we had a model, mapping a texture was relatively straightforward. For Flight Arcade, we simply created a very large image that matched the island in our heightmap. The image gets stretched over the contours of the terrain so the texture and the height map remain correlated.
This was really easy to visualize and, once again, all of the production work was done in Photoshop.
The original texture image was created at 4096x4096. That's pretty big! (We eventually reduced the size by a level to 2048x2048 in order to keep the download reasonable, but all of the development was done with the full size image). Here's a full-pixel sample from the original texture.
 A full-pixel sample of the original island texture. The entire town is only around 300px square.
Those rectangles represent the buildings in the town on the island. We quickly noticed a discrepancy in the level of texturing detail that we could achieve between the terrain and the other 3D models. Even with our giant island texture, the difference was distractingly apparent!
To fix this, we “blended” additional detail into the terrain texture in the form of random noise. You can see the before and after below. Notice how the additional noise enhances the appearance of detail in the terrain.
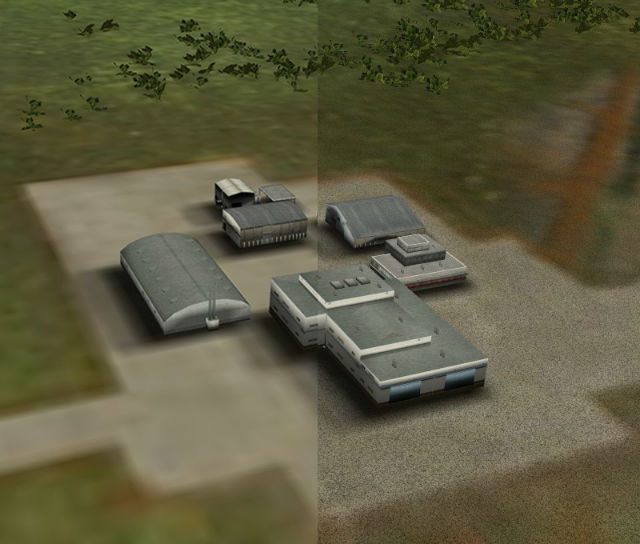
We created a custom shader to add the noise. Shaders give you an incredible amount of control over the rendering of a WebGL 3D scene and this is a great example of how a shader can be useful.
A WebGL shader consists of two major pieces: the vertex and fragment shaders. The principal goal of the vertex shader is to map vertices to a position in the rendered frame. The fragment (or pixel) shader controls the resulting color of the pixels.
Shaders are written in a high-level language called GLSL (Graphics Library Shader Language) which resembles c. This code is executed on the GPU. For an in-depth look at how shaders work, see
this tutorial on how to create your own custom shader for Babylon.js
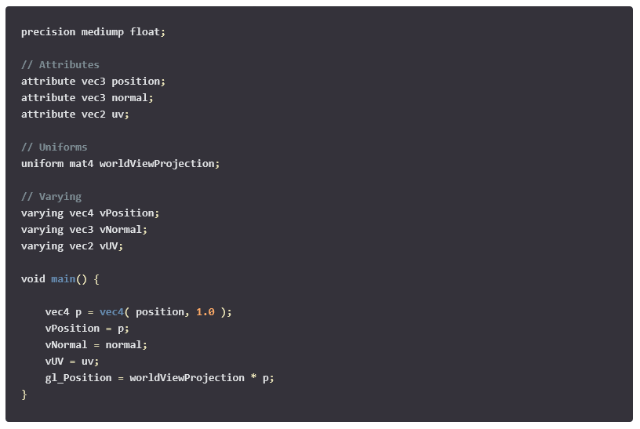
The Vertex Shader
We're not changing how our texture is mapped on to the ground mesh, so our vertex shader is quite simple. It just computes the standard mapping and assigns the target location.
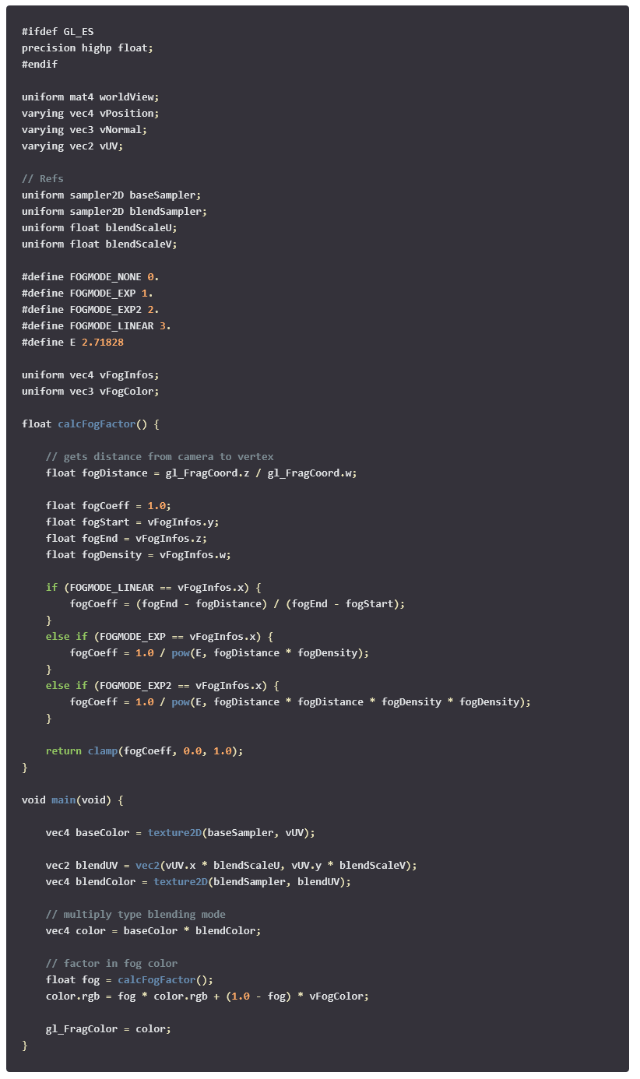
The Fragment Shader
Our fragment shader is a little more complicated. It combines two different images: the base and blend images. The base image is mapped across the entire ground mesh. In Flight Arcade, this is the color image of the island. The blend image is the small noise image used to give the ground some texture and detail at close distances. The shader combines the values from each image to create a combined texture across the island.
The final lesson in Flight Arcade takes place on a foggy day so the other task our pixel shader has is to adjust the color to simulate fog. The adjustment is based on how far the vertex is from the camera, with distant pixels being more heavily "obscured" by the fog. You'll see this distance calculation in the calcFogFactor function above the main shader code.
The final piece for our custom Blend shader is the JavaScript code used by Babylon. The primary purpose of this code is to prepare the parameters passed to our vertex and pixel shaders.
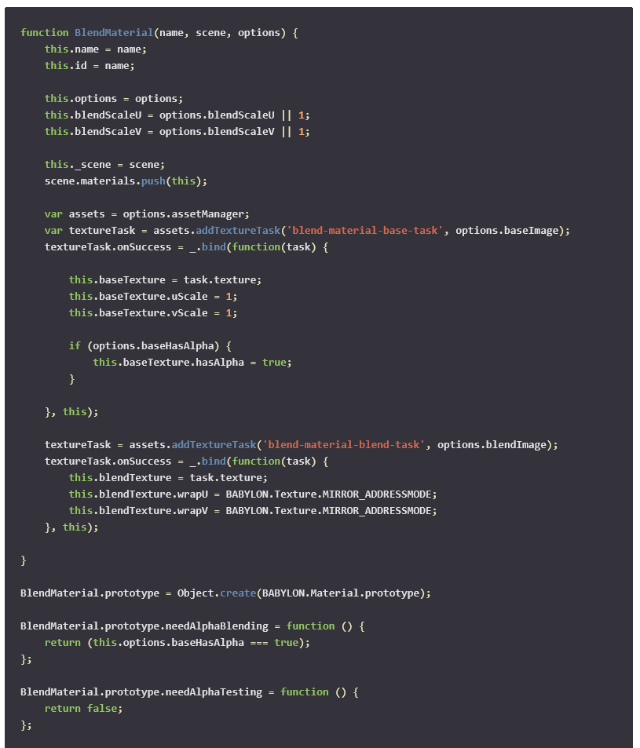
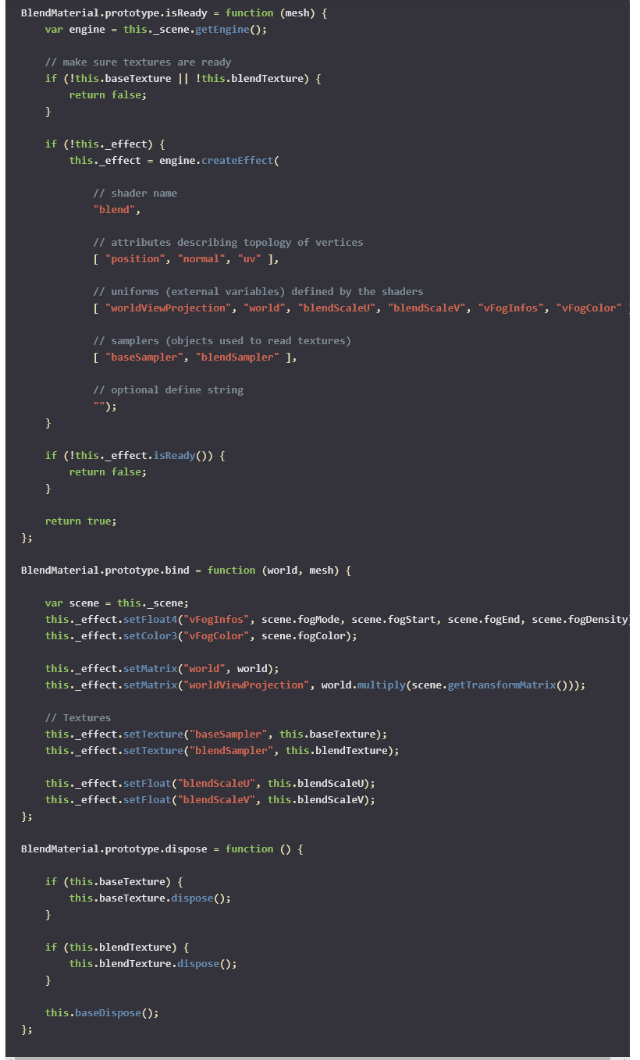
Babylon.js makes it easy to create a custom shader-based material. Our Blend material is relatively simple, but it really made a big difference in the appearance of the island when the plane flew low to the ground. Shaders bring the power of the GPU to the browser, expanding the types of creative effects you can apply to your 3D scenes. In our case, that was the finishing touch!
More Hands-on with JavaScript
Microsoft has a bunch of free learning on many open source JavaScript topics and we’re on a mission to create a lot more with
Microsoft Edge. Here are some to check-out:
And some free tools to get started:
Visual Studio Code,
Azure Trial, and
cross-browser testing tools – all available for Mac, Linux, or Windows.
This article is part of the web dev tech series from Microsoft. We’re excited to share Microsoft Edge and the new EdgeHTML rendering engine with you. Get free virtual machines or test remotely on your Mac, iOS, Android, or Windows device @ http://dev.modern.ie/
(dpe) 
Thank you for the tutorial. It was really helpful.