
How to: Circle Marks With Traceit.js and jQuery

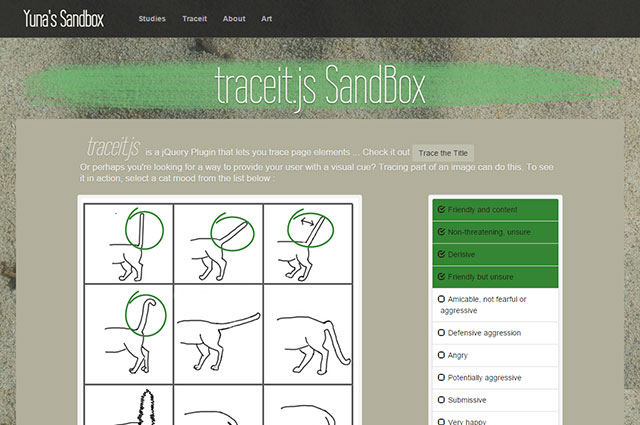
In classic whiteboard or flipchart presentations, keywords are often circled to underline their importance. This option of marking can now be transferred to web projects using the jQuery plugin „traceit.js“. Without much effort, chosen HTML elements can be marked with a circle that resembles the hand-drawn circles of whiteboard presentations. „traceit.js“ works especially well with tutorials as the important aspects can be marked very easily and efficiently.

 Once the files are integrated, any content can be circled like this:
 Default Encirclement
The plug-in makes sure that the content is circled depending on its size. The encirclements are not restricted to text elements as „traceit.js“ can also be used on images. However, there can be problems when trying to circle multiple words that cover more lines than one. Other than that, the plug-in does a good job at calculating the size of the element.
Default Encirclement
The plug-in makes sure that the content is circled depending on its size. The encirclements are not restricted to text elements as „traceit.js“ can also be used on images. However, there can be problems when trying to circle multiple words that cover more lines than one. Other than that, the plug-in does a good job at calculating the size of the element.
 Individual Encirclements
By default, the line overlays the chosen element. In our example, it has been placed behind it. Logically, hand-drawn circles are always above the content. But in certain situations, it makes sense to place the circle behind the content to make it easier to read. This also makes it possible to change the content.
As „traceit.js“ mimics hand-drawn circles, the starting and ending points of the circles should not match. The option „traceCanvasPadding“ allows the user to enter the distance between the two points. Using the value 0 creates a perfect ellipse while using values above that creates points that don't match. Via „redrawSpeed“, the pace of the encirclement is adjusted. For a realistic presentation, „traceCanvasPadding“ and „redrawSpeed“ should always be changed together as the distance between starting and ending point of a hand-drawn circle usually increases with increasing drawing speed.
Individual Encirclements
By default, the line overlays the chosen element. In our example, it has been placed behind it. Logically, hand-drawn circles are always above the content. But in certain situations, it makes sense to place the circle behind the content to make it easier to read. This also makes it possible to change the content.
As „traceit.js“ mimics hand-drawn circles, the starting and ending points of the circles should not match. The option „traceCanvasPadding“ allows the user to enter the distance between the two points. Using the value 0 creates a perfect ellipse while using values above that creates points that don't match. Via „redrawSpeed“, the pace of the encirclement is adjusted. For a realistic presentation, „traceCanvasPadding“ and „redrawSpeed“ should always be changed together as the distance between starting and ending point of a hand-drawn circle usually increases with increasing drawing speed.
Integrating and Using Traceit.js
To use „traceit.js“, both jQuery and the JavaScript-library „Raphaël“ need to be incorporated as the plug-in uses the SVG-drawing methods of „Raphaël“. Alternatively, there is also a combined JavaScript file that contains the plug-in as well as the „Raphaël“ library.
Once the files are integrated, any content can be circled like this:
<p><span id="schlagwort">Schlagworte</span> sollten immer auffallen.</p>
In the example, the content of a „<span>“-Element is circled. To do so, an ID is distributed and transferred to „traceit.js“ to use the plug-in on the content.
$("#schlagwort").trace();
Default Encirclement
The plug-in makes sure that the content is circled depending on its size. The encirclements are not restricted to text elements as „traceit.js“ can also be used on images. However, there can be problems when trying to circle multiple words that cover more lines than one. Other than that, the plug-in does a good job at calculating the size of the element.
Altering the Encirclement's Appearance
By default, the elements are circled by a thin, green line. However, the emergence of the line can be adjusted in unique ways via „traceOpt“. Not only line color and width but also the opacity can be changed.$("#schlagwort").trace({
traceOpt {
"stroke": "red";
"stroke-width": 5,
"stroke-opacity": 0.5,
"fill": "yellow",
"fill-opacity": 0.25,
"z-index": -1,
"stroke-linecap": "round"
}
});
In the above example, a five pixel wide, red line with 50% opacity is drawn. The circle is filled out by a yellow area with 25% opacity. The position of the line can be defined via „z-index“. All CSS characteristics known by the SVG format can be used for the representation of the line. For example, a circle's starting and ending points can be added to the lines via „stroke-linecap“, which gives the circles an even more realistic touch.
Individual Encirclements
By default, the line overlays the chosen element. In our example, it has been placed behind it. Logically, hand-drawn circles are always above the content. But in certain situations, it makes sense to place the circle behind the content to make it easier to read. This also makes it possible to change the content.
As „traceit.js“ mimics hand-drawn circles, the starting and ending points of the circles should not match. The option „traceCanvasPadding“ allows the user to enter the distance between the two points. Using the value 0 creates a perfect ellipse while using values above that creates points that don't match. Via „redrawSpeed“, the pace of the encirclement is adjusted. For a realistic presentation, „traceCanvasPadding“ and „redrawSpeed“ should always be changed together as the distance between starting and ending point of a hand-drawn circle usually increases with increasing drawing speed.
Encirclement Drawn as an SVG Element
The encirclement is - as mentioned before - created as an SVG element using „Raphaël“. To do so, an SVG element is placed inside of a „<div>“ container. This container is given an ID consisting of the ID of the element that is going to be circled – „keywords“ in the example – followed by the character string „_wrap“. The name of the container can be changed via „traceDivPref“. This can be useful when the generated IDs are already in use somewhere else. The placement of the encirclement is done using stylesheets of the „<div>“ container. As the container can be accessed via its ID, the position and appearance of the circle can be changed individually using CSS. This way, the SVG element is drawn via Inline CSS, so that protruding contents are hidden („overflow: hidden“). Sometimes, this causes the end of the line not to be shown completely, as it protrudes from the drawing area. This can be overwritten via stylesheets.#keyword_wrap svg {
overflow: visible !important;
}
That way it is made sure that the drawn ellipse is always shown completely.
Defining the Encirclement Behavior
One click on a circle is enough to hide it. Alternatively, a line can also be hidden using the „trigger()“ method.$("#schlagwort").trigger("hide.trace");
Furthermore, „traceit.js“ provides three callbacks. They enable the execution of a feature when the animation is completed („onEndTrace“), the circle is clicked („onClick“) or when it gets hidden („onHide“).
$("#schlagwort").trace({
  onEndTrace: function() {
    alert("Circle completed.");
  }
});
In this example, the user is alerted as soon as the circle is completed.
This is a cool trick – thanks!
Thanks, Denis!
So since then I also wrote an angular directive for it. Here is a demo page if you are curious: http://yunap.github.io/angular-traceit/#/home