
Blogging for Beginners Vol. 2: Plugin Basics, Theme Choice

In the first part of our small series "Blogging for Beginners", you've picked your web host and decided on a domain. In this second part, we'll help you install the most important plugins, as well as find a theme, so you can start blogging soon.
Plugins and a suitable theme are very important parts of any WordPress blog. They determine what your blog looks like and how it acts. Design is an important topic, as a horrible design can scare off potential readers.
 The "Hueman" Theme in a Three-Column View. It is also possible to display it with two columns.[/caption]
You'll get most themes in a two-column layout. This layout has established itself. On the left, you'll find the main content, and the sidebar is on the right. A good theme lets you customize a lot of different things. The color of links and the content area, whether you are able to use a background image, how many columns the layout has, and whether you can use a custom logo or not.
The shown theme can do all of that and a lot more. You can get it for free on WordPress.org. By now, WordPress.org offers about 4,000 free themes to choose from. Search for them within your admin area and install them with one click.
Example: a Two-Column Theme
[caption id="attachment_77169" align="alignnone" width="660"]
The "Hueman" Theme in a Three-Column View. It is also possible to display it with two columns.[/caption]
You'll get most themes in a two-column layout. This layout has established itself. On the left, you'll find the main content, and the sidebar is on the right. A good theme lets you customize a lot of different things. The color of links and the content area, whether you are able to use a background image, how many columns the layout has, and whether you can use a custom logo or not.
The shown theme can do all of that and a lot more. You can get it for free on WordPress.org. By now, WordPress.org offers about 4,000 free themes to choose from. Search for them within your admin area and install them with one click.
Example: a Two-Column Theme
[caption id="attachment_77169" align="alignnone" width="660"]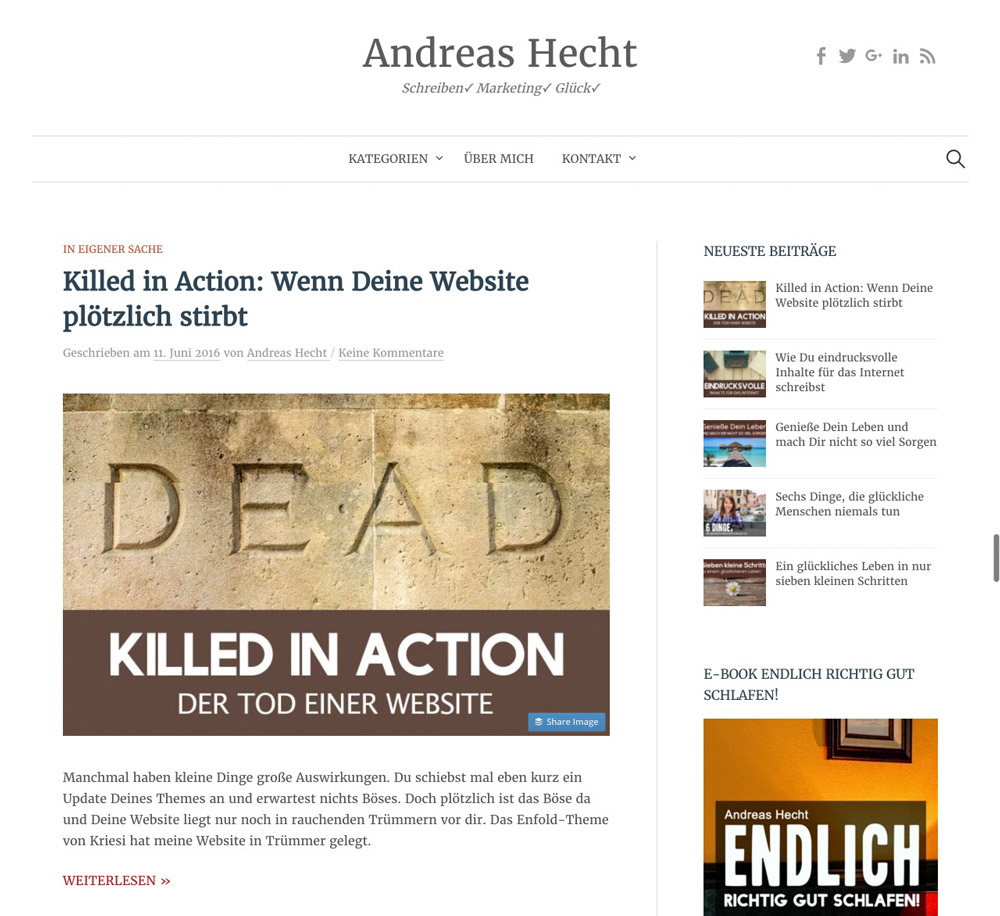 The Example of a Two-Column Theme. Content on the Left, Sidebar on the Right.[/caption]
Theme: A Refined Version of the Graphy Theme from WordPress.org
The Example of a Two-Column Theme. Content on the Left, Sidebar on the Right.[/caption]
Theme: A Refined Version of the Graphy Theme from WordPress.org
 Under Install => Themes => Design, You'll Find all Free Themes.[/caption]
[caption id="attachment_77166" align="alignnone" width="660"]
Under Install => Themes => Design, You'll Find all Free Themes.[/caption]
[caption id="attachment_77166" align="alignnone" width="660"]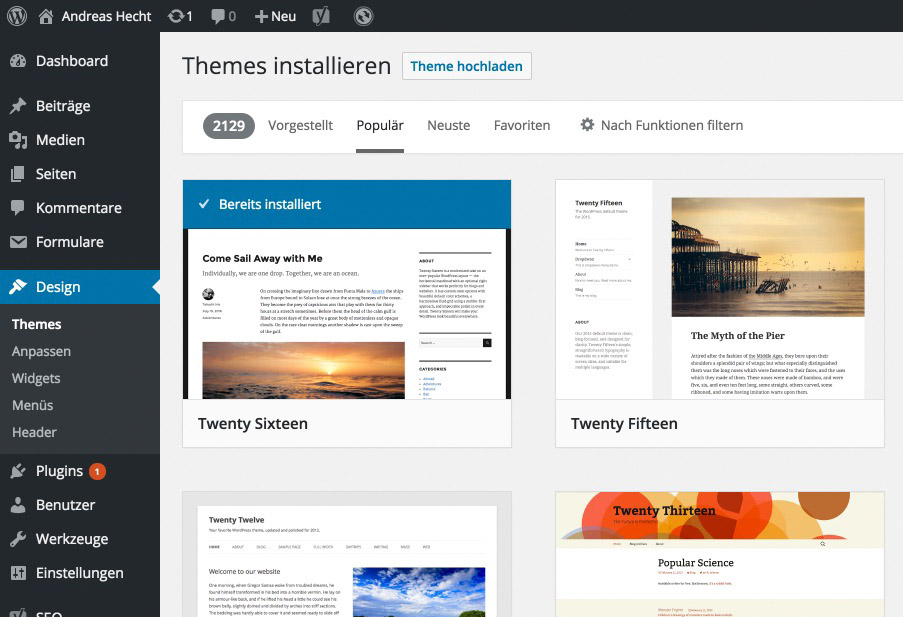 This Display Lets You Filter the Themes for Characteristics.[/caption]
 The most important plugin. It prevents spam comments and makes sure that your blog only contains comments written by humans.
 This SEO plugin is indispensable. It optimizes the distribution of meta article tiles, and the respective meta description, and is able to optimize them for the visibility in Google search results. In this case, meta title and meta description is the information important to Google. Here is an example of how both can be displayed in the search results:
[caption id="attachment_77170" align="alignnone" width="660"]
This SEO plugin is indispensable. It optimizes the distribution of meta article tiles, and the respective meta description, and is able to optimize them for the visibility in Google search results. In this case, meta title and meta description is the information important to Google. Here is an example of how both can be displayed in the search results:
[caption id="attachment_77170" align="alignnone" width="660"]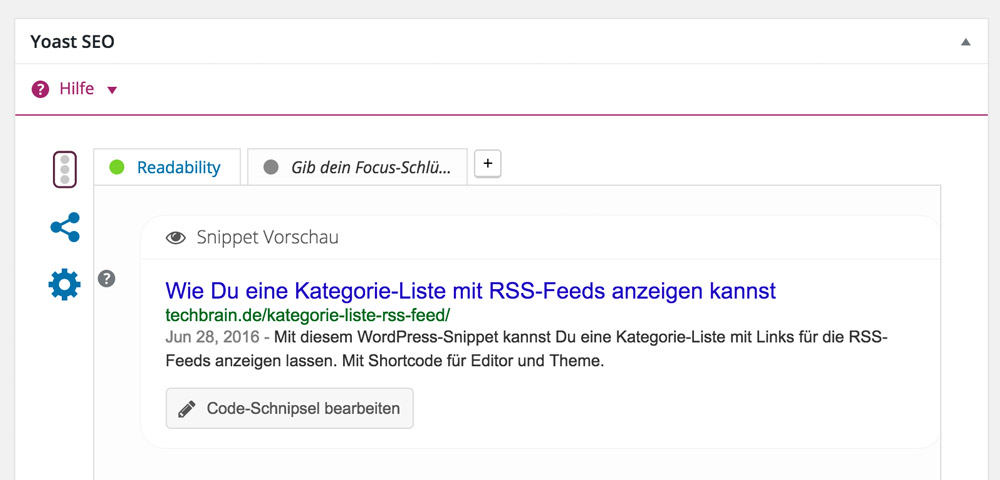 The SEO Meta Data. The Meta Title and the Meta Description.[/caption]
This editor appears below each post under Write Posts. You can manually edit the information for a better description.
The SEO Meta Data. The Meta Title and the Meta Description.[/caption]
This editor appears below each post under Write Posts. You can manually edit the information for a better description.
 Publish Confirm makes sure that you don't accidently publish unfinished articles. The plugin creates a small pop-up in which you need to confirm a second time that you want to publish the post. Although it doesn't do much, this plugin is one of the absolute essentials and I use it on each of my websites.
 Autoptimize helps you accelerate your website. It accumulates almost all JavaScript files in a single one and compresses the code. The plugin does the same to your CSS files. This makes for a faster loading time of your blog.
 Cachify is the optimal addition to Autoptimize. Cachify caches your website and sends the cached page to your visitors. This increases the website's speed significantly, making both the visitors and Google happy, as the loading time is a ranking factor.
Professionals state that Cachify, when combined with an extensive speed optimization, is the fastest caching plugin on the market. On top of that, it is also capable of optimizing large websites. It's suited very well for beginners too, because of its simple set up.
Cachify is the optimal addition to Autoptimize. Cachify caches your website and sends the cached page to your visitors. This increases the website's speed significantly, making both the visitors and Google happy, as the loading time is a ranking factor.
Professionals state that Cachify, when combined with an extensive speed optimization, is the fastest caching plugin on the market. On top of that, it is also capable of optimizing large websites. It's suited very well for beginners too, because of its simple set up.
 With the help of this plugin, creating a form for your contact page becomes a piece of cake. Very effective and, above all else, very easy to set up.
 A website's images and graphics are the bottleneck of loading speed. Thus, a good plugin for image optimization is crucial. You could use this plugin for free, however, I strongly recommend purchasing a premium license, as the free version only optimizes images of up to 100KB. The premium license is 19 Euro a year. In return, you'll get the best plugin for image optimization with support for the WebP image format.
 You can get the required plugin for free on WordPress, but the backup function requires paying for the service. The service is an offer from Automattic, the company behind WordPress.
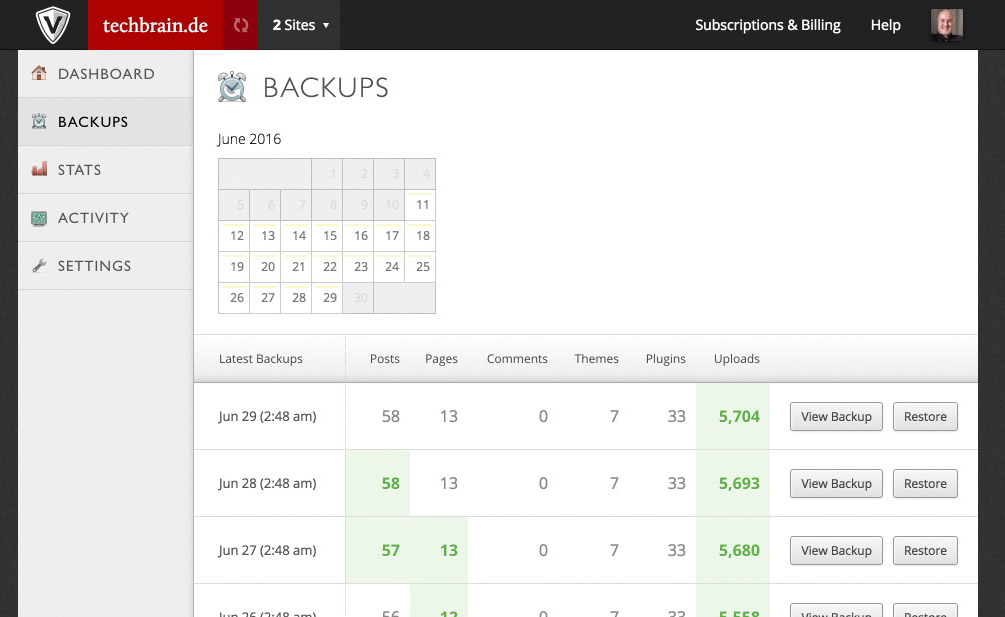 Restoring a Backup Using VaultPress. One Click on "Restore" is all it Takes.[/caption]
The Functions in a Video:
https://videopress.com/v/TxdSIdpO
Restoring a Backup Using VaultPress. One Click on "Restore" is all it Takes.[/caption]
The Functions in a Video:
https://videopress.com/v/TxdSIdpO
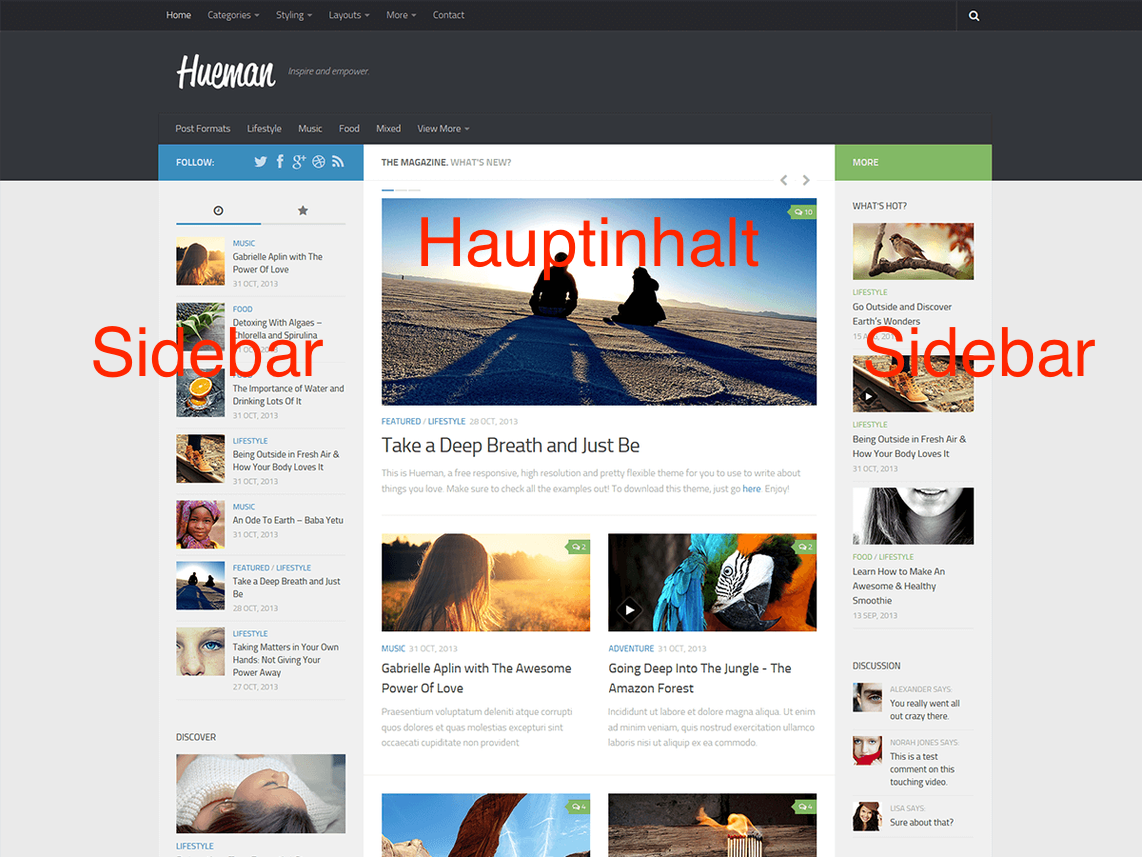
Choosing the Right Theme
A theme is what determines the appearance of your blog. Via programmed functions, a theme is also able to decide which options you have when it comes to customization - whether you get to choose colors or can determine basic layouts. Conventional themes can display content in one to three columns. This means that you have a main content area, and up to two sidebars, into which supporting content is placed - the latest comments, or the newest articles, for example. [caption id="attachment_77164" align="alignnone" width="660"] The "Hueman" Theme in a Three-Column View. It is also possible to display it with two columns.[/caption]
You'll get most themes in a two-column layout. This layout has established itself. On the left, you'll find the main content, and the sidebar is on the right. A good theme lets you customize a lot of different things. The color of links and the content area, whether you are able to use a background image, how many columns the layout has, and whether you can use a custom logo or not.
The shown theme can do all of that and a lot more. You can get it for free on WordPress.org. By now, WordPress.org offers about 4,000 free themes to choose from. Search for them within your admin area and install them with one click.
Example: a Two-Column Theme
[caption id="attachment_77169" align="alignnone" width="660"] The Example of a Two-Column Theme. Content on the Left, Sidebar on the Right.[/caption]
Theme: A Refined Version of the Graphy Theme from WordPress.org
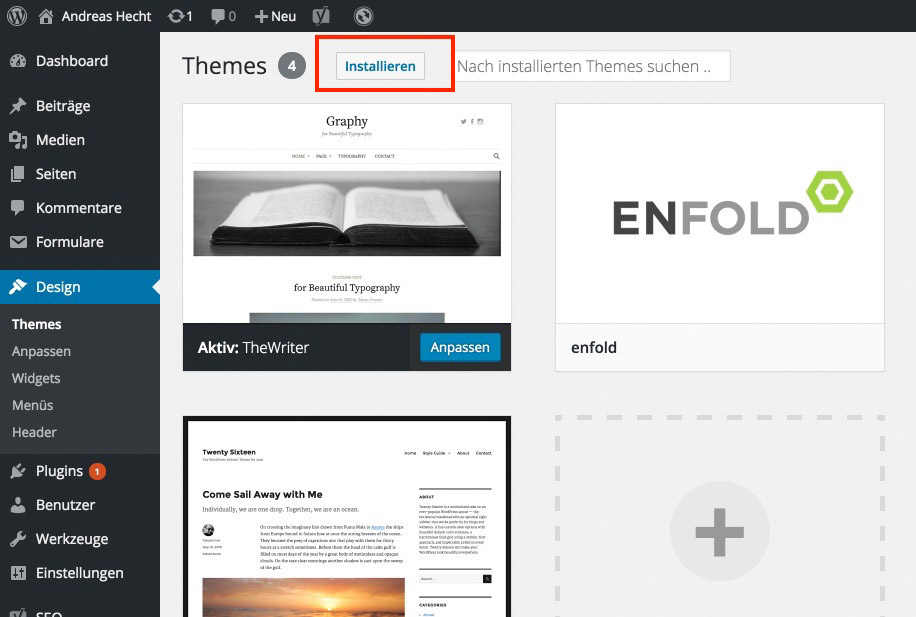
Searching for, and Installing Themes
[caption id="attachment_77165" align="alignnone" width="660"] Under Install => Themes => Design, You'll Find all Free Themes.[/caption]
[caption id="attachment_77166" align="alignnone" width="660"] This Display Lets You Filter the Themes for Characteristics.[/caption]
Download Link
The WordPress Plugin Basics
Plugins are important. They extend the WordPress functionality by a lot of useful functions. For example, they serve the purpose of spam prevention within the WP comment function. I have created a list of plugins that should be a part of any blog. All presented plugins have proven to be effective and are in constant development.1- Antispam Bee
The most important plugin. It prevents spam comments and makes sure that your blog only contains comments written by humans.
2 - Yoast SEO
This SEO plugin is indispensable. It optimizes the distribution of meta article tiles, and the respective meta description, and is able to optimize them for the visibility in Google search results. In this case, meta title and meta description is the information important to Google. Here is an example of how both can be displayed in the search results:
[caption id="attachment_77170" align="alignnone" width="660"] The SEO Meta Data. The Meta Title and the Meta Description.[/caption]
This editor appears below each post under Write Posts. You can manually edit the information for a better description.
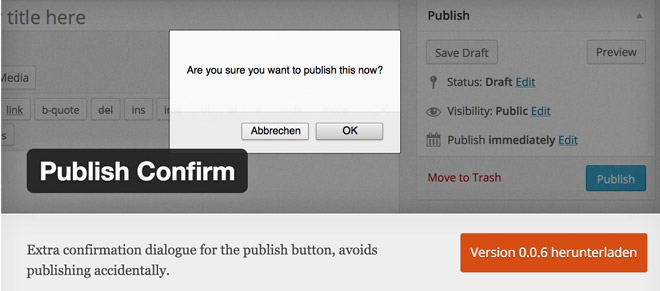
3 - Publish Confirm
Publish Confirm makes sure that you don't accidently publish unfinished articles. The plugin creates a small pop-up in which you need to confirm a second time that you want to publish the post. Although it doesn't do much, this plugin is one of the absolute essentials and I use it on each of my websites.
4 - Autoptimize
Autoptimize helps you accelerate your website. It accumulates almost all JavaScript files in a single one and compresses the code. The plugin does the same to your CSS files. This makes for a faster loading time of your blog.
5 - Cachify
Cachify is the optimal addition to Autoptimize. Cachify caches your website and sends the cached page to your visitors. This increases the website's speed significantly, making both the visitors and Google happy, as the loading time is a ranking factor.
Professionals state that Cachify, when combined with an extensive speed optimization, is the fastest caching plugin on the market. On top of that, it is also capable of optimizing large websites. It's suited very well for beginners too, because of its simple set up.
6 - Contact Form 7
With the help of this plugin, creating a form for your contact page becomes a piece of cake. Very effective and, above all else, very easy to set up.
7 - Optimus - WordPress Image Optimization
A website's images and graphics are the bottleneck of loading speed. Thus, a good plugin for image optimization is crucial. You could use this plugin for free, however, I strongly recommend purchasing a premium license, as the free version only optimizes images of up to 100KB. The premium license is 19 Euro a year. In return, you'll get the best plugin for image optimization with support for the WebP image format.
Highly Recommended: A Professional Backup
Actually, this should've been number one. However, you won't get a really good backup for free. I'll address it nonetheless. When blogging, a backup of your blog is the most important thing of them all. Created daily and automatically, and also equipped with a one-click recovery function. So many things could happen. Your blog could get hacked. It's also possible that a plugin or theme update destroys your website. Then, there's no other option aside from restoring the latest backup. When this can be done with one click, every cent is well-spent. Of course, there are free backup plugins as well, but when it comes to restoring the website, you need to manually import the database via phpMyAdmin. This takes a while and requires expertise knowledge. That's why I've been using a paid solution for years now.The VaultPress Backup Service
You can get the required plugin for free on WordPress, but the backup function requires paying for the service. The service is an offer from Automattic, the company behind WordPress.
- Costs: starting at 5 USD a month
- Requirements: WordPress.com account and a credit card (prepaid is accepted as well)
- Website: VaultPress.com
Restoring a Backup Using VaultPress. One Click on "Restore" is all it Takes.[/caption]
The Functions in a Video:
https://videopress.com/v/TxdSIdpO
Like the backup plugins – super useful