
WordPress Theme Customizer: First Steps
I've already explained how to create a theme options page quickly and easily. Creating a custom page for theme options is optimal if you want to offer your users many features. But there's another way of realizing a page for theme options. For a while now, WordPress has been offering the theme customizer. This is perfect if your theme doesn't offer too many options. The customizer's big advantage is its live preview. Every change made to the theme can be checked out before you transfer it to the website. This article shows you how to "feed" the Customizer with your features.
Creating theme options with the Theme Customizer is relatively easy and offers its users the big advantage of a live preview before saving the changes. The Theme Customizer got introduced with WordPress version 3.4.
 Our example theme is the Ari theme by Elmastudio. It only provides the predefined options and can thus be extended nicely in the course of this tutorial. In the following, we'll create an entirely new Theme Customizer page for the theme.
Important: All of the following code snippets can be clicked on to download the code directly from GitHub.
Our example theme is the Ari theme by Elmastudio. It only provides the predefined options and can thus be extended nicely in the course of this tutorial. In the following, we'll create an entirely new Theme Customizer page for the theme.
Important: All of the following code snippets can be clicked on to download the code directly from GitHub.

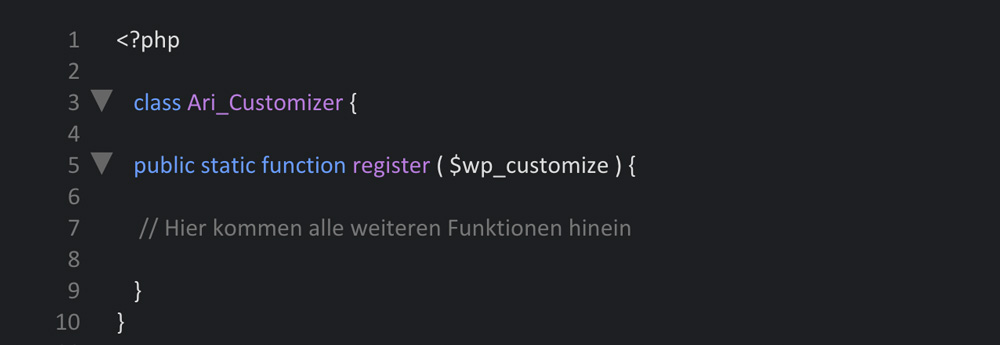 First, an own class is distributed, and then the features are registered. Every code that we'll write now belongs into this function.
 First of all, the code describes the options that can be altered by the user, like link and text colors. Furthermore, a standard, which is already defined in the theme's CSS stylesheet, is set for each of the two options. This way, you don't need to define the settings for each of the color options. The settings that the user can modify in the Theme Customizer are defined this way as well. Without this configuration, a new section in the setting options won't appear in the customizer.
Finally, the code also defines the audits that allow for these settings.
Here, new WP_Customize_Color_Control activates the color picker that enables you to determine the custom colors.
By the way, I didn't have to set up a "colors" section, as this happens automatically when audits are defined within that section.
Now, our Theme Customizer looks like this:
First of all, the code describes the options that can be altered by the user, like link and text colors. Furthermore, a standard, which is already defined in the theme's CSS stylesheet, is set for each of the two options. This way, you don't need to define the settings for each of the color options. The settings that the user can modify in the Theme Customizer are defined this way as well. Without this configuration, a new section in the setting options won't appear in the customizer.
Finally, the code also defines the audits that allow for these settings.
Here, new WP_Customize_Color_Control activates the color picker that enables you to determine the custom colors.
By the way, I didn't have to set up a "colors" section, as this happens automatically when audits are defined within that section.
Now, our Theme Customizer looks like this:
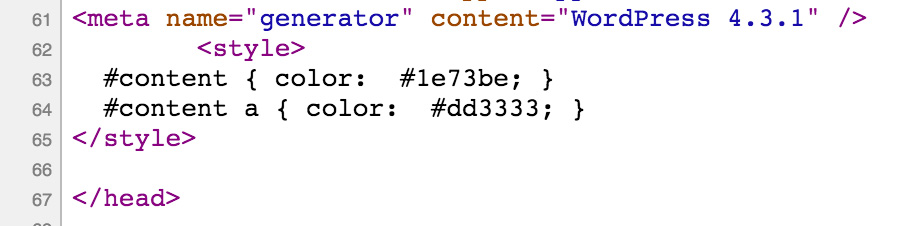
 You can also adjust the colors with a color picker, but no changes will be made to the theme yet. To allow the changes to be applied to the theme, you need to adjust the theme's header.php. Thus, copy the following code directly at the top of the finishing </head> tag in the header.php:
 Once you've done that, the color adjustments are directly visible in the customizer, before clicking »Save & Publish«. Immediately after choosing a new color, the page is refreshed, and the changes in color choice become visible.
 The two variables take the changes from the customizer and transfer the values to the small inline CSS, which is responsible for the display of the new colors.
 The priority determines where the new menu item is displayed. The smaller the number, the closer to the top the menu item will be placed.

 There are many different controller objects, depending on what you need. Here, we have used WP_Customize_Control, which is useful for input boxes. You can use it to create a text area, a text zone, check boxes, radio elements, and colors. There are also other controller objects such as WP_Customize_Color_Control, WP_Customize_Upload_Control, and WP_Customize_Image_Control to enter colors or upload a file or image.
 Once you've chosen refresh as your transport method, there's nothing left to do. When you chose the transport method postMessage, you need to write a little JavaScript in order for changes to be visible in real time.
 I've chosen a checkbox for the activation of the dark Ari theme. By placing a checkmark, you'll activate the dark theme.
 Of course, the colors of the texts and links should be adjusted afterward, as we've already done above.
 The code makes sure that the stylesheet of the dark theme only appears in the <head> area when needed.
 Additionally, a little jQuery is needed for real-time display.
 Keep in mind that the code for the text and description elements are different from the advertising block. The advertising block is tied to an HTML element while text and description are tied to a text element. For me, the real time display of blog names and descriptions only worked this way.
 Copy the following line of code into the theme's functions.php so that the customizer.php is accessed.
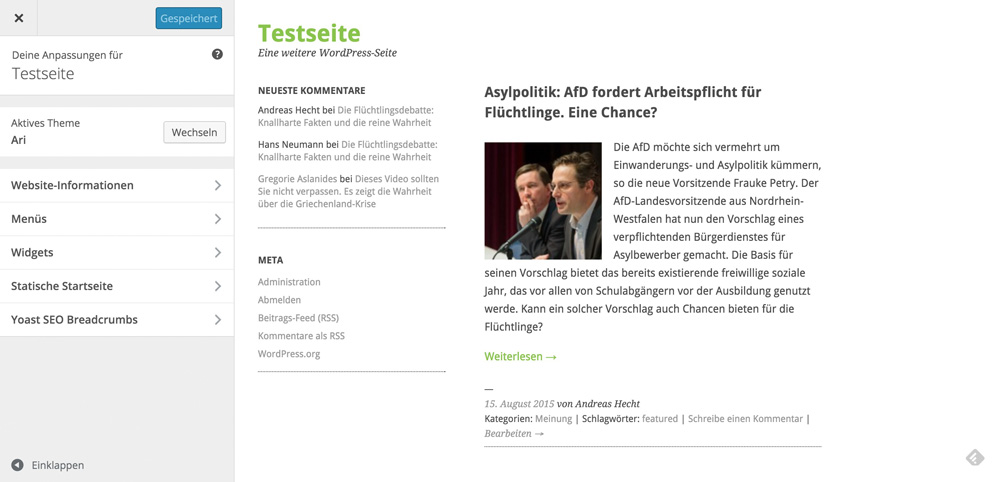
 When activating the Ari theme, the following image should be displayed under »Design => Edit«:
Important to Know: No More Theme Options Pages for WordPress.org Themes
When you want to create a theme for the WordPress.org theme index, you have to use the Theme Customizer. Theme options pages are not allowed anymore since the 21st of October of last year.Creating Theme Options for the Theme Customizer
Our example theme is the Ari theme by Elmastudio. It only provides the predefined options and can thus be extended nicely in the course of this tutorial. In the following, we'll create an entirely new Theme Customizer page for the theme.
Important: All of the following code snippets can be clicked on to download the code directly from GitHub.
The Four Methods of the $wp_customize Object
The Predefined Settings
WordPress comes with some default settings that don't need to be defined.- title_tagline - Website Title and Tagline
- colors - Colors
- header_image - Header Image
- background_image - Background Image
- nav - Navigation
- static_front_page - Static Front Page
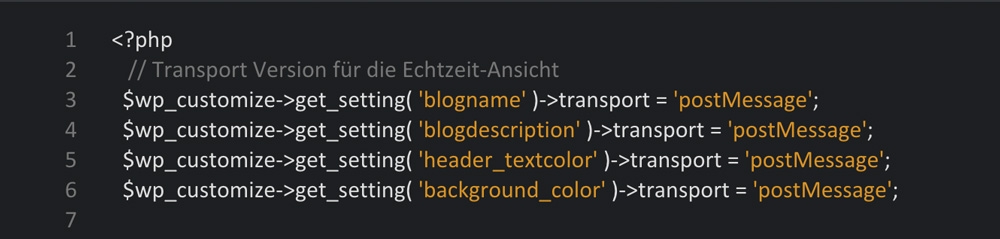
The Transport Versions - refresh vs. postMessage
However, if you want some of these features to be visible before saving them, you need to add them to the Theme Customizer feature. You can assign two "transport" versions. Refresh means that after entering your settings within the Theme Customizer, the preview page is updated directly. After that, the new settings are visible. PostMessage however, means real-time changes. When you change the blog name in the Theme Customizer, for example, the entered letters are visible immediately. For the transport method postMessage, you need an additional, small jQuery file.Important to Know: WordPress' Standard Features
The screenshot shows the standard features of the transport method »refresh«. However, you can also configure them for a real-time view as pictured.
Creating Theme Options With the Theme Customizer
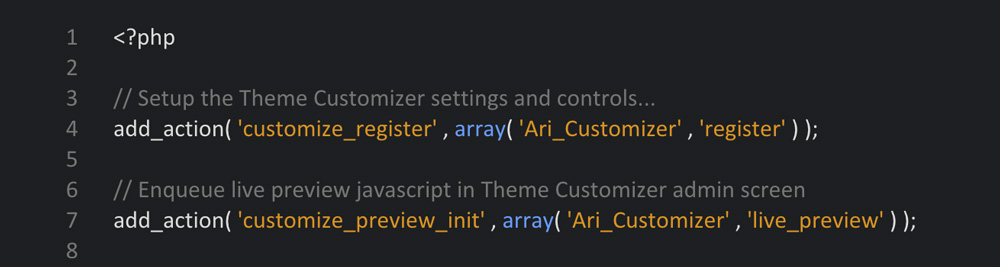
Please set up a new file named customizer.php in your theme's main index. You can either create the file in a pure text editor like TextEdit or an HTML Editor. Paste the following code into the customizer.php:
First, an own class is distributed, and then the features are registered. Every code that we'll write now belongs into this function.
Letting the User Adjust the Colors
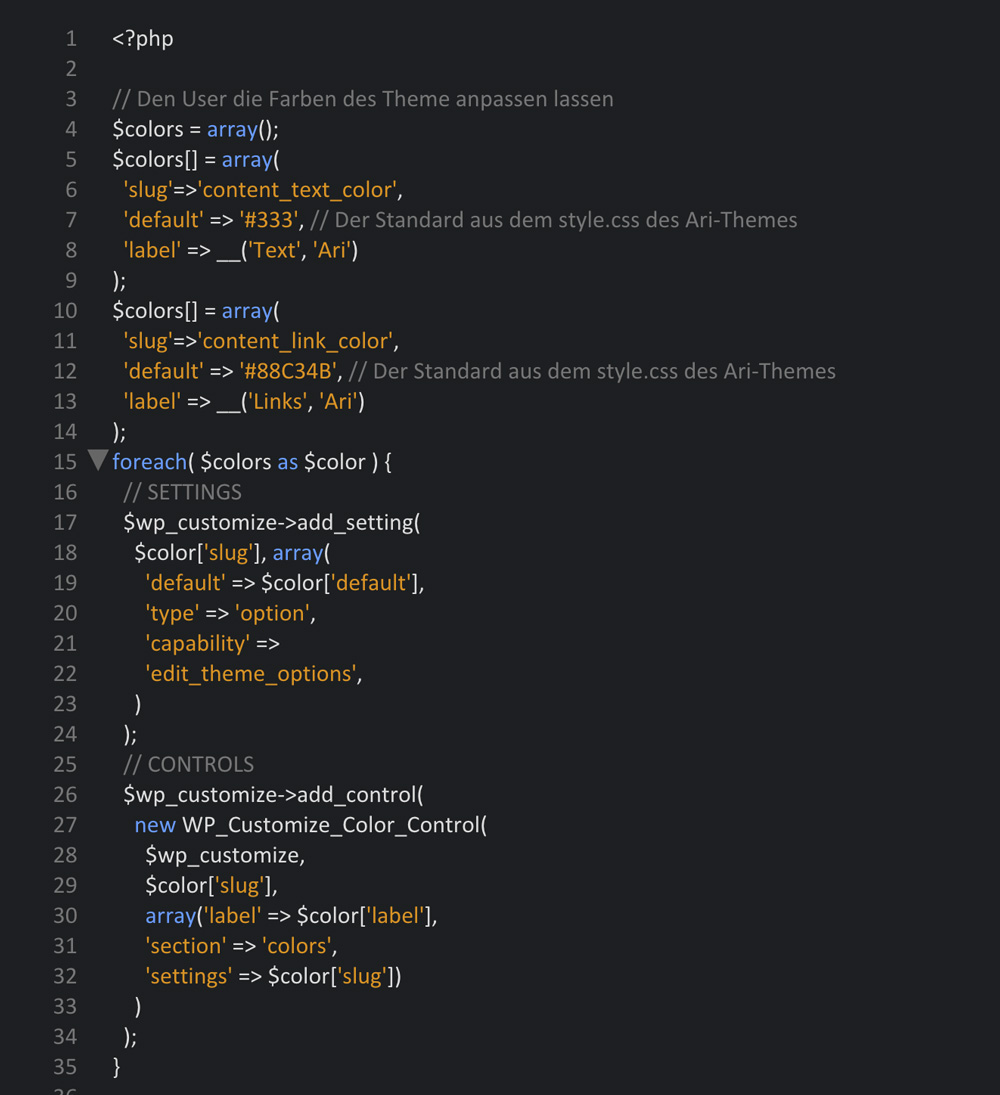
We're setting up a section for the colors that users are supposed to be able to choose from later. The link and the text colors can be edited. The code needs to be copied into the function that we just set up. In this case, we'll access the transport method »refresh«, which doesn't need to be defined as it's the WordPress standard, as an example.
First of all, the code describes the options that can be altered by the user, like link and text colors. Furthermore, a standard, which is already defined in the theme's CSS stylesheet, is set for each of the two options. This way, you don't need to define the settings for each of the color options. The settings that the user can modify in the Theme Customizer are defined this way as well. Without this configuration, a new section in the setting options won't appear in the customizer.
Finally, the code also defines the audits that allow for these settings.
Here, new WP_Customize_Color_Control activates the color picker that enables you to determine the custom colors.
By the way, I didn't have to set up a "colors" section, as this happens automatically when audits are defined within that section.
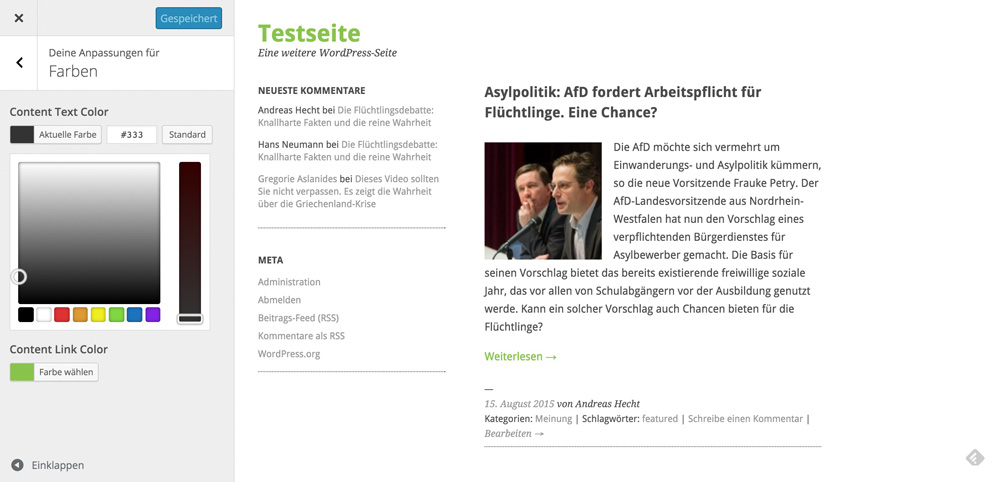
Now, our Theme Customizer looks like this:
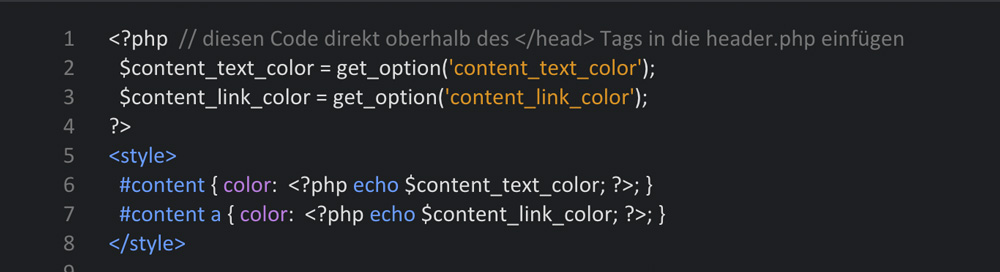
You can also adjust the colors with a color picker, but no changes will be made to the theme yet. To allow the changes to be applied to the theme, you need to adjust the theme's header.php. Thus, copy the following code directly at the top of the finishing </head> tag in the header.php:
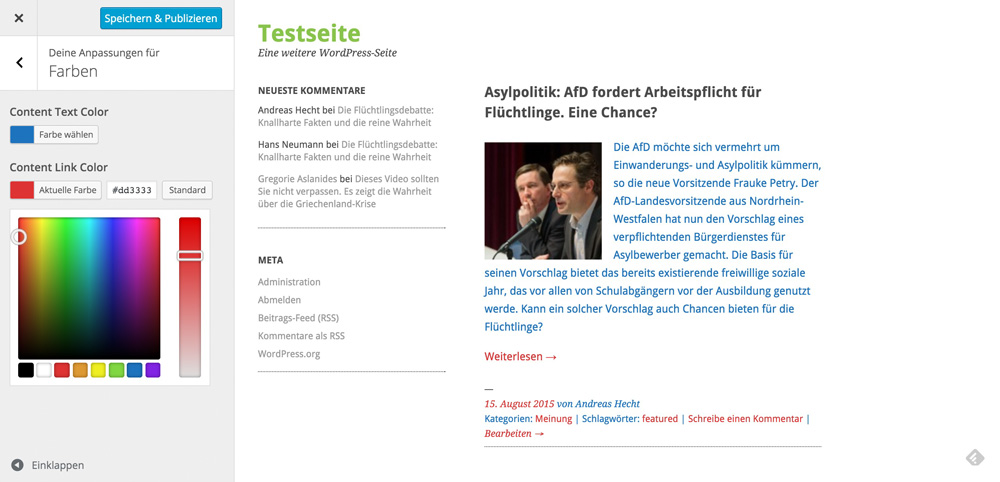
Once you've done that, the color adjustments are directly visible in the customizer, before clicking »Save & Publish«. Immediately after choosing a new color, the page is refreshed, and the changes in color choice become visible.
The two variables take the changes from the customizer and transfer the values to the small inline CSS, which is responsible for the display of the new colors.
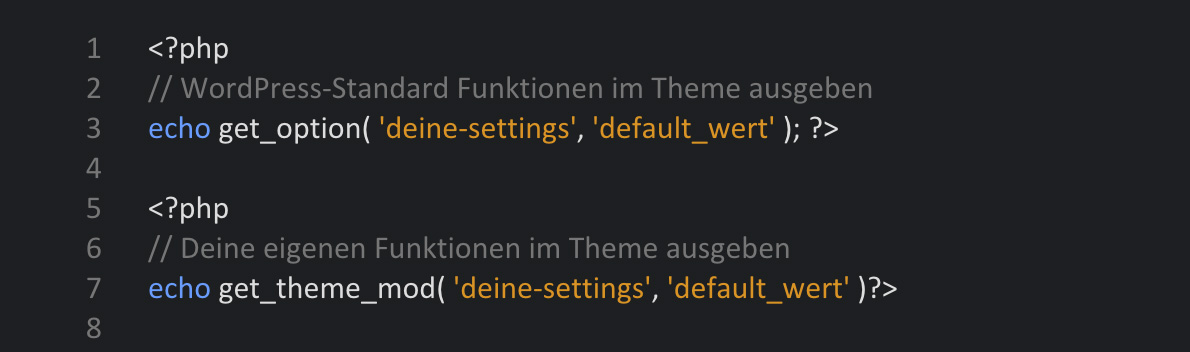
Showing the Options in the Theme
Here, we differentiate between the features provided by WordPress by default and the one's we defined ourselves.
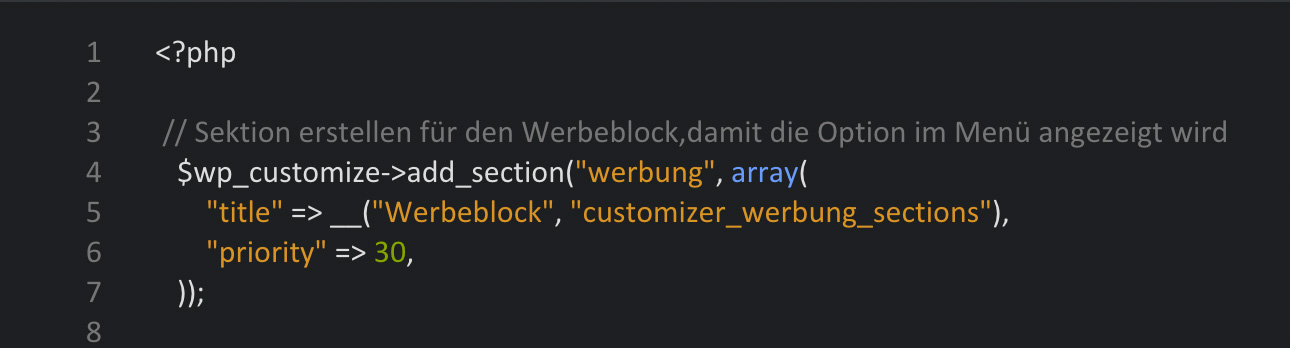
Implementing an Advertisement Block
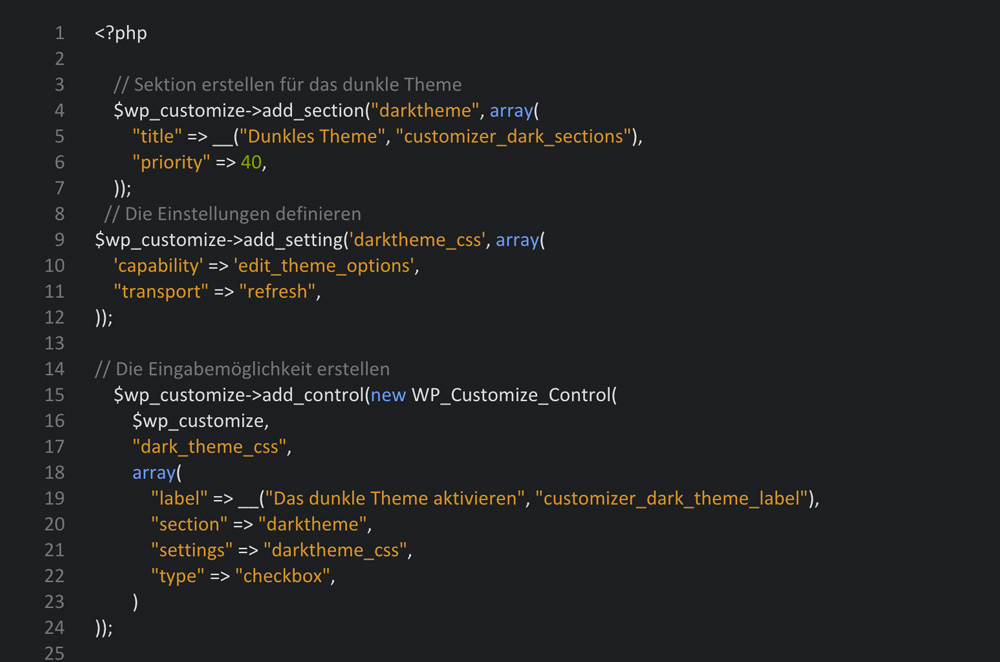
In this case, it won't be as easy as it was when editing the colors. More code is necessary. To begin, a new section has to be set up so that the new menu item can be displayed. To do that, we're using the $customizer_object->add_section method.
The priority determines where the new menu item is displayed. The smaller the number, the closer to the top the menu item will be placed.
Defining the Settings
Here is where the $customizer_object->add_setting method comes into play.
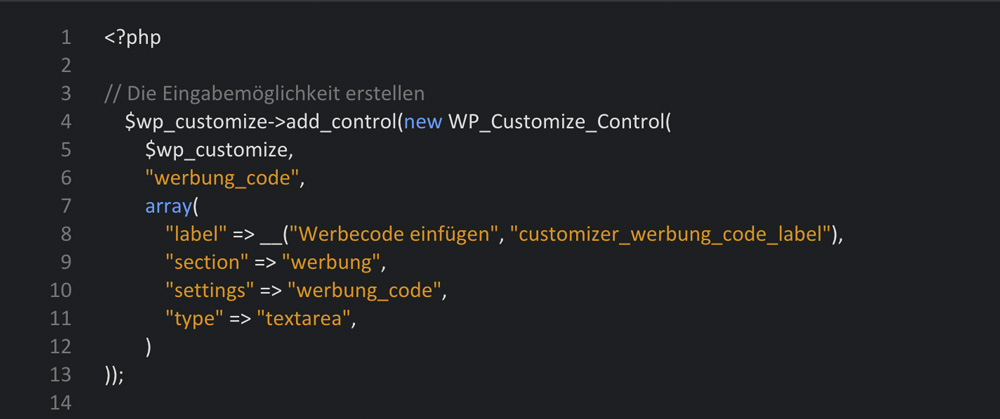
Creating the Input for the Settings
To create the control that is responsible for the display of the setting options in the customizer, we need the $customizer_object->add_control($controller_object) method.
There are many different controller objects, depending on what you need. Here, we have used WP_Customize_Control, which is useful for input boxes. You can use it to create a text area, a text zone, check boxes, radio elements, and colors. There are also other controller objects such as WP_Customize_Color_Control, WP_Customize_Upload_Control, and WP_Customize_Image_Control to enter colors or upload a file or image.
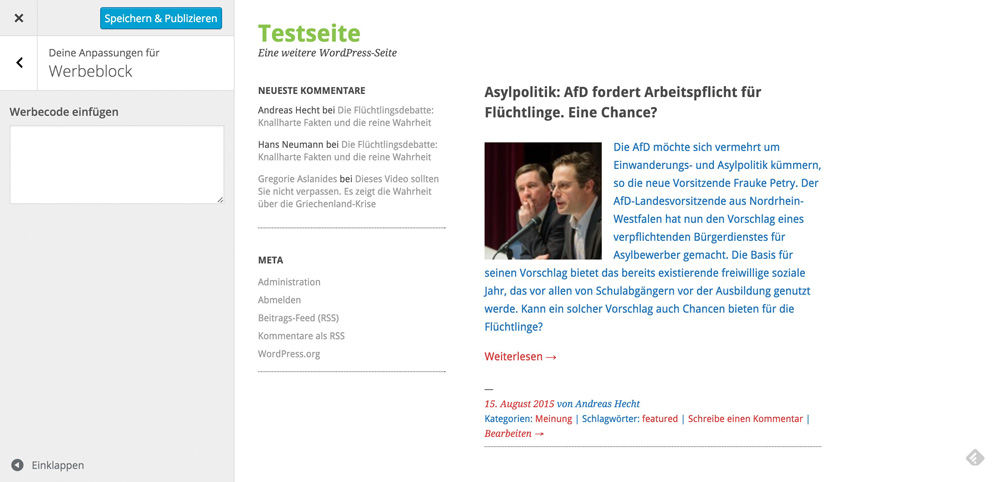
The Provisional Result in the Customizer
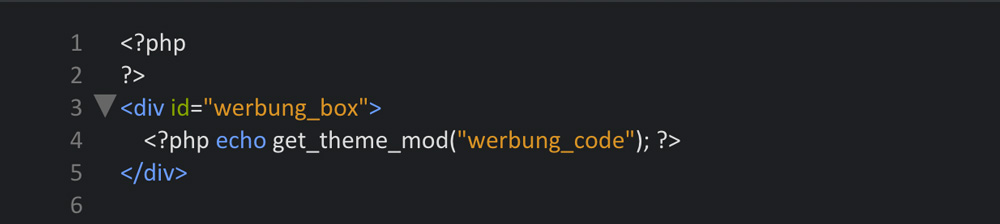
Displaying the Advertising Block in the Theme
You need to place a small code snippet wherever you want the advertising block to appear.
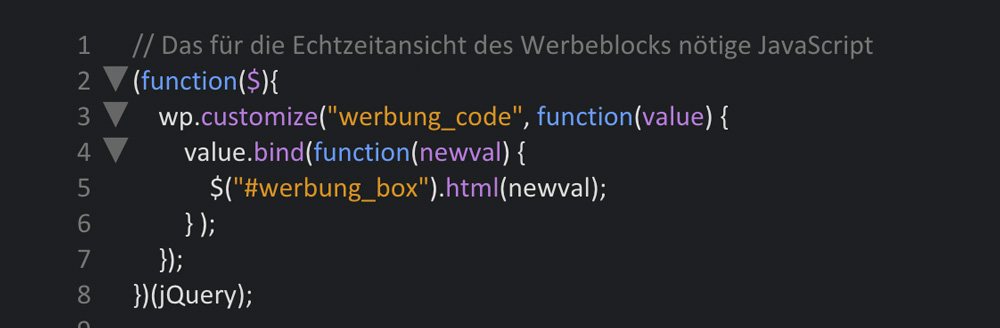
Once you've chosen refresh as your transport method, there's nothing left to do. When you chose the transport method postMessage, you need to write a little JavaScript in order for changes to be visible in real time.
The JavaScript for the Real Time Display of Changes
Create a JavaScript file within the theme index. Name it theme-customizer.js. Enter the following code into the file:
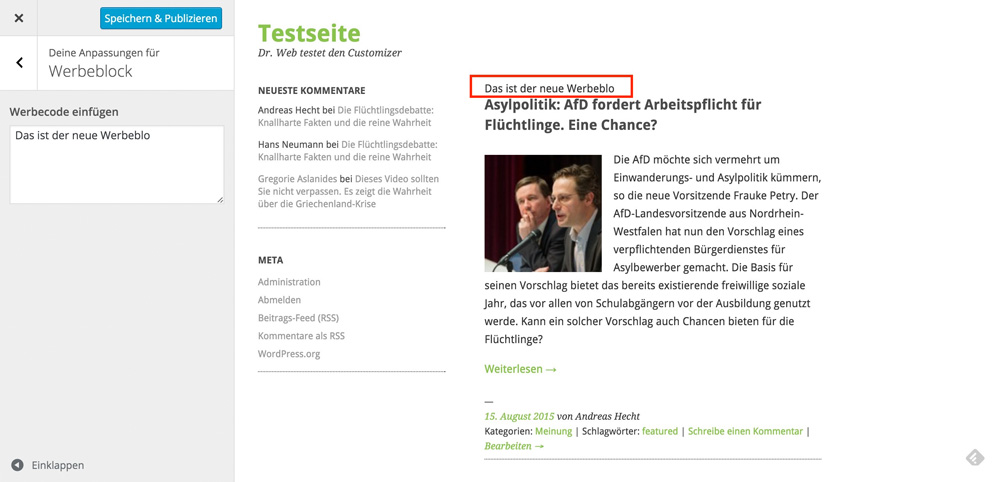
The Result in the Theme - Advertising Block
The newly defined advertising block can now be placed everywhere in the theme, filled with text, banners, or advertisements.
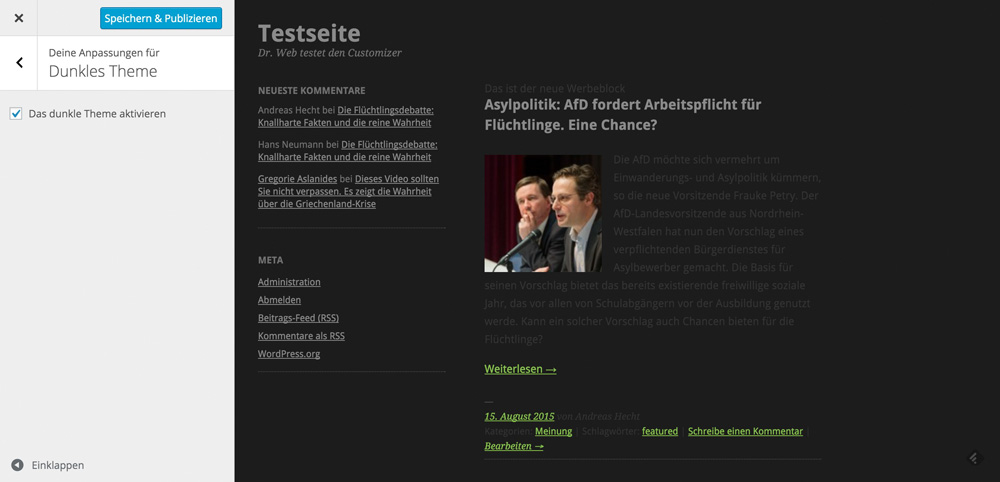
Activating the Ari Theme's Dark Theme
Ari also offers a dark version that can be activated on the theme options page. But as we only want to learn about the Customizer, we will realize the switch option for the WordPress Customizer. The real-time view makes little sense here, as the changes are visible instantly upon refreshing the page even before saving. Thus, we'll use the standard method »refresh« for the code.
I've chosen a checkbox for the activation of the dark Ari theme. By placing a checkmark, you'll activate the dark theme.
Of course, the colors of the texts and links should be adjusted afterward, as we've already done above.
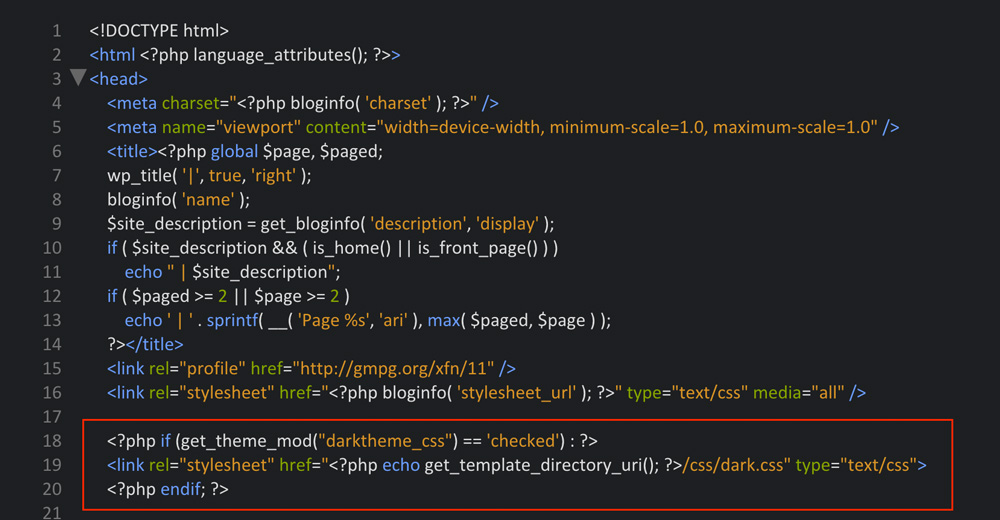
The Needed Adjustments in the Theme - header.php
A small change has to be made in the theme's header.php, so that the dark theme can be activated.
The code makes sure that the stylesheet of the dark theme only appears in the <head> area when needed.
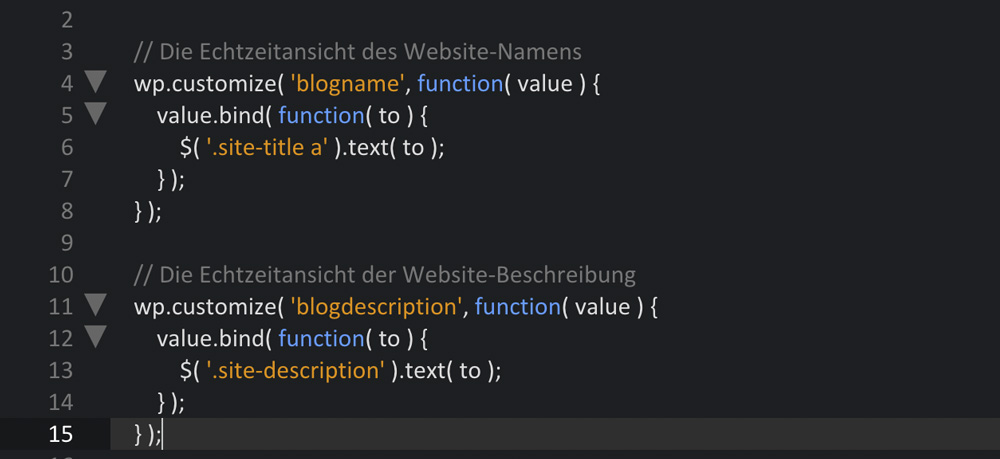
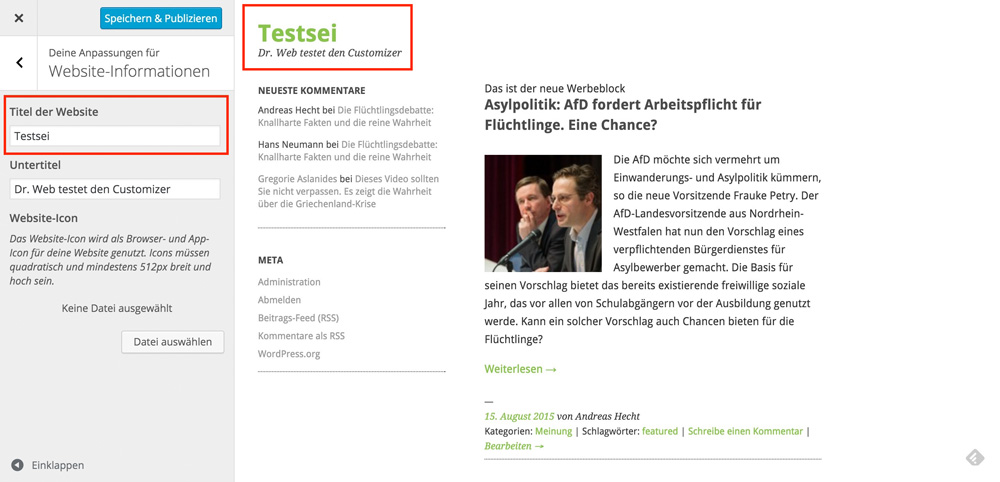
The WordPress Default Settings in Real Time
We'll now realize two of WordPress' default settings, being the blog name and the description, in real time using the transport method »postMessage«. To do so, the following two lines of code are required:
Additionally, a little jQuery is needed for real-time display.
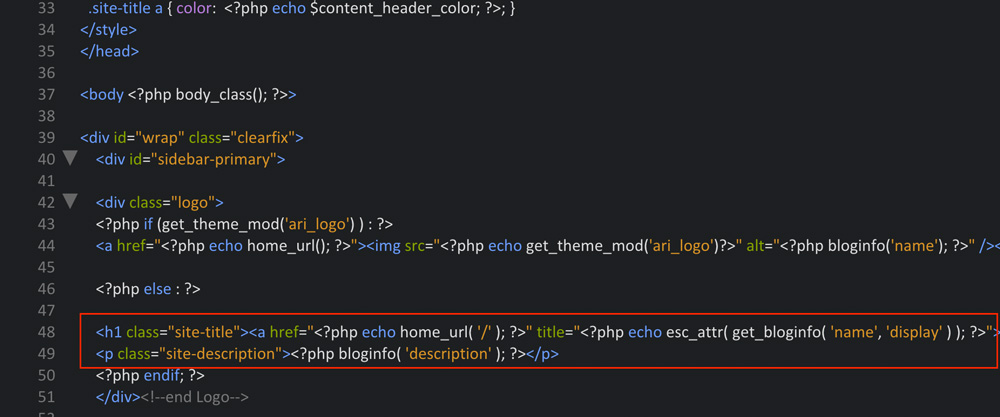
Changes in the header.php
Once again, the theme's header.php has to be edited. We need to add a CSS class each for the website title and the description to access the elements easier with jQuery.
The Result in the Customizer
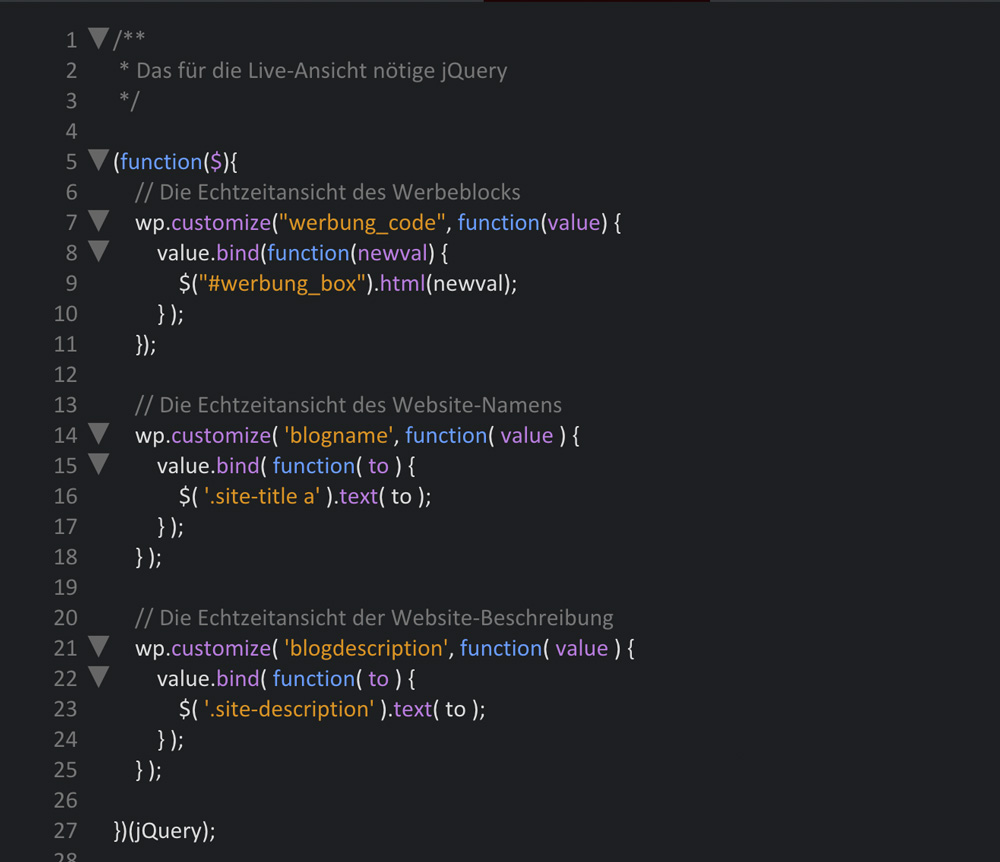
Creating and Referencing the Entire JavaScript
We need a jQuery, which we'll name theme-customizer.js, for our features advertising block, blog name, and blog description. It looks like this and belongs into the theme's main index:
Keep in mind that the code for the text and description elements are different from the advertising block. The advertising block is tied to an HTML element while text and description are tied to a text element. For me, the real time display of blog names and descriptions only worked this way.
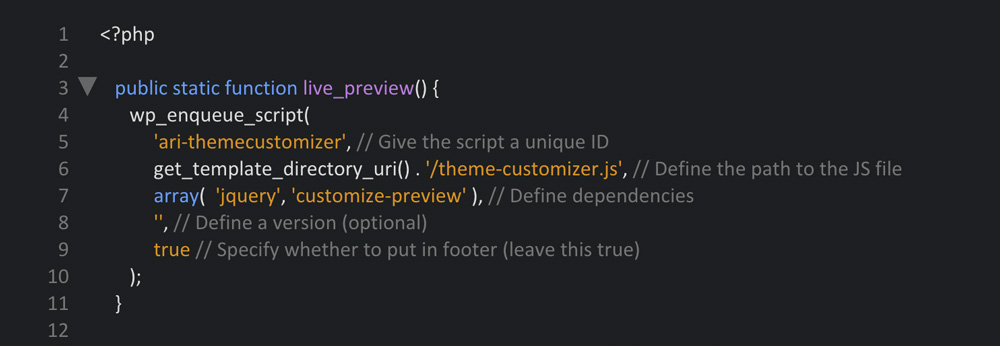
Referencing the JavaScript
For the Theme Customizer to be able to use the jQuery, we need to reference it. This is done in the customizer.php file within the class Ari_Customizer, but outside of the function register().
Finishing Touches
Initiating the Customizer functions and the JavaScript.
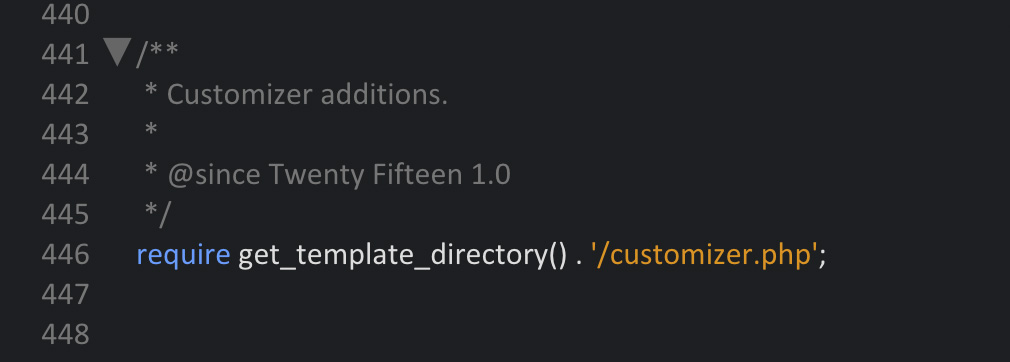
Copy the following line of code into the theme's functions.php so that the customizer.php is accessed.
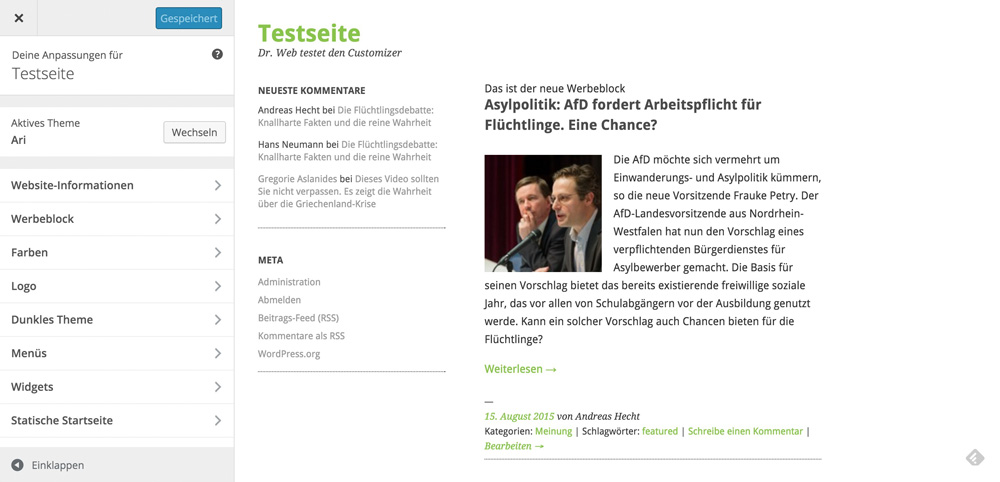
When activating the Ari theme, the following image should be displayed under »Design => Edit«:
The Complete Files and the Edited Theme to Download
To better understand how everything fits together and works, you can find the downloads to the complete files here.- The customizer.php file download at GitHub
- The theme-customizer.js file download at GitHub
- The optimized header.php file of the Ari theme download at GitHub
- The complete, working and modified Ari-Theme as a .zip file
Conclusion
The Theme Customizer surely is an interesting thing that every developer has to deal with when wanting to offer themes in the official index. This will inevitably cause new, high-quality themes of the large providers not to be listed there anymore. That's because large providers like WooThemes, Krisi and Co. still prioritize their own theme options page as it's the only way to realize the vast amount of settings that today's premium themes come with. Of course, the professionals that provide themes on WordPress, will be able to solve many things more elegantly than I did in this article. However, this article was mainly about the basic knowledge of the Customizer; about first, fast success. And this is provided.Further Reading
- WordPress: Theme Customization API
- WordPress Theme Review Team: Details on the new theme settings (customizer) guideline
- Tuts+: A Guide to the WordPress Theme Customizer - 7-part series
- Smashing Magazine: The WordPress Theme Customizer
- Narga: Comprehensive Guide to make WordPress Theme Options with Customization API
- WordPress Theme Review Team: Customizer tutorials and documentation
- WordPress Theme Handbook: Theme Options – The Customizer API
- Justin Tadlock: Multiple checkbox customizer control
Nice! I was trying to make this work and was accidentally trying to load the customizer twice in functions.php. So make sure to not do that ;)