Adobe Illustrator Tutorial: Creating a Disco Ball
Creating an illustration of a sparkling disco ball might seem very complicated, and with good reason. In this new Adobe Illustrator tutorial we will try make it simple. We will be creating a really nice, shiny disco ball using only AI and our good taste in color selection. Overall, the coloring will be a real challenge. So get ready to create a vector that will have you dancing in your chair.
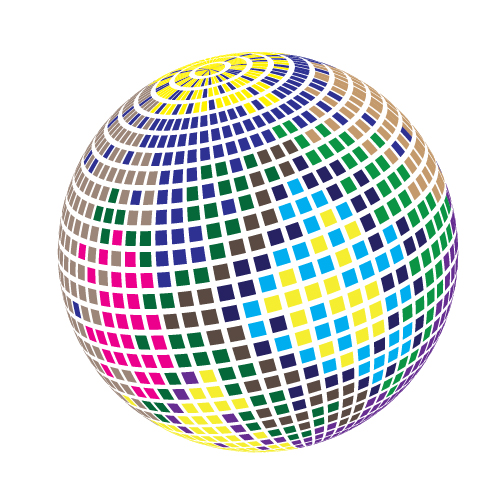
This is what we will be creating.

 Now, grab the Rectangle Tool (
 Now we have to divide our rectangle into small squares. To do that, under Object click Rasterize. Leave everything at its default and hit the OK button.
 Select Object again and then Create Object Mosaic.
 Set the Tile Spacing to
  This way we have created many small squares that we will apply to the Disco Ball later.
 We have to make a small adjustment to the group of small squares. In the Layer Panel make sure to remove the last rectangle on the list. This way we'll have only small squares.
 Grab the group of the small squares and drag it to the Symbol Panel. Make sure to set the Type to Graphic and hit the OK button.
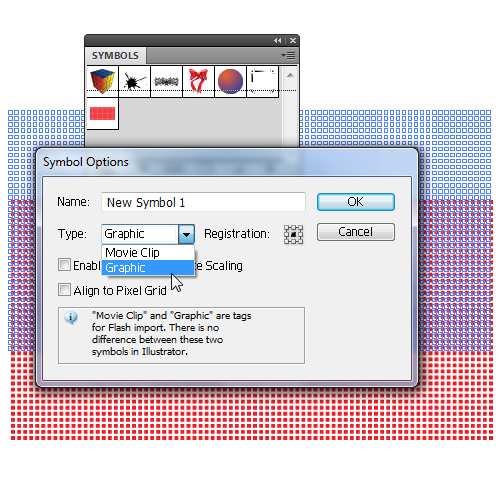 Now when we have the symbol of the squares we can remove it from the Artboard.
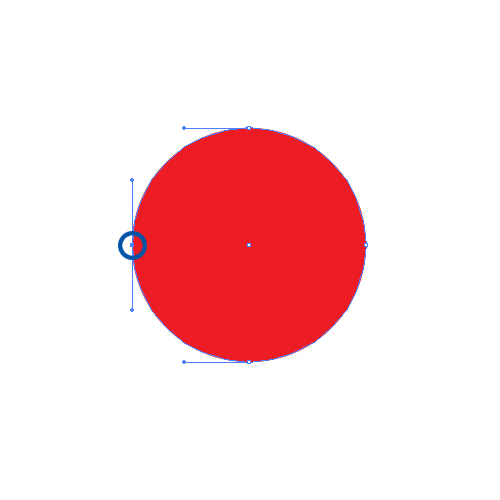
Now we have to prepare the circle we created in the beginning of this tutorial. Grab the Direct Selection Tool (
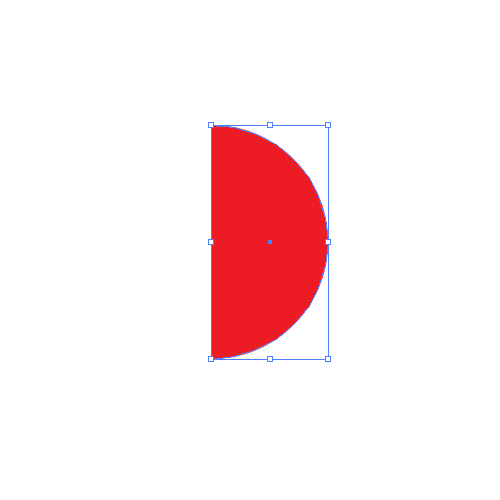 Under Effect select 3D > Revolve. Make sure to set the Surface to No Shading. This way we will avoid creating unnecessary parts of the ball.
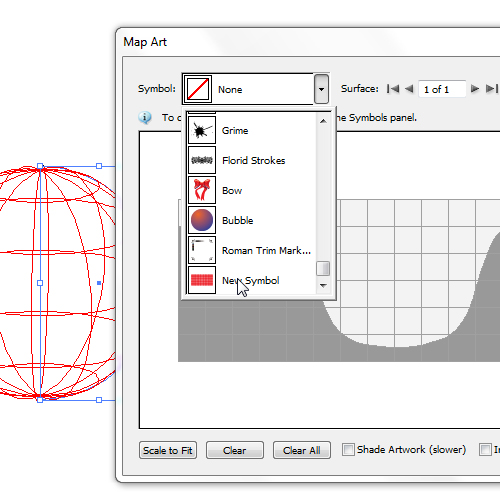
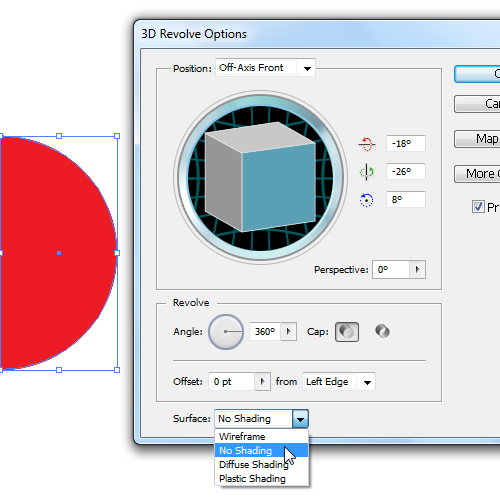 Now is the time to apply our squares to the ball. To do that hit the Map Art button. A new window will pop up. In the Symbol drop down menu select the symbol of the squares.
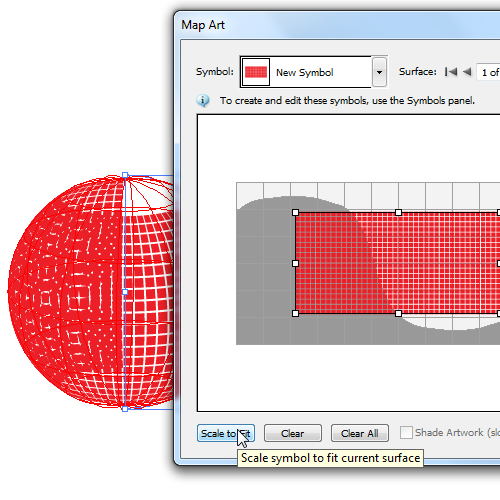
 You will notice that the squares don't cover the whole surface of the ball. To fix that just hit the Scale to Fit button in the bottom of the window. It will stretch out our symbol and will cover the ball.
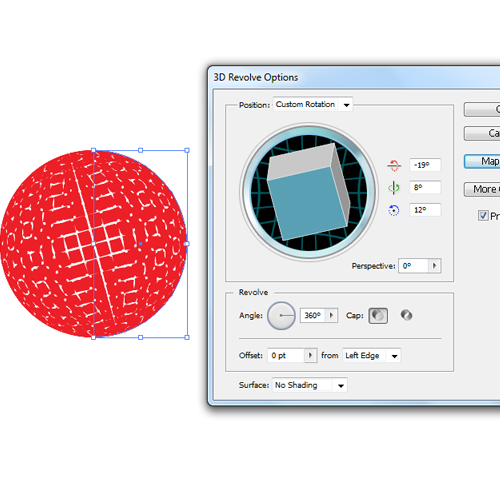
 Feel free to change the rotation of the cube in the 3D Revolve Options window. This way we will change the rotation of the disco ball as well.
 When you are satisfied with the basic look of the Disco Ball make sure to select Object > Expand. Ungroup (
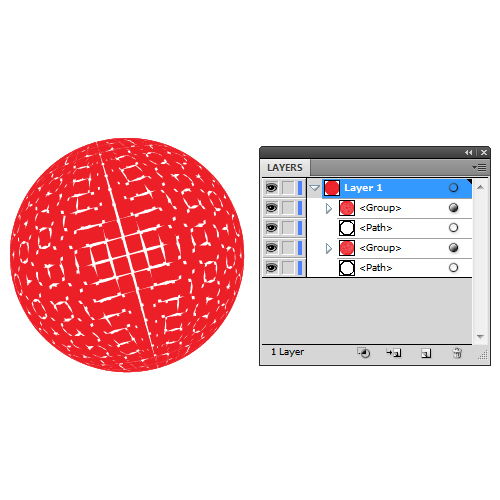 You will notice that one of the layers contains the front side of the ball, the other layer contains back side of the ball, and the other two layers contain only round paths. Remove both paths and the back side of the ball. You should end up with something like this.
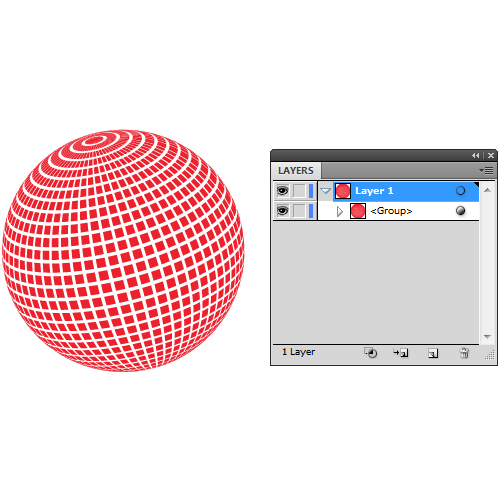 This is actually the look of the Disco Ball without the nice colors which will give our illustration the fancy look we desire.
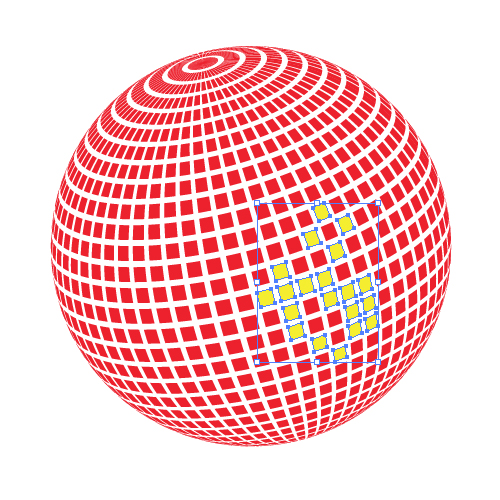
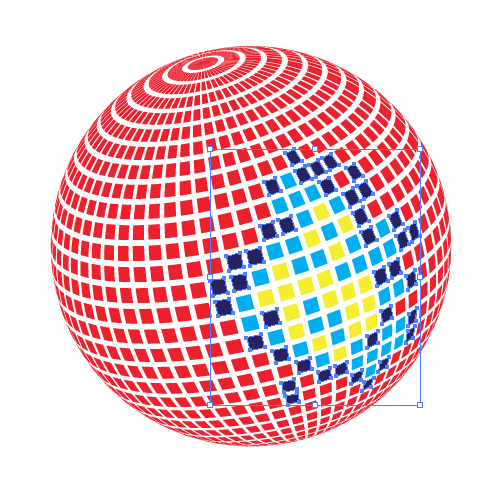
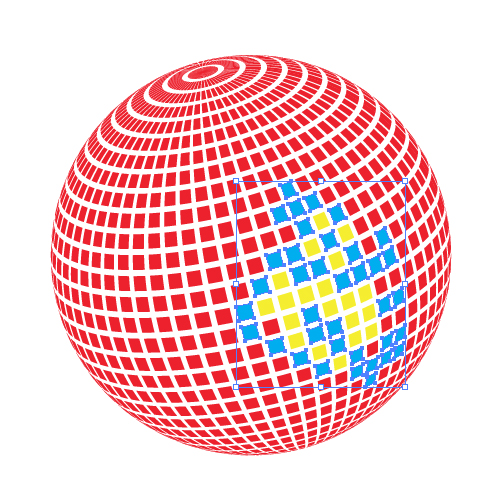 There are many rectangles that needs to be selected. It might be easier if you select the larger area at once and then holding the Shift key on your keyboard with Selection Tool (
 Now, grab the Ellipse Tool (
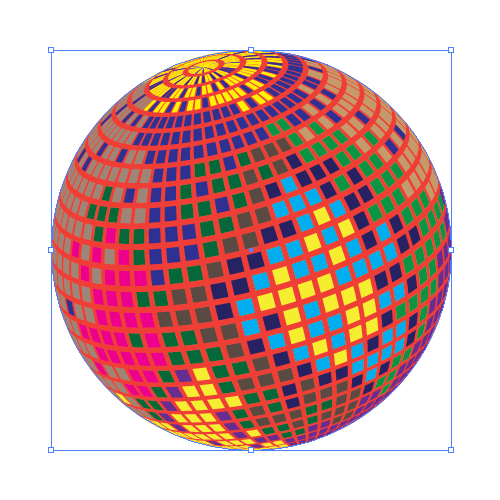 Now we need to find a way to turn this boring illustration into a nice and fancy disco ball. Color gradients will help us to do that.
In this tutorial we will use a golden gradient, but feel free to use any color combination you like.
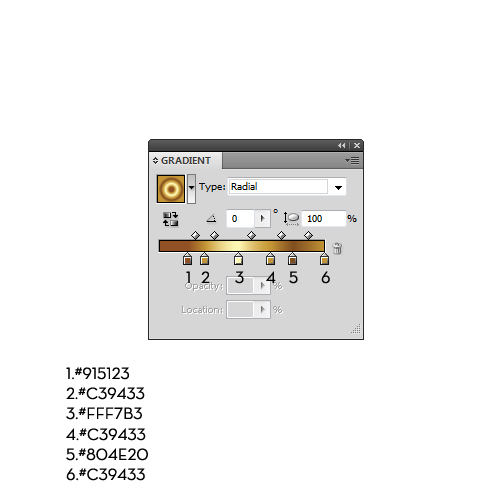 Apply the golden gradient to the circle behind the rectangles.
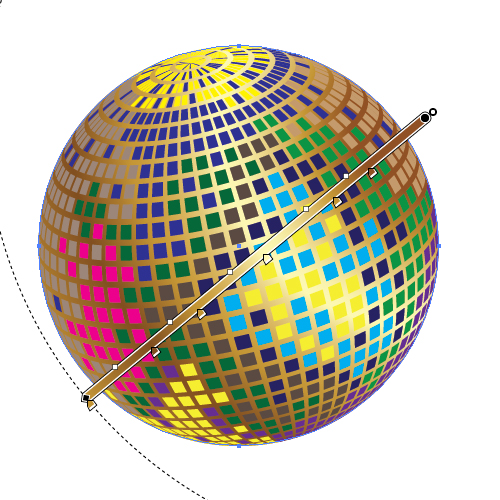 We will apply the same radial gradient to each part of the disco ball we've grouped. Make sure to use different angles when you are dragging the gradient with the Gradient Tool (
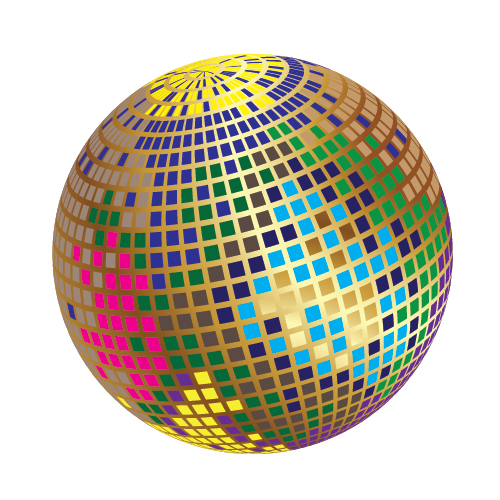
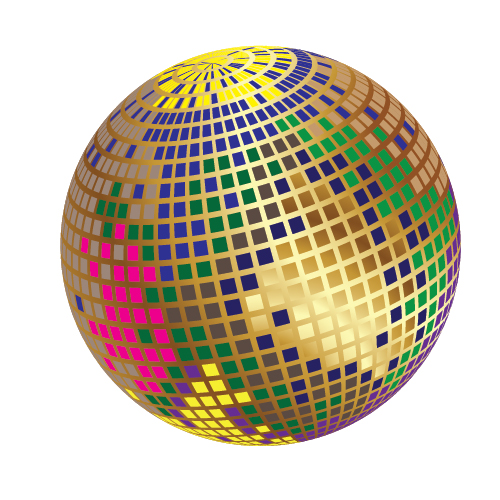
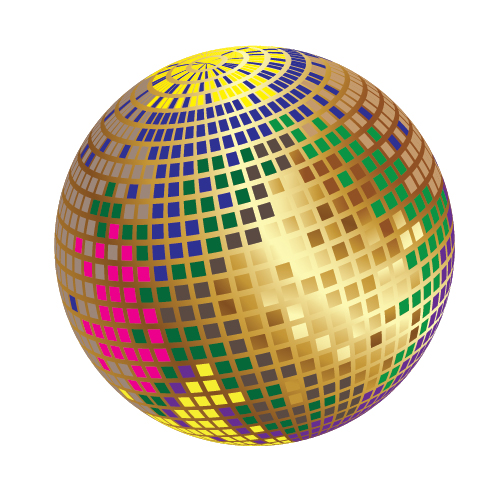
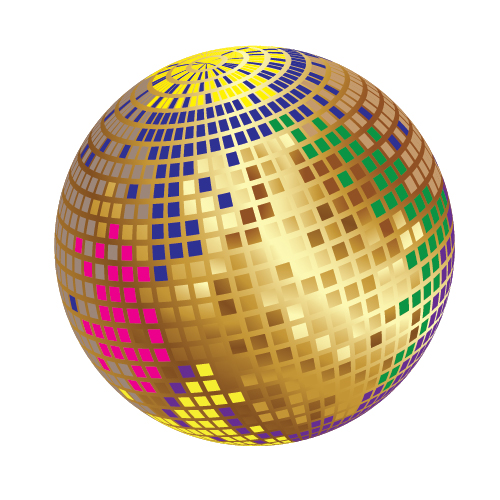
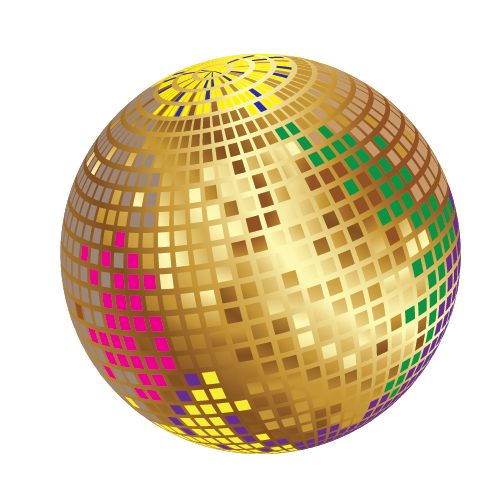
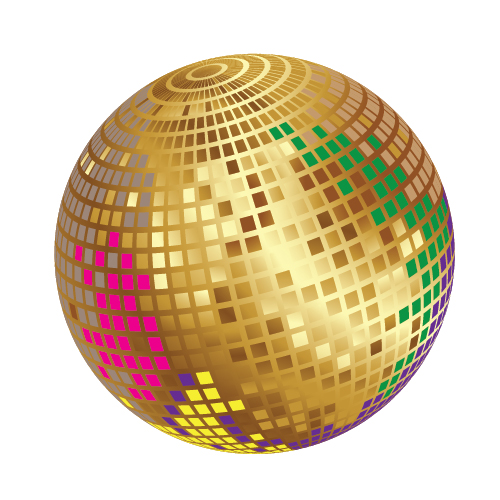
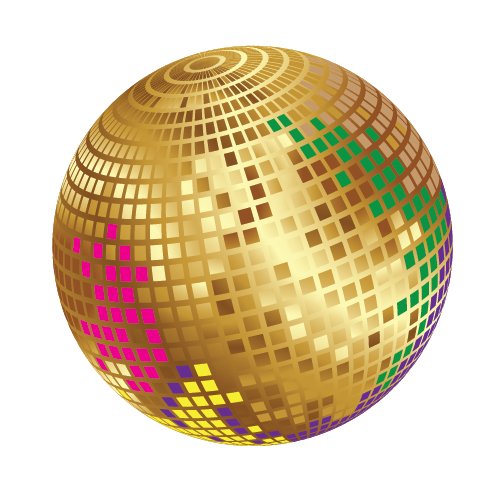
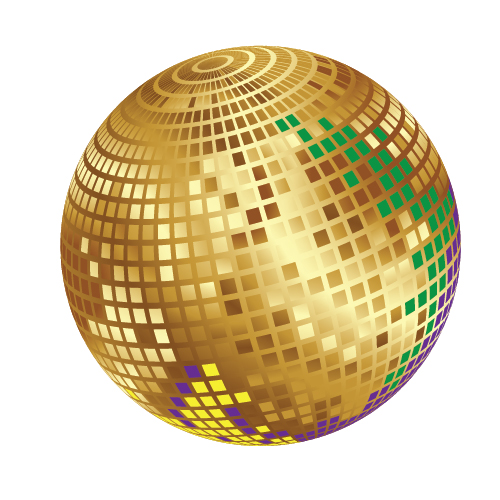
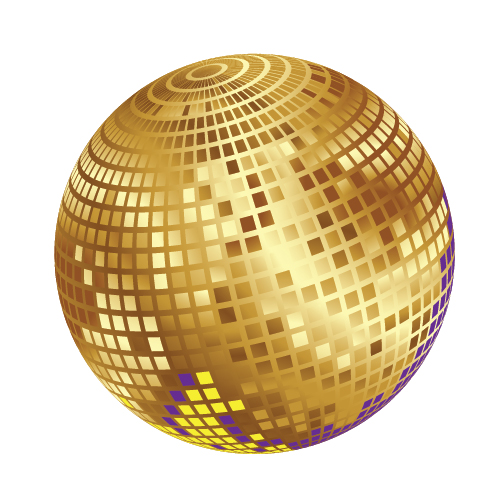
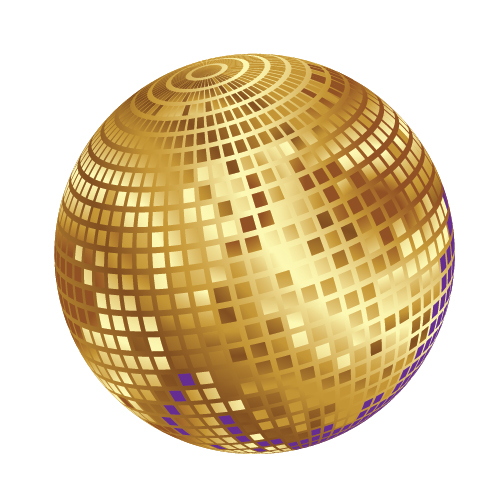
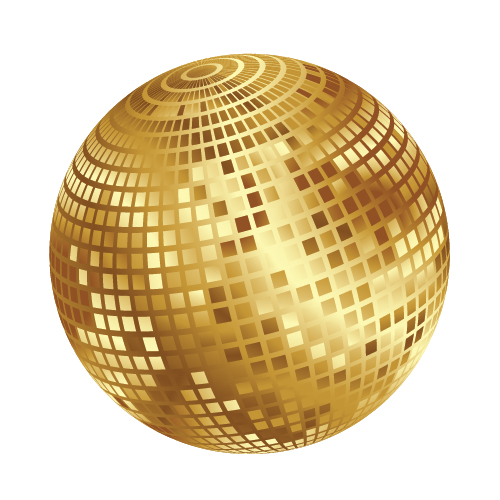 As you can see, we've made some improvements but we still need to work on details.
To emphasize the influence of the light we will set the Fill color for some rectangles to white (
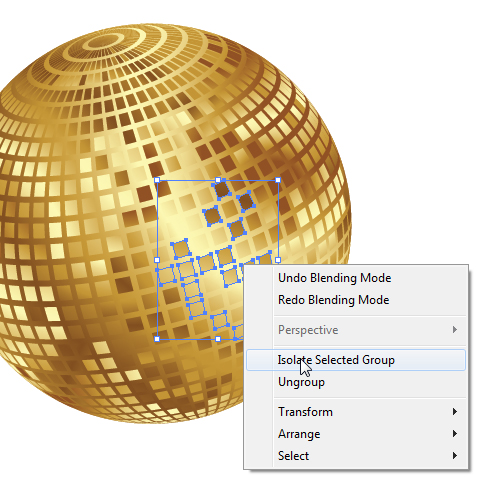
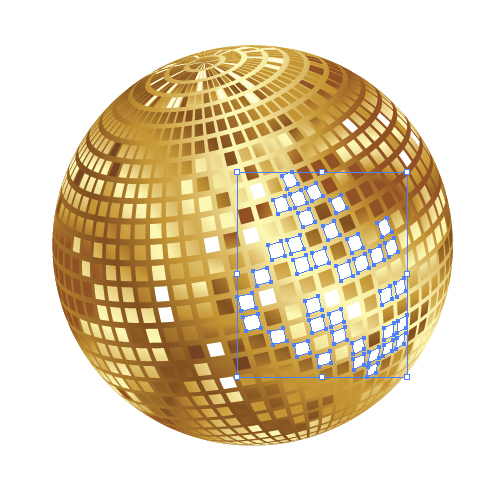 Play around with colors, use different shades of the gradient until you create something you like.
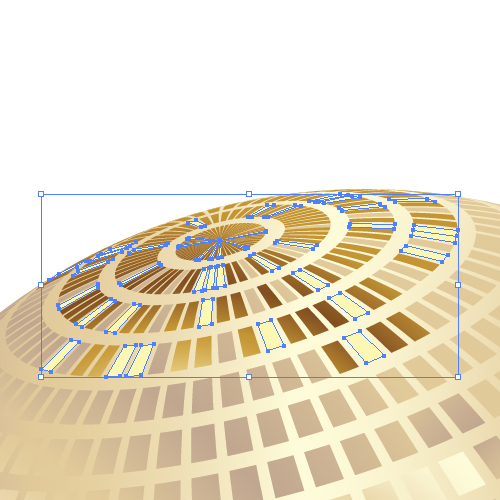 To exit the Isolation Mode just click on the bar at the top of the window.
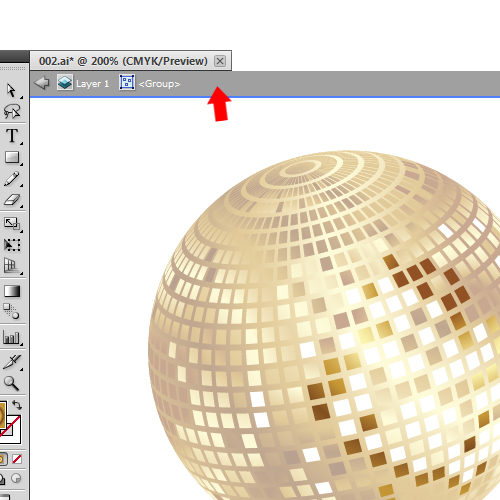 Our disco ball looks better now, but there is one more thing we can do to improve it. Grab the Ellipse Tool (
 Make a few copies (

Creating the Basic Shape of the Disco Ball
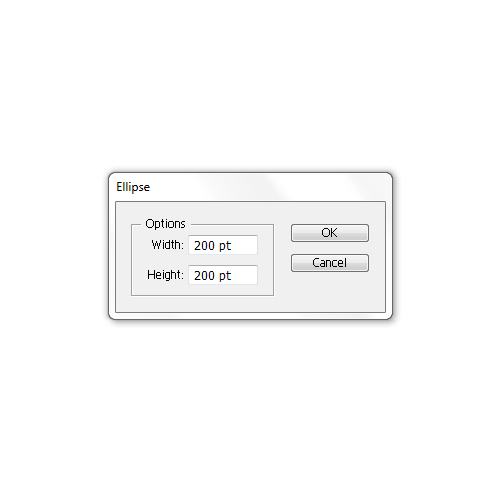
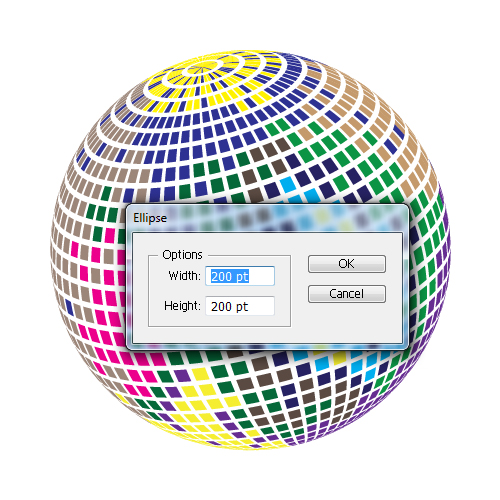
In this part of tutorial we will create the basic shape of the ball with small rectangles. Grab the Ellipse Tool (L) from the Tool Panel and just click on the Artboard. It will bring up the Ellipse Options box where we can set the dimension of the circle. Let's set it to 200 x 200.
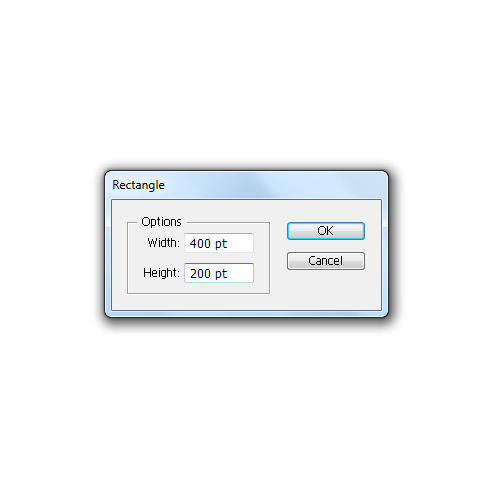
 Now, grab the Rectangle Tool (
M) from the Tool Panel and click somewhere on the Artboard. It will bring up the Rectangle Options box. We will set the width to 400 pixels and the height to 200 pixels.
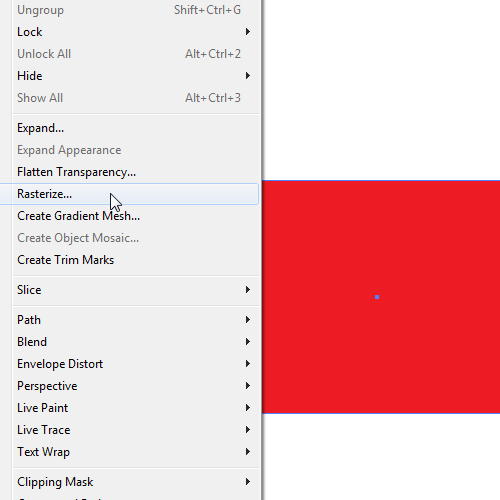
 Now we have to divide our rectangle into small squares. To do that, under Object click Rasterize. Leave everything at its default and hit the OK button.
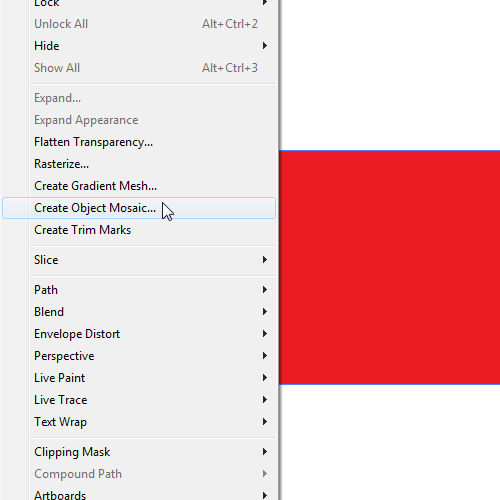
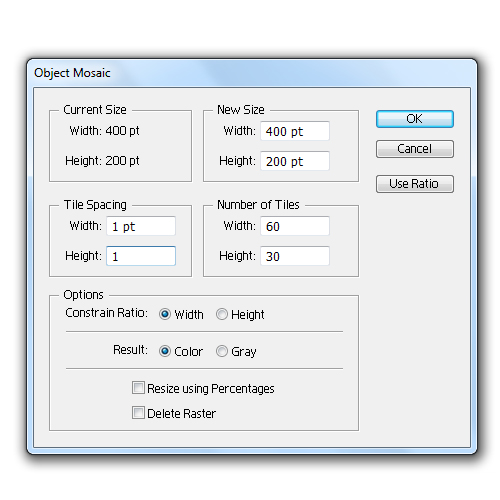
 Select Object again and then Create Object Mosaic.
 Set the Tile Spacing to
 1 and the Number of Tiles to 60 and 30.
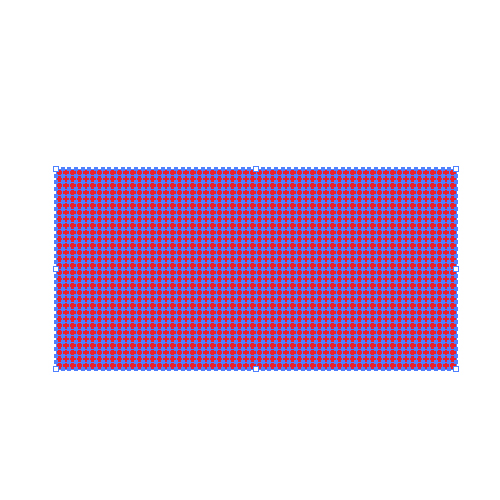
 This way we have created many small squares that we will apply to the Disco Ball later.
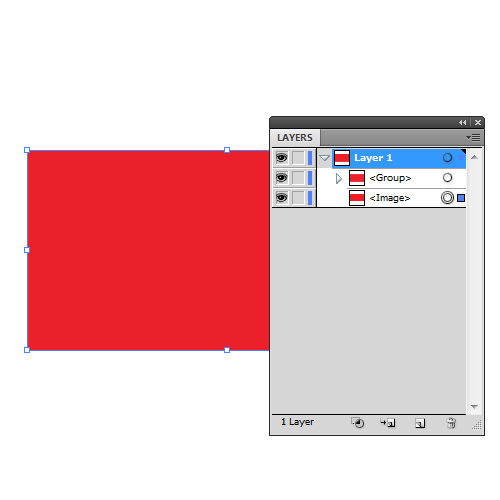
 We have to make a small adjustment to the group of small squares. In the Layer Panel make sure to remove the last rectangle on the list. This way we'll have only small squares.

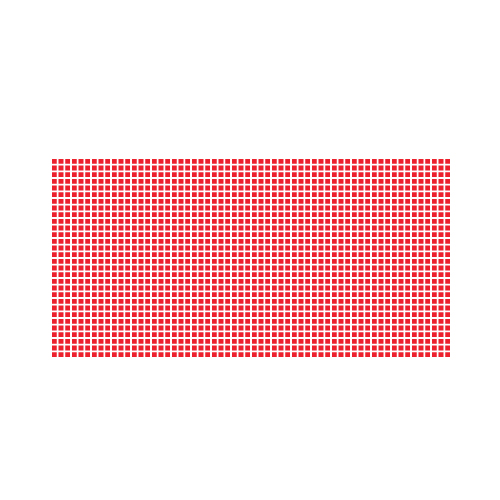
 Grab the group of the small squares and drag it to the Symbol Panel. Make sure to set the Type to Graphic and hit the OK button.
 Now when we have the symbol of the squares we can remove it from the Artboard.
Now we have to prepare the circle we created in the beginning of this tutorial. Grab the Direct Selection Tool (
Now when we have the symbol of the squares we can remove it from the Artboard.
Now we have to prepare the circle we created in the beginning of this tutorial. Grab the Direct Selection Tool (A) from the Tool Panel and select the left anchor point on the circle. Hit the Delete button on your keyboard in order to remove it.

 Under Effect select 3D > Revolve. Make sure to set the Surface to No Shading. This way we will avoid creating unnecessary parts of the ball.
 Now is the time to apply our squares to the ball. To do that hit the Map Art button. A new window will pop up. In the Symbol drop down menu select the symbol of the squares.
 You will notice that the squares don't cover the whole surface of the ball. To fix that just hit the Scale to Fit button in the bottom of the window. It will stretch out our symbol and will cover the ball.
 Feel free to change the rotation of the cube in the 3D Revolve Options window. This way we will change the rotation of the disco ball as well.
 When you are satisfied with the basic look of the Disco Ball make sure to select Object > Expand. Ungroup (
Shift + Ctrl / Cmd + G) the ball (several times). You should end up with the Layer Panel like this.
 You will notice that one of the layers contains the front side of the ball, the other layer contains back side of the ball, and the other two layers contain only round paths. Remove both paths and the back side of the ball. You should end up with something like this.
 This is actually the look of the Disco Ball without the nice colors which will give our illustration the fancy look we desire.
Applying Color Gradients
This is the part of the tutorial where we will show off our ability to turn something very simple (our red ball with small squares) into a stunning illustration of a shiny disco ball. In theory, all we have to do to it is Ungroup (Shift + Ctrl / Cmd + G) the ball and to change their Fill color to something more colorful. Sounds easy.
For the right look, we have to find the exact combination of colors which will create the impression of a three dimensional object (ball) and the shiny effects. This can be very tricky. Given that a disco ball is actually a ball with many small mirrors attached to the surface all with the ability to reflect light and we have to recreate this effect. What we will try in this tutorial is to make several groups of rectangles and change their Fill color with colors that will blend nicely. But let's move from words to deeds.
As we said, Ungroup (Shift + Ctrl / Cmd + G) the disco ball. Now, with the Selection Tool (V) select the rectangles as it's shown in the pictures below (don't forget to hold the Shift key on the keyboard for multiple selections).

 There are many rectangles that needs to be selected. It might be easier if you select the larger area at once and then holding the Shift key on your keyboard with Selection Tool (
V) just deselect some rectangles.

 Now, grab the Ellipse Tool (
L) from the Tool Panel and click somewhere on the Artboard. In the Ellipse Options box set the dimensions to 200 x 200 (same as we did at the beginning) and hit the OK button. Send the new circle behind our disco ball (Shift + Ctrl . Cmd + [) and align it horizontally and vertically with the disco ball using the (Align Panel > Horizontal and Vertical Align Center).

 Now we need to find a way to turn this boring illustration into a nice and fancy disco ball. Color gradients will help us to do that.
In this tutorial we will use a golden gradient, but feel free to use any color combination you like.
 Apply the golden gradient to the circle behind the rectangles.
 We will apply the same radial gradient to each part of the disco ball we've grouped. Make sure to use different angles when you are dragging the gradient with the Gradient Tool (
G).


 As you can see, we've made some improvements but we still need to work on details.
To emphasize the influence of the light we will set the Fill color for some rectangles to white (
As you can see, we've made some improvements but we still need to work on details.
To emphasize the influence of the light we will set the Fill color for some rectangles to white (#FFFFFF). Feel free to use other colors as well, in order to reach the look you like. To be able to edit individual rectangles inside their groups, without ungrouping them, just enter the Isolation Mode that can be found under the right click.

 Play around with colors, use different shades of the gradient until you create something you like.
 To exit the Isolation Mode just click on the bar at the top of the window.
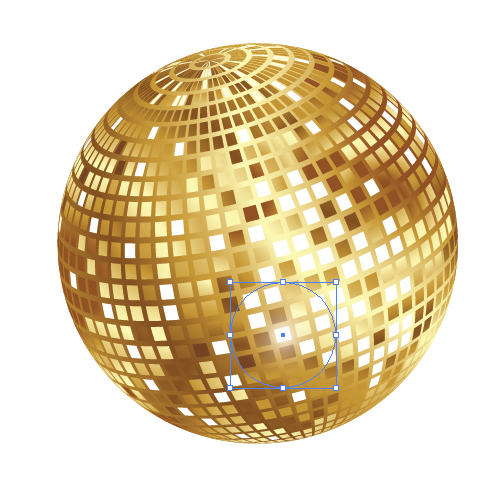
 Our disco ball looks better now, but there is one more thing we can do to improve it. Grab the Ellipse Tool (
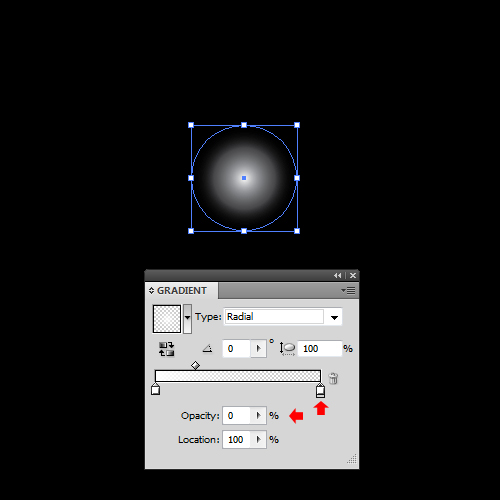
L) from the Tool Panel and create a circle. Apply a radial gradient to the circle, as is shown below. Just make sure to set the Opacity of the white color on the left side of the slider to 0%.
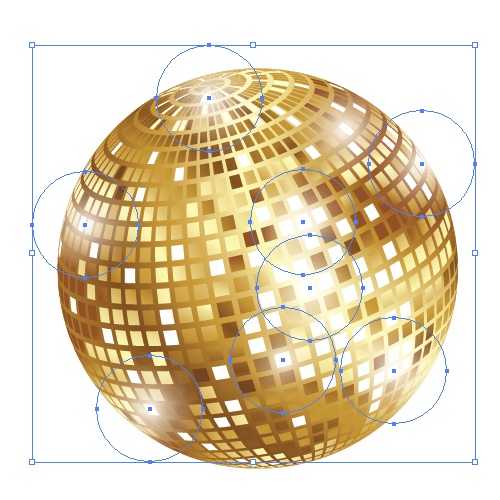
 Make a few copies (
Ctrl / Cmd + C, Ctrl / Cmd + V) of the circle and place them on some of the white rectangles on the disco ball. It will create a nice glow around the sparkling mirrors.


Very explanatory and very nice…Great job :)
very good tutorial!
hello i think when i want create a earth i can make the self thing !?
Yes, you can use the same technique for creating a globe. All you need is a vector of the world map to apply it as a symbol to your sphere.
Very good explained tut. Easy to follow. I will try to make it. Thank you for sharing :)
WOW Stunning.! Time to DISCO!
That was an easy to understand tutorial.
Well Explained
thank you for the nice intelligible tutorial.
it is very deferent tutorial. so i like that.
Thank you very much, it was really really usefull!!! <3 thanks a lot!
really this was very helpful to me!!! thanx for these types of tutorials.
Great job ! Very good tutorial, Thank you so much for shared :)
Thanks so much for this comprehensive tutorial!! Learned a lot and this was super helpful for my assignment :D
I used the rectangular grid and pathfinder tools instead of the mosaic tool though to make the squares- that way you don’t have to rasterize the vector.
Amazing, using it now to create my own, for a temples of India website!