
Photoshop Tutorial: Create a Semi-Realistic MacBook Pro from Scratch
In the following Photoshop tutorial you will learn how to create a semi-realistic MacBook Pro from scratch. First, you will learn how to use the grid and the snap to grid for an easier workflow. We’ll start with some simple vector shapes and several warp techniques along with a bunch of basic tools. Next, we’ll add some color using the Layer Style properties. Finally, we’ll use Layer Masks, Clipping Masks and some discrete Noise to add the final touches for your illustration.
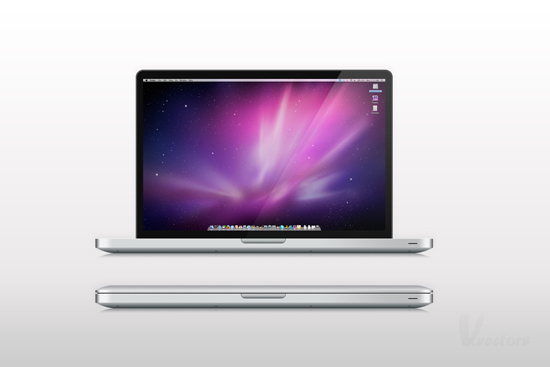

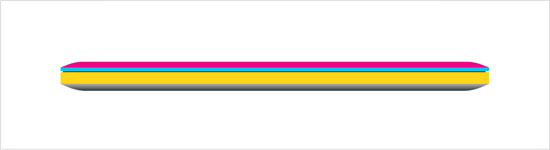
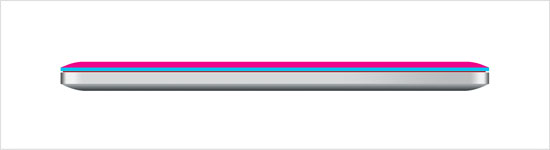


Final Image
This is the image that we’ll end up with by completing this Photoshop tutorial:
Step 1
Open Photoshop and hit Control + N to create a new document. Enter all the data shown in the following image and click OK. Next, enable the Grid (View > Show > Grid) and the Snap to Grid (View > Snap To > Grid). For the moment you need a grid every 2.5px. Go to Edit > Preferences > Guides, Grid & Slices and focus on the Grid section. Enter 2.5 in the Gridline Every box and 1 in the Subdivision box. Also, set the grid color at white (#ffffff). Once you set all these properties click OK. You should also open the Info panel (Window > Info) for a live preview with the size and position of your shapes.
Step 2
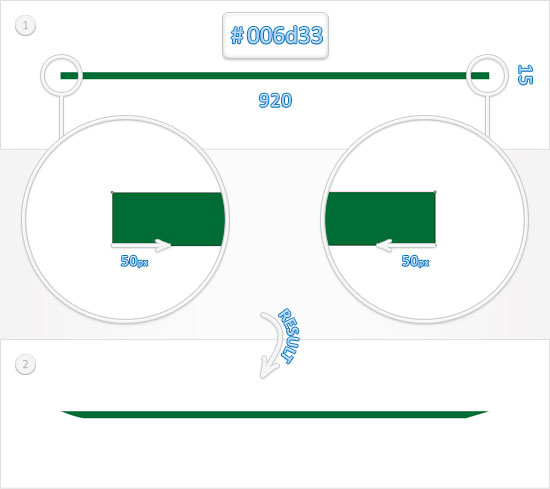
Set the foreground color at #006d33, pick the Rectangle Tool and create a 920 by 15px shape. Make sure that this new shape is selected and switch to the Direct Selection Tool. Select the bottom, left anchor point and move it 50px to the right then select the bottom, right anchor point and move it 50px to the left. In the end your shape should look like it does in the second image.
Step 3
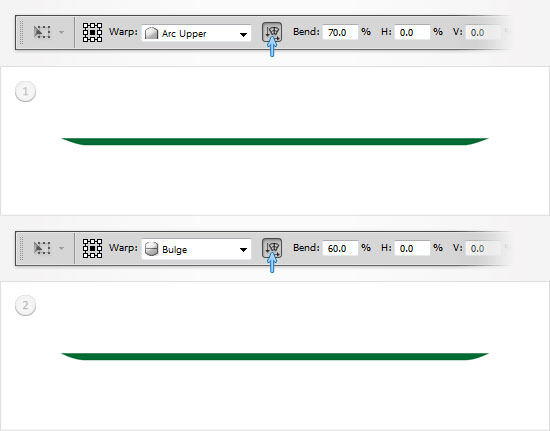
Reselect the shape created in the previous step and go to Edit > Transform Path > Warp. Select Arc Upper from the Warp menu, check the Orientation button, enter 70% in the Bend box and hit Enter. Make sure that this green shape is still selected and go again to Edit > Transform Path > Warp. This time select Bulge from the Warp menu, check the Orientation button, enter 60% in the Bend box and hit Enter.
Step 4
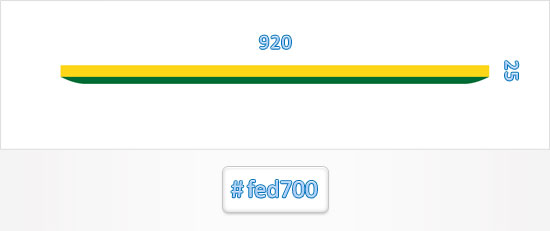
Set the foreground color to #fed700, pick the Rectangle Tool, create a 920 by 25px shape and place it as shown in the following image.
Step 5
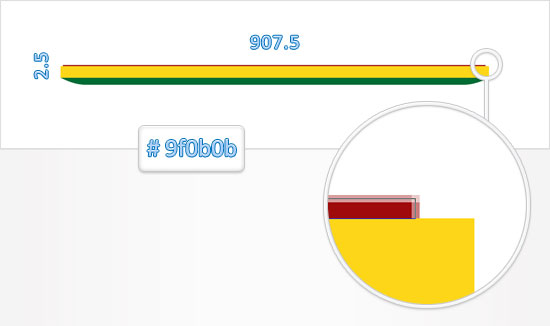
Set the foreground color to #9f0b0b, pick the Rectangle Tool, create a 907.5 by 2.5px shape and place it as shown in the following image.
Step 6
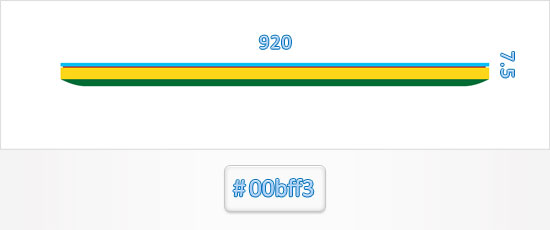
Set the foreground color to #00bff3, pick the Rectangle Tool, create a 920 by 7.5px shape and place it as shown in the following image.
Step 7
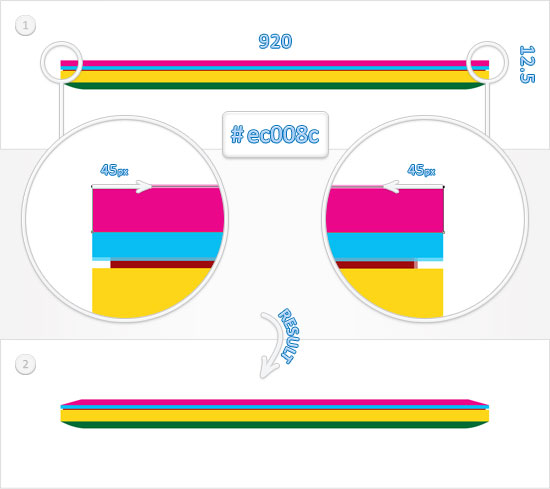
Set the foreground color to #ec008c, pick the Rectangle Tool, create a 920 by 12.5px shape and place it as shown in the first image. Make sure that this new shape is selected and switch to the Direct Selection Tool. Select the top, left anchor point and move it 45px to the right then select the top, right anchor point and move it 45px to the left. In the end your shape should look like as it does in the second image.
Step 8
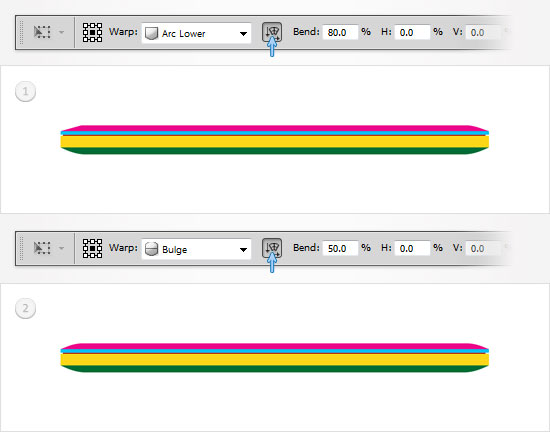
Reselect the shape created in the previous step and go to Edit > Transform Path > Warp. Select Arc Lower from the Warp menu, check the Orientation button, enter 80% in the Bend box and hit Enter. Make sure that this pink shape is still selected and go again to Edit > Transform Path > Warp. This time select Bulge from the Warp menu, check the Orientation button, enter 50% in the Bend box and hit Enter.
Step 9
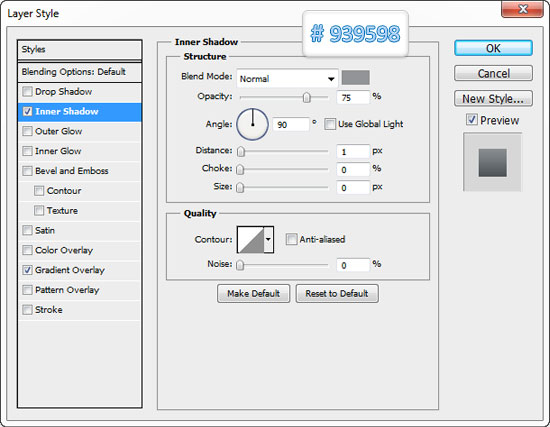
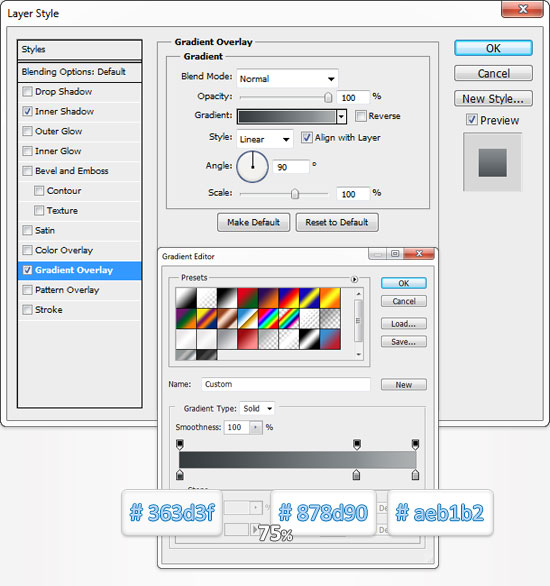
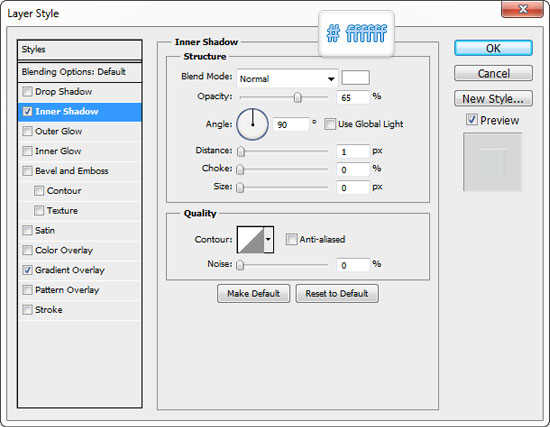
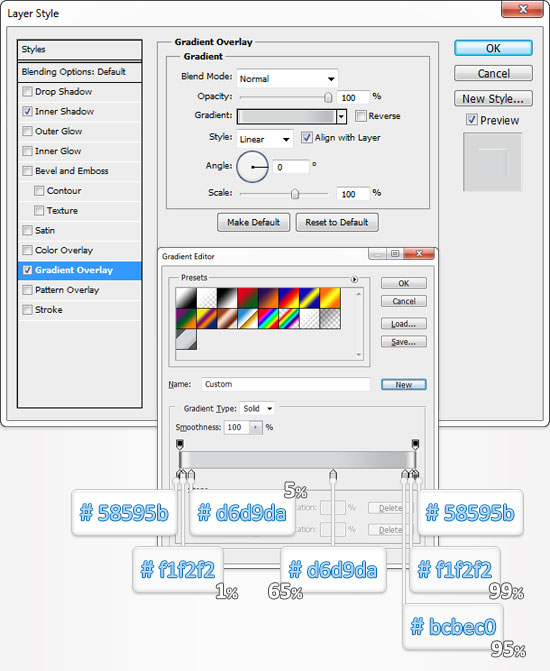
Focus on the Layers panel and double click on the green shape created and edited in the first steps. This will open the Layer Style window. Check the Inner Shadow and the Gradient Overlay then enter the properties shown in the following images.
Step 10
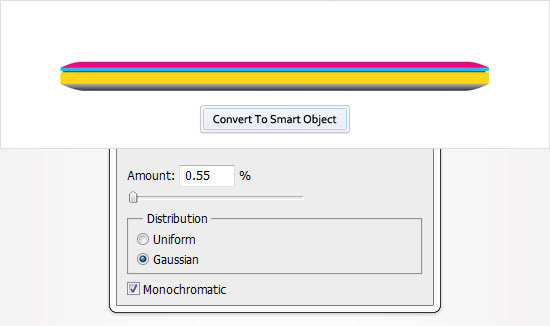
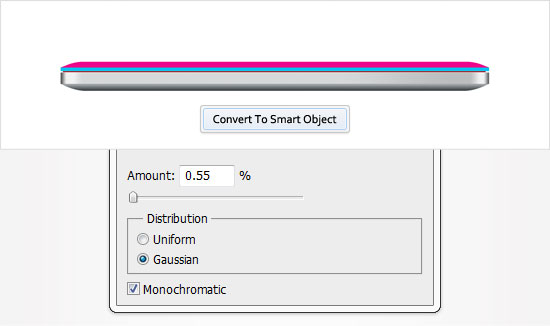
Keep focusing on the Layers panel, find the shape edited in the previous step, right click on it and click on Convert to Smart Object. Make sure that this new smart object is selected and go to Filter > Noise > Add Noise. Enter the properties shown below and click OK.
Step 11
Move to the yellow shape and open the Layer Style window. Enter the properties shown in the following images and click OK. Make sure that you save the gradient when you get to the Gradient Overlay section. Just click on the New button and pick a name for your gradient and click OK. You can find your newly saved gradient in the Presets window.
Step 12
Move to the Layers panel and convert the shape edited in the previous step to a smart object. Select it and go to Filter > Noise > Add Noise. Enter the properties shown below and click OK.
Step 13
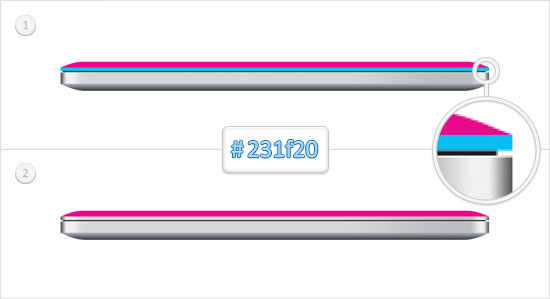
Reselect the thin, red shape created in the fifth step and replace the red with #231f20. Move to the blue shape and open the Layer Style window. Enter the properties shown in the following images and click OK. Pick the gradient saved in the eleventh step when you get to the Gradient Overlay section.
Step 14
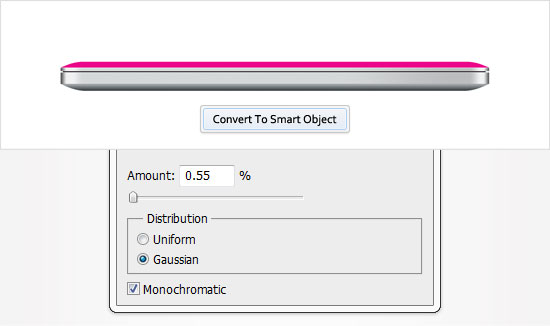
Convert the second shape edited in the previous step to a smart object. Select it and go to Filter > Noise > Add Noise. Enter the properties shown below and click OK.
Love the title ( Semi-Realistic) , great tut!
thank you for sharing the lovely design of mac book pro. By step by step you have explained the designing process
Your way of explanation is awesome ! Thanks for this kind of great post.
Great demo. I love how now this is the default image for a laptop now. At least it looks good. Thanks.
Hey Mark, was just thinking about this the other day. I think that you tend to see more Macbooks being portrayed due to the consistency of the design. With so many PC brands out there, if you were trying to model a realistic looking illustration on one of those, each particular model of laptop would have a different look. Therefore, hardly anyone would recognize that it was modeled after a real laptop. Just what I had come up with on the subject. :)
Like the thread…