
How To Create Custom Illustrations For Your Website?
Gone are those days when you only needed to put blocks of text on your website and expect a boost in engagement rates. People are becoming more graphics-centric and believe it should be an integral part of every marketing stage.
That’s where illustrations come in. They are powerful visual elements that you can employ on every aspect of your website - homepage or blog posts.
According to Springer, customers guided by texts and illustrations perform 323% better than those without. This is especially true if the illustration is placed on your sales page and places where you need to nudge your customers down the conversion funnel.
Note that an illustration can simply be a work of art with characters depicting your brand process. It can also be a combination of data visualizations created with geometric shapes and is useful for articles.
In this article, we will discuss ten important steps that will help you create a cutting-edge illustration.
10 Steps To Create Custom Illustrations For Your Website
Creating a custom illustration for any page on your website is a no-brainer, but you need a basic knowledge of how designs work. So it’s advisable you go through a few tutorials on Youtube to help you get a good feel of how things work.
Regardless, we have simplified ten basic steps that will help you create awesome illustrations as a beginner or pro below.
- Finding The Right Tools
There are several tools for creating illustrations, but the best picks on our list are Adobe Illustrator (AI) and Procreate. AI is a vector-based design software that you can use to design logos, fliers, prints, infographics, and illustrations. And designers sometimes use it to convert raster-based images to vector-based art and vice versa.
Procreate boasts similar functions to AI, such as logo designs and illustrations. You can use Procreate to design artwork, including 2D and 3D characters, which are helpful for storytelling on your home and sales page. Additionally, you can get resources like anime and manga brushes for Procreate from platforms like Brush Galaxy, which makes the tool even easier to use.
- Brainstorm A Concept
Once you have a preferred tool, it’s time to brainstorm a concept. You should have a clear picture of how you want your illustration to look, what it should contain, the colors, fonts, and the message to pass. On a better note, you should first identify what page of your website you’re designing the illustration for.
If you’re creating one for your homepage, then you’re most likely going to be working with stats like previous sales data, completed projects, and many others. In some cases, it could be character or descriptive art, which is often useful for impressing new visitors to your website.
A blog post usually does not need overly complex visuals. So your illustration might just wrap around a single paragraph, statistics, or fact. The same goes for case studies and newsletters.
When you’ve figured out what type of illustration you need, visit sites like Pinterest for variations of your concept. Filter the results to get relevant ideas and visuals. You can also explore Canva’s library and Freepik for more.
- Sketch Out Your Idea
Don’t forget to sketch the ideas you’ve just brainstormed. Concepts are very volatile, and it’s quite easy to forget one or two at every click. If you have an iPad, you can download Procreate and use your pen to quickly create a rough prototype. Alternatively, you can do the sketches on a sheet of paper - anyone works.
Note that you’re not replicating the same concepts you’ve seen from other designers. You are only taking inspiration from their illustrations to create yours. So take note of the possible variations that can give your own design a unique look when sketching.
- Set Up Your Workspace
The workspace is where all of your designs take place. To enhance your productivity and creativity, you should put all the necessary elements here. For example, you can line up your color palettes on the left for easy access when you’re creating your illustrations. This saves you the stress of going to the color drawer over and over again.
Other things to include in your workspace include your preferred shapes, quick boxes, images, and the texts you will use. Another way to tweak your workspace is by adjusting the existing preferences.
- Start Designing
Now that you have your sketches, you can scan and upload them to Adobe Illustrator. Start by tracing out the sketch lines and get a basic shape in place. You only need to create a gray draft before adding colors and other elements.
Adobe Illustrator has a font-matching feature that comes with Adobe Sensei. Use it to dig out the best fonts and strokes to use for your texts.
- Work With Geometric Shapes
Geometric shapes include rectangles, squares, circles, and stars. Often, most non-sketch illustrations start with these shapes and are further combined to create more complex designs. For example, you can use Adobe Illustrator’s “distort and transform” tool to bloat and pucker your shapes for a more artistic look.
When creating illustrator charts for in-article use, you can work with rectangles for the bar and circles for pies.
- Prioritize Brand Consistency
Brand consistency means presenting your brand across all channels the same way. The importance of brand consistency is instant recognition. And that means anywhere your customers or previous website visitors see your designs, they know it’s you.
A quick way to implement consistency is by creating a reusable template for your illustrations. You should also maintain the colors you use, your inscriptions, the logo, and the design pattern.
- Go 2D And 3D If Necessary
While most illustrations are already pretty good without adding extra aesthetics, they don’t have to look paper-like or rigid. For more realistic and expressive designs, you can use tools like Procreate and Adobe Illustrator.
Also, note that not all of your illustrations need to be 2D and 3D. For example, illustrative pie charts and statistics for email content should be as simple as possible. Blog illustrations can take it an inch further and go 2D.
- Review And Edit
Once your illustrations are ready, sleep on them and review them for extra details. You should also test them across different devices and screens. Importantly, your file size matters a lot since they will be going live on your website.
So ensure you optimize each byte without affecting the illustration’s quality while also prioritizing your page-load speed.
- Use Pre-built Templates
Instead of creating everything from scratch, you can alternatively use pre-built templates. Some sites like Freepiks offer both premium and free templates which you can edit. All you need to do is insert your data where necessary.
If you are a bit versed in graphic designing, you can do some tweaking to the colors, shapes, and other elements used.
Conclusion
Illustrations are so important and almost indispensable if you want to create a quality experience for people on your website. Adding them to your blog posts is even more crucial and can help enhance engagement.
To create a custom illustration, you need to brainstorm and sketch a concept. Afterward, open up your design software and set up the workspace. Scan the sketch and start designing. Finally, add the finishing touches.
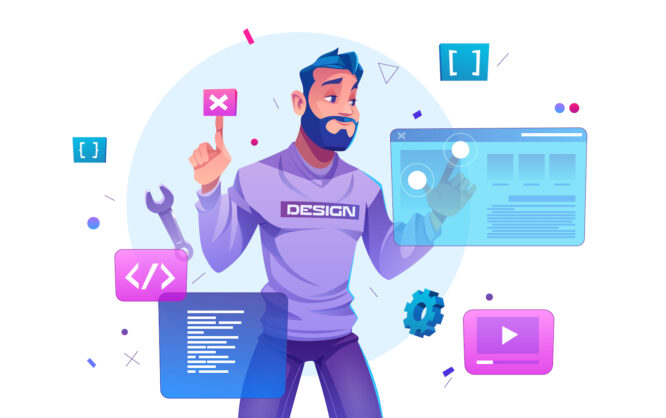
Featured Image by upklyak on Freepik
Really nice to read this kind of Interesting Article. Nice Post.
Nice tutorial, thanks a lot! Like. ??