
Progressive Web Apps: Closest to Native Apps With HTML5 and JavaScript

Native apps for Android and iOS devices have several major advantages over web applications developed using HTML5 and JavaScript. For instance, native apps can access camera, file system, and other device features, while web apps can only do that with reservations. However, more and more functions that used to be exclusive to native apps can be recreated via JavaScript, so the differences between web apps and native apps are shrinking. The so-called progressive web apps are barely inferior to classic apps.
HTML5 and CSS3 Were Just the Beginning
With HTML5, the markup language for the web has made a quantum leap forward. Aside from better semantics, the support of the mobile internet was another main goal of HTML5.
Special input types for forms were introduced, displaying case specific keyboards on smartphones and tablets - for email addresses and numeric input.
[caption id="attachment_103476" align="aligncenter" width="1000"]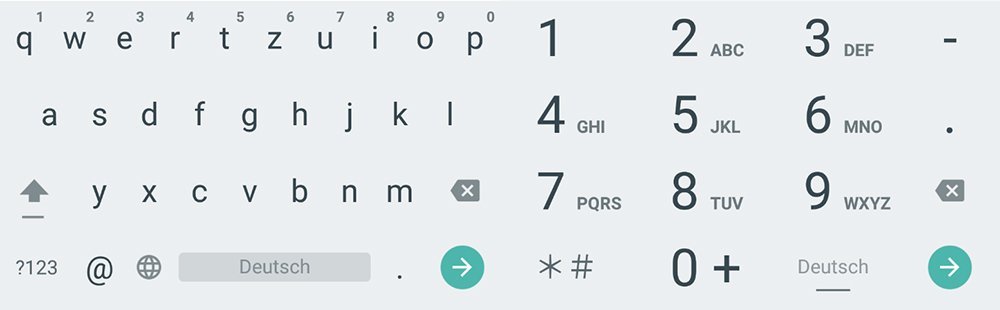 Different Keyboards Depending on the Input Field[/caption]
The CSS3 animation options allow you to get your website moving in a resource-efficient way, without having to rely on JavaScript.
Increasing Number of JavaScript APIs for Mobile Device Support
Aside from usability and design, the many mobile features are a major reason as to why apps are interesting in the first place. In the past years, several JavaScript APIs, specifically designed for mobile devices, were introduced.
One of them is the geolocation API, which has access to the location information of a device, as well as the device orientation API, which allows you to access the device orientation.
APIs that enable audio and video streaming, as well as capturing are still in development. The vibration and battery status API allow you to set vibration alarms and query the battery percentage.
When looking at the current state of the different JavaScript-APIs, you'll notice that a big amount of them was specifically designed for mobile terminals.
Setting Up Notifications and Background Services
With the notification API, it has been possible to create notifications for a while now. However, it is always necessary to have the website that sends the notification open in the browser.
[caption id="attachment_103475" align="aligncenter" width="1024"]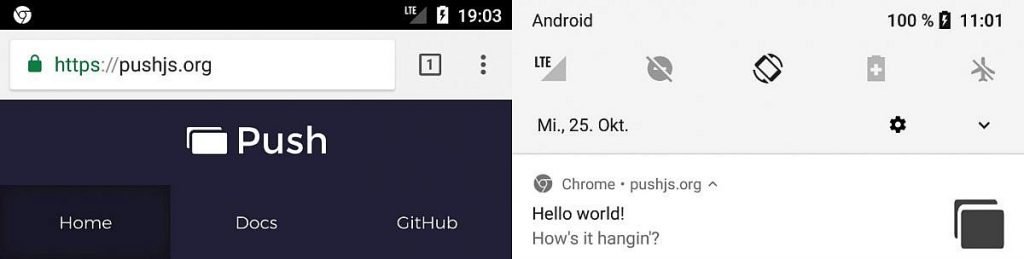 Notification Executed by a Website[/caption]
With the new push-API and the service-worker-API, the respective website does not need to be opened anymore. The service-worker-API registers a JavaScript that is executed independently of the website. We can compare this to the background services of native mobile apps.
navigator.serviceWorker.register(”/app.js”)
The example registers the file "app.js" as a service worker. This file and the script it contains are executed independently of the website. This is done using a service of the browser which always runs in the background. This file allows us to set up and execute push notifications.
self.addEventListener("push", function(e) {
    const optionen = {
    body: "Text",
    icon: "/icon.png",
    badge: "/badge.png"
  };

  event.waitUntil(self.registration.showNotification("Title", options));

});
A simple implementation of the push-API is possible using the library Push.js. Here, you can also find fallback solutions for older browsers, allowing you to set your notifications without worries.
Use the service workers to download all necessary files for offline usage. Ideally, depending on the app, it will be usable without an internet connection.
Web-App-Manifest: Full-Screen Mode and Icon on the Start Screen
Eventually, you can use the web-app-manifest, so that the look and feel of your web app is no different from a native app.
It is a JSON file that is integrated into the HTML document.
Among other things, the file defines how the web app will be displayed on the start screen. Thus, you get to define a name, short name, as well as the icons in different sizes.
 "short_name": "My App",
  "name": "My Super Awesome App",
  "icons": [
    {
      "src": "icon.png",
      "type": "image/png",
      "sizes": "48x48"
    }
 ],
  "start_url": "app.html"
 }
"start_url" also lets you put in a different start URL that loads whenever you access the web app via the landing page.
With the attribute "display", it is possible to display the web app without any browser elements, like the address bar.
"display": "standalone";
You can also enter a background color using "background_color". If you want to, the display of the app can be tied to a certain device orientation. The options "landscape" and "portrait" are available via "orientation".
Once you've set up a service worker, and placed a web-app-manifest, the mobile Chrome displays a badge at the bottom page border while loading, which lets you place the web app on the start screen.
[caption id="attachment_103473" align="aligncenter" width="689"]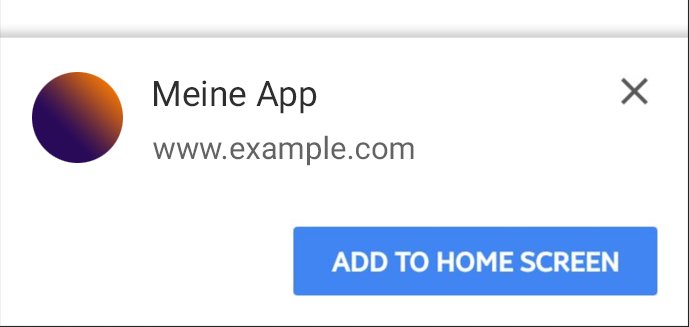 Badge for the Installation of a Web App[/caption]
However, the badge will only be displayed if you have visited a website at least twice on two different days, within two weeks.
By now, at the latest, your web app cannot be told apart from other native apps. When accessing it via the start screen, you can't tell that the web app was loaded into a browser. On top of that, many features, like notifications and other device functions, are possible.
However, another requirement has to be met: your web app has to run via HTTPS, which applies to many JavaScript-APIs as it is.
Lighthouse Extension for Chrome
With the extension Lighthouse, Chrome provides you with a tool that helps with the development of progressive web apps.
[caption id="attachment_103474" align="aligncenter" width="1000"] Lighthouse Extension[/caption]
For instance, it lets you check if your web app fulfills all criteria to be added to the home screen.
Image by vectorjuice on Freepik