
SVG: How to Create Interactive Graphics for Your Website

You surely know that SVG is much more than just a vector-based file format. Animations as well as interactions are also a part of the vector format's arsenal. As JavaScript can also be used within an SVG file, there are plenty of usage options. The JavaScript solution 
 Via „binding“, you can choose what should happen with the value. The character string before the @ symbol describes the SVG form's ID and the string behind it defines the attribute of the form that is supposed to maintain the value. The value „#elementA@fill“ assigns the colour you defined through „backgroundColor“ to the „fill“ trait of the shape with the ID „elementA“.
Last but not least, you need to tie in the JavaScript file.
Via „binding“, you can choose what should happen with the value. The character string before the @ symbol describes the SVG form's ID and the string behind it defines the attribute of the form that is supposed to maintain the value. The value „#elementA@fill“ assigns the colour you defined through „backgroundColor“ to the „fill“ trait of the shape with the ID „elementA“.
Last but not least, you need to tie in the JavaScript file.
 Altered the Star's Appearance via „<param>“ Elements
 Appearance of the Star After the Action „backgroundColorChange“
 There is an extensive documentation as well as plenty of examples that reflect the JavaScript's different areas of application. The framework is available for free under the liberal MIT license and is free to use for commercial purposes as well. It works without any additional dependencies.
(dpe)
There is an extensive documentation as well as plenty of examples that reflect the JavaScript's different areas of application. The framework is available for free under the liberal MIT license and is free to use for commercial purposes as well. It works without any additional dependencies.
(dpe)
svidget.js provides an extensive framework which allows you to create and integrate SVG graphics as widgets.
Creating and Integrating SVG Widgets
SVG widgets are classic SVG files at first. They can be expanded by additional elements that allow you to alter the appearance of a graphic thanks to the frameworksvidget.js. Additionally, the framework enables you to define actions and results. The SVG widgets are integrated into an HTML document via an „<object>“ element and can then be configured via a „<parameter>“ element. In how far the entries made via „<parameter>“ affect the SVG file is defined within the SVG itself.
To get the framework to work, you will have to integrate the JavaScript file svidget.js into your HTML document as well as the respective SVG file.
Setting Parameters in the SVG File
Usingsvidget.js, it is also possible to tie one and the same SVG file but with different appearances into one and the same HTML document. Here, the parameters that are to be considered are set within the SVG.
<svidget:params>
  <svidget:param name="backgroundColor" type="string" subtype="color" binding="#elementA@fill" />
  <svidget:param name="borderColor" type="string" subtype="color" binding="#elementB@stroke" />
  <svidget:param name="borderWidth" type="number" binding="#elementA@stroke-width, #elementB@stroke-width" />
</svidget:params>
Individual parameters are fixed via „<svidget:param>“ within the element „<svidget:params>“. These will interpret the entries that you made in the „<parameter>“ elements of the integrating HTML document later. Apart from a name, every value that is expected is set via „type“ and „subtype“. The first two entries, for example, expect a character string that has to describe a colour, the third one expects a number.
Via „binding“, you can choose what should happen with the value. The character string before the @ symbol describes the SVG form's ID and the string behind it defines the attribute of the form that is supposed to maintain the value. The value „#elementA@fill“ assigns the colour you defined through „backgroundColor“ to the „fill“ trait of the shape with the ID „elementA“.
Last but not least, you need to tie in the JavaScript file.
<script type="application/javascript" xlink:href="svidget.js"></script>
Embedding the SVG Widget in the HTML Document
In the next step, you incorporate the SVG file into an HTML document. To do so, use the „<object>“ element.<object data="star.svg" role="svidget" id="star" type="image/svg+xml" width="200" height="200">
<param name="borderColor" value="red" />
<param name="backgroundColor" value="green" />
<param name="borderWidth" value="3" />
</object>
The SVG file is referenced via „data“. It is important, that the value „svidget“ is set via „role“. Only then, the framework knows that the SVG is supposed to be treated as an SVG widget. Using the „<param>“ elements, you can now choose a background colour as well as a frame colour and strength. The names of the individual „<param>“ elements need to match the names of the respective „<svidget:param>“ names in the SVG itself.
Altered the Star's Appearance via „<param>“ Elements
Choose Actions
The actions that you can define with the „<svidget:actions>“ and „<svidget:action>“ elements, are what enables the interactivity.<svidget:actions>
<svidget:action name="backgroundColorChange" binding="changeBackgroundColor">
<svidget:actionparam name="newBackgroundColor" type="string" subtype="color" />
</svidget:action>
</svidget:actions>
In the above example, an action named „backgroundColorChange“ is being defined. I used „binding“ to enter the name of a function that is supposed to be executed when it is accessed through the HTML document. „<svidget:actionparam>“ allows you to define parameters that are transferred to the SVG widget in the HTML document using JavaScript.
function changeBackgroundColor(newBackgroundColor) {
  svidget.current().param("backgroundColor").value(newBackgroundColor);
}
The feature „changeBackgroundColor()“ within the SVG changes the background colour of the SVG widget with the value entered into „newBackgroundColor“.
Within the HTML document, you can set up an event listener that invokes the action in the SVG element with a click on an element.
document.getElementById("button").addEventListener("click", function() {
 svidget.widget("star").action("backgroundColorChange").invoke("red");
}, false);
In this example, clicking the element with the ID „button“ in the SVG widget with the ID „star“ causes the action „backgroundColorChange“ to take place. Via „invoke()“, a value - in this case the colour information „red“ – is transferred. The feature „changeBackgroundColor()“ within the SVG makes sure that the parameter „backgroundColor“ is changed to the value „red“ on click.
Appearance of the Star After the Action „backgroundColorChange“
SVG Interactive: Set Events
Another feature ofsvidget.js is the definition of events. This allows you to react to events inside an SVG using the HTML document. To do so, you need to set an event, similarly to actions within the SVG file, via „<svidget:events>“ and „<svidget:event>“.
<svidget:events>
  <svidget:event name="changeComplete" />
</svidget:events>
Afterwards, you need to define a point in the SVG on which the HTML document will be noticed that the event has occured. This can be done in the „changeBackgroundColor()“, for example.
function changeBackgroundColor(newBackgroundColor) {
  svidget.current().param("backgroundColor").value(newBackgroundColor);
  svidget.current().event("changeComplete").trigger();
}
The additional line makes sure that the event „changeComplete“ is started by „trigger()“. Within the HTML file, you now need to decide what you want to happen when the event got triggered by the SVG widget.
svidget.loaded(function (e) {
  svidget.widget("star").event("changeComplete").on(function() {
    console.log("Ready!");
  });
});
In the example, the event invokes a feature that types something into the console of the browser. This means, that as soon as the feature „changeBackgroundColor()“ is executed in the SVG, the HTML document writes to the console via „console.log()“.
Interactive SVG: Use Cases
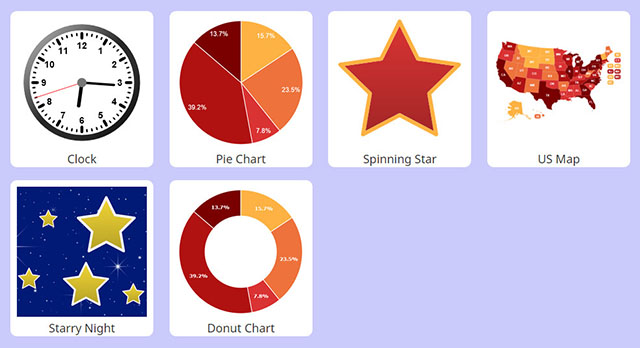
The possibilities we presented here are just a small part of a much larger scope of features provided bysvidget.js. The framework is very useful to display diagrams via SVG as well. Within the SVG, shapes of a pie or bar chart can be set. Parameters would then allow you to enter values and labels. The same SVG can be displayed in multiple different ways.
There is an extensive documentation as well as plenty of examples that reflect the JavaScript's different areas of application. The framework is available for free under the liberal MIT license and is free to use for commercial purposes as well. It works without any additional dependencies.
(dpe)