
A Marketer’s Guide to Training ChatGPT

ChatGPT is a pretty impressive tool. Marketers use it in multiple ways, from writing blog posts to drawing meaningful insights from data with AI SEO tools.
Of course, when use ChatGPT to write for you, it might not use the tone and style that you use. Or, maybe the tone and style is fine, but ChatGPT misses to add important information that is needed to perform the task adequately.
Thankfully, there are ways to train ChatGPT to use your writing style or data. On this page, we will cover the most accurate ChatGPT data training techniques.
The Role of Training Data
The training data forms the base for ChatGPT. It is crucial in fine-tuning the model and influencing how it responds.
By training ChatGPT with your specific data, you can customize the model to meet your needs and make sure it aligns with your target domain and produces responses that connect with your audience.
Although the training data shapes the model's responses, the architecture of the model and its underlying algorithms are also key factors in how it behaves.
How to Train ChatGPT with Custom Data using OpenAI API & Python?
Follow the steps below to learn how to train an AI bot with a custom knowledge base using ChatGPT API.
? Remember that this method requires knowledge and experience of coding, Python, and an OpenAI API key.
Step 1: Install Python
Check if you have Python 3.0+ installed. If you don't have Python on your device, download it.

Step 2: Upgrade Pip
Pip is a Python package manager (a system that automates installing, configuring, upgrading, and removing computer programs). The new version of Python comes with pip pre-packaged.
But, if you use the old version of Python, you can upgrade it to the latest version using a command.
pip3 install --upgrade --user <package-name>
Step 3: Install required libraries
Run a series of commands in the Terminal application to install the required libraries.
First, install the OpenAI library.
PIP3 INSTALL OPENAI

And GPT Index (LlamaIndex)

PIP3 INSTALL GPT_INDEX

Then install PyPDF2, which will allow you to parse PDF files.

PIP3 INSTALL PYPDF2

Finally, install Gradio, which will help you build a basic UI, allowing you to interact with ChatGPT.

??PIP3 INSTALL GRADIO
?Tip: You will need a code editor tool to edit and customize the code. You can use code editors like Notepad++ or Sublime Text according to your needs.
Step 4: Get your OpenAI API key
An OpenAI API key is a unique code that developers use to access OpenAI's models via the API. This key helps confirm who is making the request and monitors their usage.
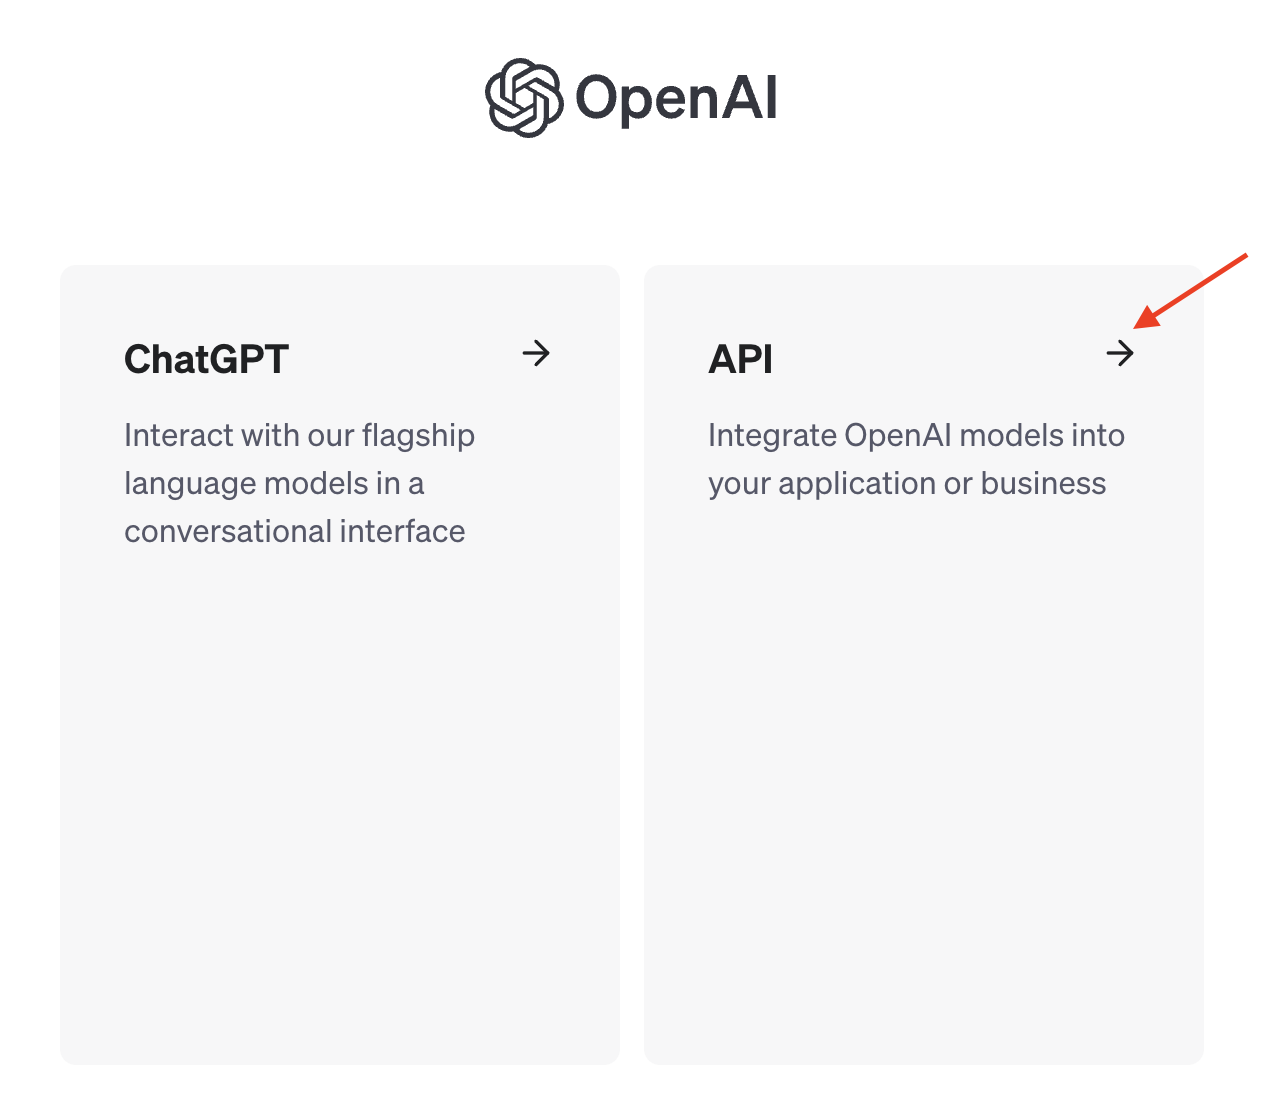
To get your OpenAI API key, log in to your OpenAI account & choose the API option.
From the left navigation menu, select API Keys.
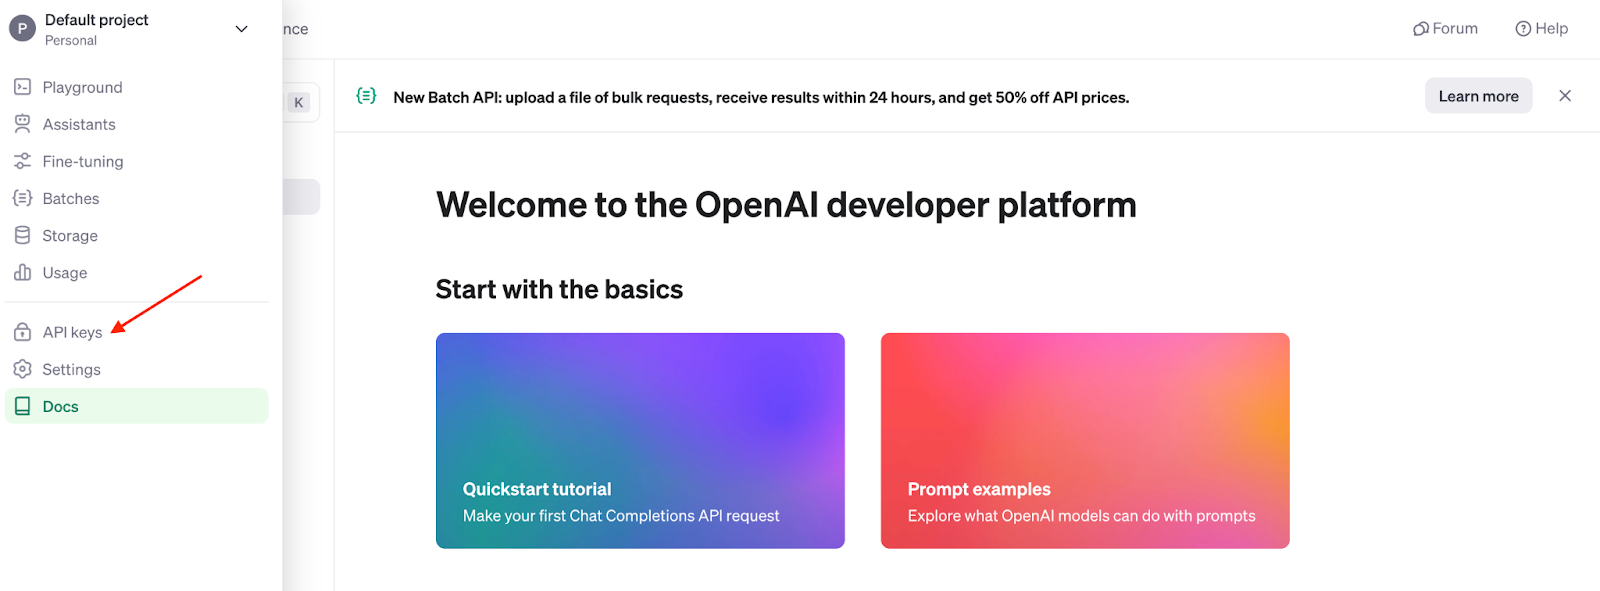
Choose Create new secret key, which will generate a new API key for you. You should copy and paste it into a code editor. Note that after being generated, the secret API keys are not displayed.

Step 5: Prepare your custom data
Create a new directory named 'docs' in your system. Place TXT, CSV, or PDF files inside it.
Remember the token limit for free accounts in OpenAI, as more data will use more tokens.
You can add all the files you need to prepare your custom data in this directory.
Step 6: Create a script
Now, you will have to create a Python script to train ChatGPT using custom data. To create the script, use a text editor.
Write the necessary code and create a new page to enter the code. Add the OpenAI key to the code. Save the file in the same location that you have in your "docs" directory with the extension 'app.py.'
Here is the code that you can copy and paste into your code editor.
from gpt_index import DirectoryReader, VectorIndex, LanguageModelPredictor, QueryHelper

from langchain.openai import LanguageModel

import gradio as gr

import os

# Set your OpenAI API key here to enable language model access

os.environ["OPENAI_API_KEY"] = 'your_openai_api_key'

def build_search_index(source_folder):

    input_limit = 2048

    response_length = 1024

    overlap_size = 30

    segment_limit = 500

    # Initialize helper to manage input and output configurations

    query_helper = QueryHelper(input_limit, response_length, overlap_size, segment_limit=segment_limit)

    # Set up the language model predictor with specified parameters

    model_predictor = LanguageModelPredictor(

        language_model=LanguageModel(temperature=0.7, model_name="text-davinci-003", max_tokens=response_length))

    # Load and process documents from the specified directory

    documents = DirectoryReader(source_folder).read_files()

    # Create an index with processed documents to facilitate search

    search_index = VectorIndex(documents, model_predictor=model_predictor, helper=query_helper)

    # Save the created index to the disk for later use

    search_index.persist('search_index.json')

    return search_index

def query_chatbot(user_input):

    # Load the pre-built index from the storage

    search_index = VectorIndex.load('search_index.json')

    # Generate a response based on the user input using the loaded index

    answer = search_index.search_query(user_input, mode="concise")

    return answer

# Setup the Gradio interface

interface = gr.Interface(

    fn=query_chatbot,

    inputs=gr.inputs.Textbox(lines=7, placeholder="Type your question here..."),

    outputs="text",

    title="Custom AI Assistant"

)

# Build index from the documents directory

index = build_search_index("path_to_documents")

# Launch the application with sharing options enabled

interface.launch(share=True)
Step 7: Run the Python script in the “Terminal”
Use the terminal to go to the directory where docs and app.py are located. Run the following command:
PYTHON3 APP.PY
Now, it will start to train your custom chatbot based on the data in your ‘docs’ folder.
Depending on the amount of data you include, it might take some time. A local URL will be provided after training, where you can test the AI bot using a simple UI.
The AI bot will respond according to your added script when you ask questions.
Keep in mind that both training and asking questions will consume tokens.
All done now!
In Conclusion
Following the steps outlined in this article, you can start using your own data to control ChatGPT’s answers and create a unique conversational AI experience.
Remember to get reliable data and successfully tweak your model. Always keep in mind the ethical factors when you train ChatGPT, and opt for a responsible attitude.
There are enormous possibilities of combining ChatGPT and your own data, and you will see the innovative conversational AI chatbot you will create as a result.
Hope you start achieving your marketing goals by training ChatGPT on your own data!
Featured image by Solen Feyissa on Unsplash