A Simple Twitter App with Ruby on Rails – Messages With Ajax
Ruby on Rails is a web application framework that promotes rapid development. Clients' demands are ever increasing yet they still expect the same quality of output.
Frameworks, like Rails, help to achieve this; why?... here are some of the reasons:
Convention over Configuration (CoC):
This is used to reduce the amount of up-front configuartion. The idea is; if you abide by certain coding conventions, you will have little, to none, configuration to do.
Object-Relational Mapping (ORM):
ORM reducing coupling to the database. This abstraction allows you changed the DBMS provider with little trouble.
Structured Code:
The MVC pattern forces you to organise your code in a clean, structured way. This results in more maintainable code.
Plugins:
Plugins save you from re-inventing the wheel every time you want to add functionality to your app. For instance, making you web app capable of performing searches can be easily added with the acts_as_ferret plugin. There are many more plugins!
Who is this Tutorial for?
This tutorial is for people who have learnt the basics of Rails and want to take things to the next level. This tutorial is not a beginners guide for getting started with Rails. If you are just starting out with Rails I suggest this article from Six Revisions.
What this Tutorial Covers
In the first part of this three part series, we cover setting up a simple message model, which will hold the messages posted. Further to this, we will learn how to post a message asynchronously, using AJAX.
Ok, so you've decided to create a "twitter" style micro-blog using Ruby on Rails. First, we need to think about our basic requirements and from this we can model our application.
There are many ways that this can be done, but we will use a simple technique in which you jot down a few paragraphs about how and what the application is expected to do then highlight the nouns. So, lets try it.
My web app should work in a similar way to twitter. Users should be able to register with the site and create short posts. Users should be able to follow other users. Each user should be able to see their own posts plus the users they are following.
Note that I've been selective in what nouns I've highlighted. You only really need to take notice of the nouns which you feel will need to store data to the database.
I know there is more to twitter than this, but lets leave it simple. As you can see the "nouns", which will need to store data to the database are "posts" and "users". So we require two models:
In the first part of the tutorial, we are going to deal with posts only.
Post
User
Creating the Project Files
Before we do anything we need to create a project for our twitter web app.
> rails twitter -d mysql
As you can see, I will be using MySQL as the DBMS, however, feel free to use whatever database you want.
Open the database.yml file in the config folder and modify the password as required. An example is shown below.
So let's go right ahead and generate the "Post" model and migrate it.
  > ruby script/generate model post message:text
  > rake db:migrate
Controller
Now, let's create a controller for the post model.
> ruby script/generate controller posts
We need to set up some methods for interacting with the model. Edit your "posts_controller.rb" file and add the following methods:
class PostsController < ApplicationController
  def index
    @posts = Post.all(:order => "created_at DESC")
    respond_to do |format|
      format.html
    end
  end

  def create
    @post = Post.create(:message => params[:message])
    respond_to do |format|
      if @post.save
        format.html { redirect_to posts_path }
      else
        flash[:notice] = "Message failed to save."
        format.html { redirect_to posts_path }
      end
    end
  end
end
We only need two methods, "index" and "create". The index method creates an instance variable containing all the posts in descending order. The create method is used to create a new post.
Views
Let's create the "index" view. First, we'll create a partial for posts. Create a file called "_post.html.erb" in the views/posts folder and add the code below.
The index view is now very simple. Create a file called "index.html.erb" in the views/posts folder and add the code below.
<%= render :partial => @posts %>
Create some Posts
Open a console session and create a few new messages, as shown below.
> ruby script/console
Loading development environment (Rails 2.3.2)
>> Post.create!(:message => "My first post" )
>> Post.create!(:message => "Post number two!" )
Create a Form for Posts
Obviously you're not going to get the user to use the console to create messages. So, our next task is to inject some functionality into our web app to allow the user to create messages. Twitter has an input box above the indexed messages, which is used for submitting a new message; We will keep our web app the same.
First, we will create a partial for the form, then we will render that partial at the top of the index view. Create a file called "_message_form.html.erb" in the posts view folder and add the following code:
<% form_tag(:controller => "posts", :action => "create") do %>
<%= label_tag(:message, "What are you doing?") %><br />
<%= text_area_tag(:message, nil, :size => "44x6") %><br />
<%= submit_tag("Update") %>
<% end %>
Now, we need to modify the index view to render this partial at the top. Open the index.html.erb file and modify the code as follows:
For this to work we need to make one last modification. Open the route.rb file and map a new "posts" resource, as shown below. (Note: the comments from this file have been removed).
ActionController::Routing::Routes.draw do |map|
map.resources :posts
map.connect ':controller/:action/:id'
map.connect ':controller/:action/:id.:format'
end
This creates a few named routes. If you look back to the "create" method in the posts controller, you'll see that we make use of the posts_path named route; Defining the posts resource makes this named route available.
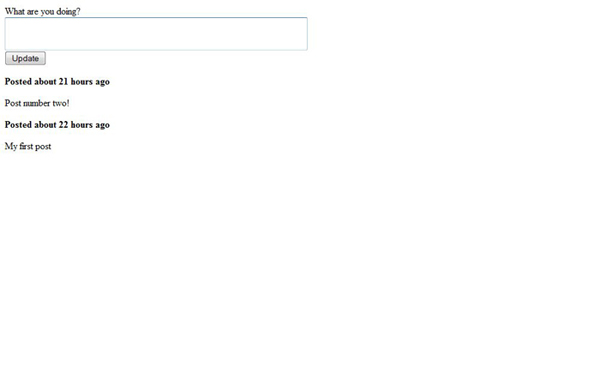
So, lets fire up the web server and a see how things look.
> ruby script/server
Now open a browser and go to http://localhost:3000/posts. You should see a screen, as shown below.
Adding some AJAX
AJAX allows you to make asynchronous requests to the server using JavaScript. We will make use of AJAX to make the posting a message a bit smoother.
When the user clicks on the "Update" button, we want the message to update without refreshing the browser. We have a few things to do to add AJAX functionality. First, lets change the "create" method in the posts controller:
def create
@post = Post.create(:message => params[:message])
respond_to do |format|
if @post.save
format.html { redirect_to posts_path }
format.js
else
flash[:notice] = "Message failed to save."
format.html { redirect_to posts_path }
end
end
end
The only change here is the "format.js" code, allowing the create method to respond to JavaScript. Next, we need to create a posts layout file. In the views/layout folder create a file called "posts.html.erb" and add the following code:
The main purpose of this is to make use of the "javascript_include_tag" call, which includes the relevant JavaScript files for AJAX and some visual effects. Next, we need to make a small addition to the index view ("index.html.erb").
As you can see all we have added is a div block surrounding the posts partial. This will be used later when we are specifying where the AJAX response should be placed. Nearly there! Now we will add a div_for block to our post partial ("_post.html.erb").
<% div_for post do %>
<p><b>Posted <%= time_ago_in_words(post.created_at) %> ago</b></p>
<p><%= post.message %></p>
<% end %>
Edit the "_message_form.html.erb" partial and change the form_tag call to form_remote_tag as show in the code extract below:
<% form_remote_tag(:controller => "posts", :action => "create") do %>
The div_for operation create a div block with a unique id, this is especially useful when looping through several records. Finally, we need to create the rjs template. To do this, create a file called "create.js.rjs" in the views/posts folder and add the following code.
The first line specifies that a new post partial will be rendered at the top of the posts div when the asynchronous call responds. The second line specifies that a "highlight" visual effect will be applied to that block when it is rendered.
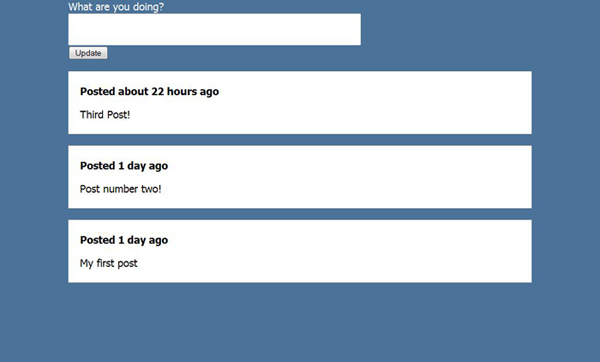
That's it! Start you web server again, browse to http://localhost:3000/posts and give it a go.
I've created a stylesheet, which we can use to make things look a bit more respectful. Create a file called layout.css in the public/stylesheets folder then add the following CSS code:
OK! It doesn't look that pretty, but it will do for our purposes.
Setting up a Home Page
To have the root URL (http://localhost:3000) direct the user towards your posts you will first need to delete the public/index.html file. Do this now.
The second thing you need to do is set up a route in your configroutes.rb file. Open routes.rb in notepad and add a new line to the end using map.root, as shown below.
ActionController::Routing::Routes.draw do |map|
map.resources :posts
map.connect ':controller/:action/:id'
map.connect ':controller/:action/:id.:format'
map.root :controller => "posts"
end
For more on routes, try the Rails API Documentation
Now if you browse to http://localhost:3000. The request will be routed to the posts controller.
Summary
This concludes the first part of the series. Depending on the popularity of this article, parts 2 and 3 will follow shortly.
What have we Learnt?
You've learnt how to carry out basic application design and how to use this design to work out what models are required. Further to this, you've learnt how to use the console to help with the development of your application. Finally, you used AJAX to perform asynchronous requests to the server.
Author: Phil McClure
Phil McClure is a Software Developer from Belfast, Northern Ireland. His main interests are software architecture, design patterns and how these can be applied to web development. Phil blogs at Therailworld. Follow him on Twitter.
Write for Us! We are looking for exciting and creative articles, if you want to contribute, just send us an email.
The jungle is alive: Be it a collaboration between two or more authors or an article by an author not contributing regularly. In these cases you find the Noupe Editorial Team as the ones who made it. Guest authors get their own little bio boxes below the article, so watch out for these.
Great. I’d like to see where this is heading. Cant wait for the other parts to show up here.
I generally tend to write my own javascript (using jquery) and not use a lot of rjs but that’s just a preference. I am not going to comment no the ruby code just yet.
Neat
Thanks a lot for this.. It was a quick way to reinforce a lot of things I learned.. Thanx Keep them coming. (One thing though.. your tags keep showing up everywhere.) I quickly re wrote my views in haml though.
This is very well presented – I haven’t tried it because it will take me ages to set up ruby – but its written so clearly with nice little text boxes etc – brilliant man.
Great tutorial… Simple and easy to follow. Looking forward to parts 2 and 3! (Seeing as how this was posted to the front page of Digg, I hope it’s popular enough to warrant a follow-up)
Not having much luck here, trying to get a html tag into a comment… Let’s try again. Bold tags, as in:-
<b>
Phil, I have fixed the code in the post now.
Thanks a lot for creating such a useful tutorial. Looking forward for your next tutorial in this series :)
I did a project at school where we made a twitterish website branded for our school called Ritter. If you’re interested, check it out on github (http://github.com/blatyo/Ritter/tree/master).
this tutorial is really simple and straight to the heart of rails , i will be looking forward to parts 2 and 3 , keep up the good work , many thanks christine
Hook us up Noope, I know nothing about Ruby on Rails. Although I wish I did. Find us a tutorial on ROR but for absolute very beginners, that use a Mac! This looks nice but I have no idea how to implement it.
great tutorial!! how can we get this div to aoto refresh? suppose a situation where multiple users are using this,if one user adds a message it should automatically be displayed in the browsers of other users. thanks in advance for your help.
I can’t seem to get the AJAX to work… I’m using Rails 3, so I’m aware of the fact that form_remote_tag is deprecated. Right now, I’m using the line “posts”, :action => “create”, :remote => true) do %> at the top of my _message_form.html.erb… and the app isn’t throwing any errors, but it’s also not Ajaxified. I saw the comments above that seemed to address the problem, but their code didn’t seem complete or at least didn’t make sense to me. Anyone have any thoughts?
Hmm, how to make it works with Rails 3?
I use rails 3 routes, but I guess some more depreciated stuff is used here. What do I have to do the other way, anybody knows?
i m implementing in rails 3,
during AJAX implementing,in rails 3
“posts”, :action => “create”) do %>
this tag not support so i keep old one that is, with :remote => true add .
“posts”, :action => “create”, :remote => true) do %>
I’ve got this section of the app working with Rails 3 (and removed any deprecated code, so I am getting no warnings in the console at runtime).
I seem to be having an issue with the ajax, however – there is no highlight when I create a new post, which presumably there should be, so I assume that the page is not ajaxified (it is too light a page to tell if it is doing a full page reload or just a section).
@ Tres , The code here was written for an older version of ruby and the function form_remote_tag has been depreciated. Part 2 of this tutorial is figuring out the proper way to do it.
Just follow it with Rails 3.1; I had to modify something but, everything worked well at the end; except for the AJAX, however I find out it didn’t worked because it needs prototype-rails, because it was deprecated in 3.1; http://weblog.rubyonrails.org/2011/4/21/jquery-new-default you can tell RoR to use it, but I think I will use Jquery for this since is the new standard
I really do appreciate the article, but Im using Rails 3.2, so i think i need some help with the _message_form.html and the routes config, because right now i can see the old post which was created at the console, but cant see the form so i can write and update
Home » A Simple Twitter App with Ruby on Rails – Messages With Ajax
We use cookies to ensure that we give you the best experience on our website. By continuing to use this site, you express your consent.I acceptPrivacy Policy


jeez, I am just learning PHP, but this gives me something to aspire to.
Great. I’d like to see where this is heading. Cant wait for the other parts to show up here.
I generally tend to write my own javascript (using jquery) and not use a lot of rjs but that’s just a preference. I am not going to comment no the ruby code just yet.
Neat
Thanks a lot for this.. It was a quick way to reinforce a lot of things I learned.. Thanx Keep them coming. (One thing though.. your tags keep showing up everywhere.) I quickly re wrote my views in haml though.
This is very well presented – I haven’t tried it because it will take me ages to set up ruby – but its written so clearly with nice little text boxes etc – brilliant man.
I just hate Ror.
ROR is not for hating….it is for loving….
Wonderful tutorial, thank you very much.
Thanks everyone.
Just one thing to note. The demo data is here:-
http://www.therailworld.com/posts/18-Create-a-Twitter-App-with-Rails-Demo-Data
I gave noupe.com the wrong link by mistake – I’ll get Noura to update this…
You missed the opportunity of creating a useful tutorial. You should’ve used JQuery instead of rjs!
Please help. What should this line
format.js
be in posts_controller.rb ???
Thanks
Solved – the tags should be removed
Great tutorial… Simple and easy to follow. Looking forward to parts 2 and 3! (Seeing as how this was posted to the front page of Digg, I hope it’s popular enough to warrant a follow-up)
thanks a lot bro
very easy steps.
easy to follow.
thx
Yeah, just a note about some of the code blocks. There are some unwanted “” and “” tags in these areas:
map.resources :posts
format.js
Just remove them, they shouldn’t be there. I’ll try to get Noura to remove them from the tutorial.
Sorry that should be bold tags i.e.
Not having much luck here, trying to get a html tag into a comment… Let’s try again. Bold tags, as in:-
<b>
Phil, I have fixed the code in the post now.
Thanks a lot for creating such a useful tutorial. Looking forward for your next tutorial in this series :)
The Source Code!
================
The link for the source code is wrong. Here is the correct URL:-
http://www.therailworld.com/posts/18-Create-a-Twitter-App-with-Rails-Demo-Data
Thanks Great tutorial. Simple and easy to follow….
thanks post.. .
hi it was a very wonderful article.really awaiting for other one.
Great and well presented… thanks for sharing!
thanks a lot my friend easy steps.
& easy to follow ill test for sure
thanx a lot :)
I’ve tried to post this a few times now, but it keeps getting blocked. This is the correct URL for getting the source code for this tutorial:-
“therailworld.com/posts/18-Create-a-Twitter-App-with-Rails-Demo-Data”
Awesome tutorial, I really hope you continue the series
Man I wish I had the time to learn RoR, seems like a really great technology that may overpass PHP one day. Still a great tutorial, thanks!
I did a project at school where we made a twitterish website branded for our school called Ritter. If you’re interested, check it out on github (http://github.com/blatyo/Ritter/tree/master).
Just what the world needs, another web based twitter client ;-). Very nice tutorial, IMHO a nice one to get your feet wet with RoR.
this tutorial is really simple and straight to the heart of rails , i will be looking forward to parts 2 and 3 , keep up the good work , many thanks christine
Thanks so much for posting this! I found this very helpful.
Great tutorial. Love the illustrations that you’ve put in.
hi!!! what version of rails you are using? becouse it throws me some errors out
for example this ->
unexpected ‘:’, expecting ‘)’
@posts = Post.find(:all :order => “created_at DESC”)
thanx
It should be
@posts = Post.find(:all, :order => “created_at DESC”)
you forgot your , after the :all
thanks.. I love this theme, thanks for sharing
Awesome tutorial!!! More tutorials about Rails, please?
Excelent tutorial, thank you so much.
wonderful work !!!! was very useful….thanks!!!
Whats with this??
NameError in PostsController#index
uninitialized constant PostsController
RAILS_ROOT: /Users/kenfoust/Projects/RubyProjects/twitter
Application Trace | Framework Trace | Full Trace
/Users/kenfoust/.gem/ruby/1.9.1/gems/activesupport-2.3.3/lib/active_support/dependencies.rb:443:in `load_missing_constant’
/Users/kenfoust/.gem/ruby/1.9.1/gems/activesupport-2.3.3/lib/active_support/dependencies.rb:80:in `const_missing_with_dependencies’
/Users/kenfoust/.gem/ruby/1.9.1/gems/activesupport-2.3.3/lib/active_support/dependencies.rb:92:in `const_missing’
/Users/kenfoust/.gem/ruby/1.9.1/gems/activesupport-2.3.3/lib/active_support/inflector.rb:372:in `const_get’
/Users/kenfoust/.gem/ruby/1.9.1/gems/activesupport-2.3.3/lib/active_support/inflector.rb:372:in `block in constantize’
/Users/kenfoust/.gem/ruby/1.9.1/gems/activesupport-2.3.3/lib/active_support/inflector.rb:371:in `each’
/Users/kenfoust/.gem/ruby/1.9.1/gems/activesupport-2.3.3/lib/active_support/inflector.rb:371:in `constantize’
/Users/kenfoust/.gem/ruby/1.9.1/gems/activesupport-2.3.3/lib/active_support/core_ext/string/inflections.rb:162:in `constantize’
/Users/kenfoust/.gem/ruby/1.9.1/gems/actionpack-2.3.3/lib/action_controller/routing/route_set.rb:440:in `recognize’
/Users/kenfoust/.gem/ruby/1.9.1/gems/actionpack-2.3.3/lib/action_controller/routing/route_set.rb:433:in `call’
I fixed it forgot the “s”
Great Tutorial!!!
Very easy, thanks!!!!!!!
Hook us up Noope, I know nothing about Ruby on Rails. Although I wish I did. Find us a tutorial on ROR but for absolute very beginners, that use a Mac! This looks nice but I have no idea how to implement it.
The data doesn’t seem to be saving to the database. New posts come up blank. Help?
Thanks man,
I have learnt Ajax on Rails through this app,.
Really interesting article..
You can also checkout another twitter app using jQuery.
http://ajaxdump.com/2009/08/21/tweetable-display-twitter-feeds-on-your-site-jquery-plugin/
I am getting this error after part 1 of this tutorial, i have double checked everything and followed everything to a tee…
undefined local variable or method `post’ for #
any ideas???
Great tutorial. Followed it through and it worked 1st time!
1 question. When it comes to validation through posts.rb, i add:
validates_presence_of :message
and within the view, I have
the validation works, but i dont get a message. What have i misseD?
Cheers
Its great tutorial ! :),
Can you tell me the details of the tables of you have used or where I can find them?
Thanks Phil McClure for the lovely post. As i’m new in ROR, didn’t understand the following lines, wiuld be better if you explain more
page.insert_html :top, :posts, :partial => @post
page[@post].visual_effect :highlight
Thanks
great tutorial!! how can we get this div to aoto refresh? suppose a situation where multiple users are using this,if one user adds a message it should automatically be displayed in the browsers of other users. thanks in advance for your help.
Great tutorial Phil, thank you a lot for nice explaining and also usage if sample images after code where most other tutorials lack.
Showing posts/_message_form.html.erb where line #1 raised:
You have a nil object when you didn’t expect it!
You might have expected an instance of ActiveRecord::Base.
The error occurred while evaluating nil.[]
Extracted source (around line #1):
1: “posts”, :action => “create”) do %>
2:
3: “44×6”) %>
4:
Trace of template inclusion: /posts/index.html.erb
Thanks Phil McClure for the lovely post. But when i open the posts page the following error will occur please let me know the problem and solution.
Showing posts/_message_form.html.erb where line #1 raised:
You have a nil object when you didn’t expect it!
You might have expected an instance of ActiveRecord::Base.
The error occurred while evaluating nil.[]
Extracted source (around line #1):
1: “posts”, :action => “create”) do %>
2:
3: “44×6?) %>
4:
Trace of template inclusion: /posts/index.html.erb
Now, we need to modify the index view to render this partial at the top. Open the index.html.erb file and modify the code as follows:
is this meant to be something missing or really ???
hey.. its a great tutorial keep it up and give some more useful tutorial
Good explanation thanku
Hi ,thanku for a great explanation .
gte
Interesting article! I certainly agree. Well stated.
this is an excellent article. Finally found a start to end example and explanation. Thank you very much.
I get this error : undefined method `form_remote_tag’
Rails 3.0.3
Ruby 1.9.2
Btw, nice article !
i’ve tried:
“posts”, :action => “create”, :remote => true do %>
that didn’t gives an error, but i also didn’t work :( (the site will be simply reloaded)
my solution:
true do %>
my solution:
“form_tag “/posts/create”, :remote => true do”
@flotto
Good job, it works !
Great tutorial,
cheers!
I can’t seem to get the AJAX to work… I’m using Rails 3, so I’m aware of the fact that form_remote_tag is deprecated. Right now, I’m using the line “posts”, :action => “create”, :remote => true) do %> at the top of my _message_form.html.erb… and the app isn’t throwing any errors, but it’s also not Ajaxified. I saw the comments above that seemed to address the problem, but their code didn’t seem complete or at least didn’t make sense to me. Anyone have any thoughts?
Well, no wonder the code didn’t look complete. The comments strip stuff out…
Hmm, how to make it works with Rails 3?
I use rails 3 routes, but I guess some more depreciated stuff is used here. What do I have to do the other way, anybody knows?
Learn Rails 3 first than make it
Goto their home page, they have got really awesome tutorials
i m implementing in rails 3,
during AJAX implementing,in rails 3
“posts”, :action => “create”) do %>
this tag not support so i keep old one that is, with :remote => true add .
“posts”, :action => “create”, :remote => true) do %>
is it write ?
Thanks very much this has been VERY helpful!
I’ve got this section of the app working with Rails 3 (and removed any deprecated code, so I am getting no warnings in the console at runtime).
I seem to be having an issue with the ajax, however – there is no highlight when I create a new post, which presumably there should be, so I assume that the page is not ajaxified (it is too light a page to tell if it is doing a full page reload or just a section).
Any ideas anyone?
Hi,
I got routing error when i used below routing with rails versino 3.0 and ruby versino 1.9
# map.resources :posts
# map.connect ‘:controller/:action/:id’
# map.connect ‘:controller/:action/:id.:format’
I converted them to
1)resources :posts
2) unable to get the equivalent of line 2 above in rails 3.0
3) match ‘:controller(/:action(/:id(.:format)))’
Please let me know the conversion text to be use for line 2 in rails 3.0 version
it will be similar as u typed in the third line…try it…
Excellent tutorial
hello….don’t hate ROR…it’s a very powerful language
Hey guys, when I change the following line in: _message_form.html.erb
from:
<% form_tag …
to:
<% form_remote_tag …
I receive a traceback. Not sure why.
The traceback is:
NoMethodError in Posts#index
Showing C:/Users/linx/twitter/app/views/posts/_message_form.html.erb where line #1 raised:
undefined method `form_remote_tag' for #<#:0xb66e350>
Extracted source (around line #1):
1: “posts”, :action => “create”) do %>
2:
3:
4: “44×6”) %>
Trace of template inclusion: app/views/posts/index.html.erb
Rails.root: C:/Users/linx/twitter
Application Trace | Framework Trace | Full Trace
app/views/posts/_message_form.html.erb:1:in `_app_views_posts__message_form_html_erb__27854131_95637984_1132246′
app/views/posts/index.html.erb:1:in `_app_views_posts_index_html_erb___206319701_95643984_0′
app/controllers/posts_controller.rb:4:in `index’
Assistance would be appreciated =)
@ Tres , The code here was written for an older version of ruby and the function form_remote_tag has been depreciated. Part 2 of this tutorial is figuring out the proper way to do it.
(Source) http://apidock.com/rails/ActionView/Helpers/PrototypeHelper/form_remote_tag
Thanks for the teachin!
Thank you..It is an excellent tutorial and very simple to undrstand and follow..!!!!
Just follow it with Rails 3.1; I had to modify something but, everything worked well at the end; except for the AJAX, however I find out it didn’t worked because it needs prototype-rails, because it was deprecated in 3.1; http://weblog.rubyonrails.org/2011/4/21/jquery-new-default you can tell RoR to use it, but I think I will use Jquery for this since is the new standard
Phil this was great, l personally can’t wait for the continuation of this, great job man. Rails is made easy with your explanation
why did u mentioned @posts%> instead of post%>( i m a newbe to ror)
I really do appreciate the article, but Im using Rails 3.2, so i think i need some help with the _message_form.html and the routes config, because right now i can see the old post which was created at the console, but cant see the form so i can write and update
Is there a way to create a view where we can have i.e posted by – username on each post
What is the Rails and Ruby versions used when creating this app?
We can manage it through RVM, right?
Rails version is 2.3.2, what about Ruby?
Just wondering if this tutorial will still work, seeing how it’s almost 4 years old?
I think PHP is better than ruby on rails but ruby on rails is not so bad!
Which version of Rails have been used to write this tutorial? I can’t find any information about Rails version.