
How to Start an Email Newsletter Using MailChimp and WordPress

The importance of email campaigns is not only high regarding e-commerce, WordPress blogs can also benefit from a frequently sent out email newsletters. A newsletter is an effective way to keep the readers of your blog updated. This way, you can turn visitors into regular readers, as offering an email newsletter solves a problem of your visitor. Not every person has enough interest or time to visit a blog on a regular basis, to check it for new articles. However, some blog owners don't offer a newsletter for the sole reason that they don't know how easy it is to set one up. Thus, today's article will show you how to create a free newsletter using MailChimp and WordPress.
 MailChimp is one of the largest providers for email campaigns, and is free to use for up to 2,000 email recipients. The interface is user-friendly, and there are many pretty templates for the newsletters. It is also possible to create a custom template to meet your own requirements. Realizing a corporate design is no problem either, using the free MailChimp account. The free account allows you to send up to 12,000 emails a month to up to 2,000 recipients. This should be more than enough for the average blogger.
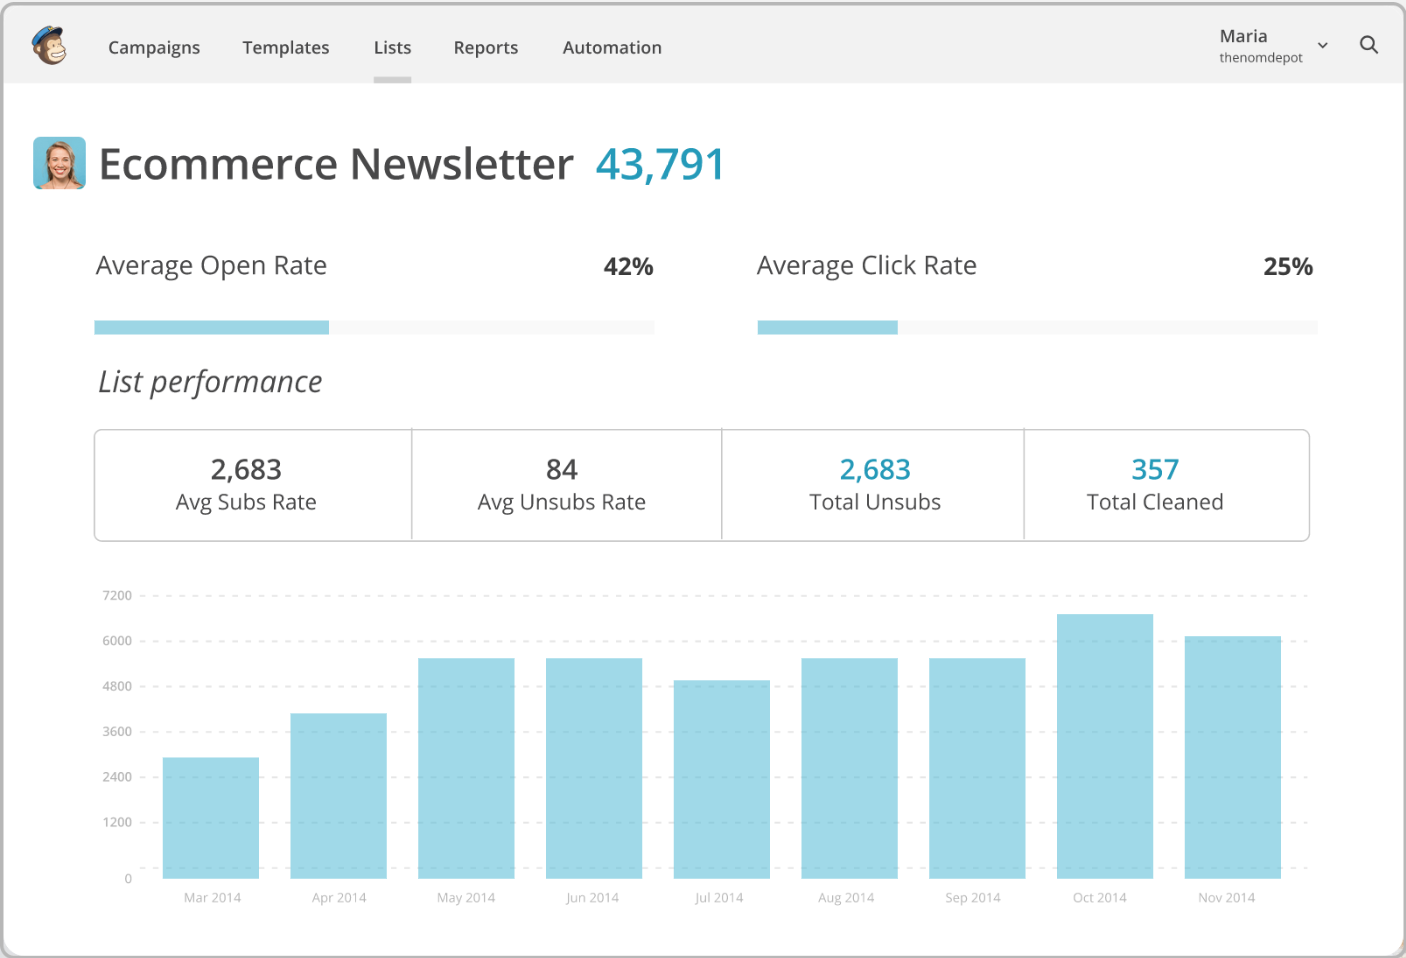
The free account also comes with a simple analysis function. If you need more, you need to upgrade to a paid account. The paid accounts start at 10 USD a month. Of course, if this is something you can't afford, there are many great affordable alternatives to Mailchimp out there.
MailChimp is one of the largest providers for email campaigns, and is free to use for up to 2,000 email recipients. The interface is user-friendly, and there are many pretty templates for the newsletters. It is also possible to create a custom template to meet your own requirements. Realizing a corporate design is no problem either, using the free MailChimp account. The free account allows you to send up to 12,000 emails a month to up to 2,000 recipients. This should be more than enough for the average blogger.
The free account also comes with a simple analysis function. If you need more, you need to upgrade to a paid account. The paid accounts start at 10 USD a month. Of course, if this is something you can't afford, there are many great affordable alternatives to Mailchimp out there.
 After confirming your email address, it becomes fit for use. Now, execute the remaining steps one by one.
 The first step is the creation of an email list that stores all email addresses that you want to send the newsletter to. As you don't have a list yet, click "Create List" in the next window. Fill in the entire form. You'll be asked things like the name of the list, the email address, and the name that will be entered as the sender, as well as the reason why the recipients receive the newsletter, and so on.
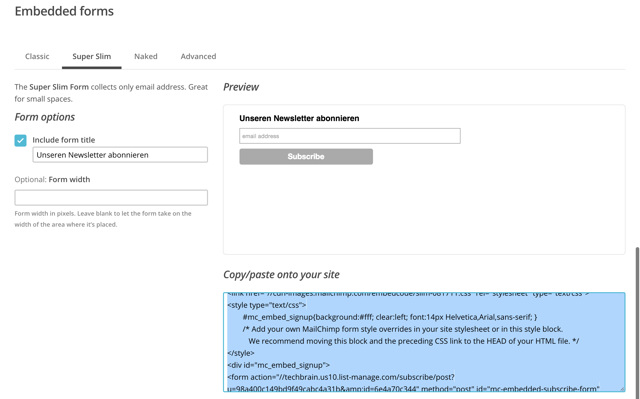
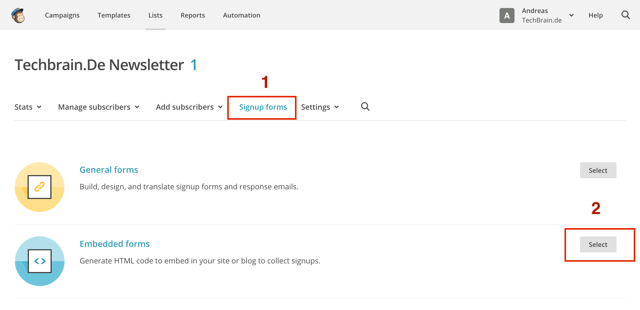 To create a subscription form for your newsletter, first click on Signup forms, and then on Select. You'll then be redirected to a page where you can choose between a couple of options for a signup form. Choose a variant and then copy the displayed code.
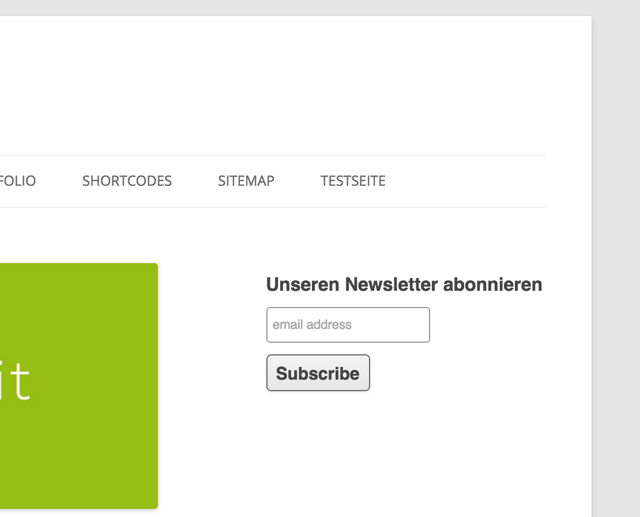
 Now, you have a signup form for the newletter on your blog, which allows you to start collecting email addresses.
 Of course, there are many different, and more successful integrations of a newsletter signup form, but considering all the variants would blow up this article. Thus, let's stick to the simple default signup form.
 Then choose the "RSS-Driven Campaign" in the next window.
 Enter your RSS feed adress in the opening window, choose which day of the week you want the newsletter to be sent out, and how frequent, as well as at which time you want it to be sent.
 Now click on "Next" in the bottom right to continue. Then, MailChimp will ask for the email list that you want the newsletter to be sent to. Choose your list and click on "Next" once more.
In the following window, we'll assign a name to the campaign (this will only be used internally), and make some smaller adjustments. Them, click "Next" again.
Now click on "Next" in the bottom right to continue. Then, MailChimp will ask for the email list that you want the newsletter to be sent to. Choose your list and click on "Next" once more.
In the following window, we'll assign a name to the campaign (this will only be used internally), and make some smaller adjustments. Them, click "Next" again.
 Choose one of the templates or themes and click "Select". MailChimp will then allow you to make some adjustments to your newsletter. You can place a logo, add content blocks, change text colors and fonts, and a lot more.
The important thing here is, that your newsletter has to contain the "RSS Header"- and "RSS Items"-content blocks, as empty emails will be sent out otherwise.
Choose one of the templates or themes and click "Select". MailChimp will then allow you to make some adjustments to your newsletter. You can place a logo, add content blocks, change text colors and fonts, and a lot more.
The important thing here is, that your newsletter has to contain the "RSS Header"- and "RSS Items"-content blocks, as empty emails will be sent out otherwise.
 In the upper bar, there are multiple ways to test your newsletter before sending it. You can view an email preview under "Preview and Test".
 If you feel like your newsletter is complete, you can send a test mail to yourself.
My advice to you: do some in-depth testing before sending your first newsletter. When everything looks or works the way you want it to, click on "Save and Exit" in the top right corner.
Further steps are not necessary, you've now successfully created an RSS feed newsletter with MailChimp.
If you feel like your newsletter is complete, you can send a test mail to yourself.
My advice to you: do some in-depth testing before sending your first newsletter. When everything looks or works the way you want it to, click on "Save and Exit" in the top right corner.
Further steps are not necessary, you've now successfully created an RSS feed newsletter with MailChimp.
Why Choose MailChimp as Your Newsletter Provider?
MailChimp is one of the largest providers for email campaigns, and is free to use for up to 2,000 email recipients. The interface is user-friendly, and there are many pretty templates for the newsletters. It is also possible to create a custom template to meet your own requirements. Realizing a corporate design is no problem either, using the free MailChimp account. The free account allows you to send up to 12,000 emails a month to up to 2,000 recipients. This should be more than enough for the average blogger.
The free account also comes with a simple analysis function. If you need more, you need to upgrade to a paid account. The paid accounts start at 10 USD a month. Of course, if this is something you can't afford, there are many great affordable alternatives to Mailchimp out there.
MailChimp Newsletter With WordPress - How to
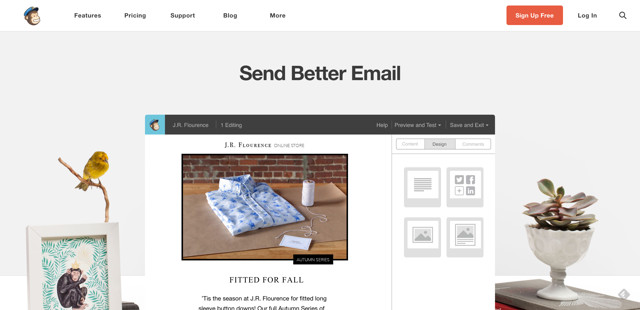
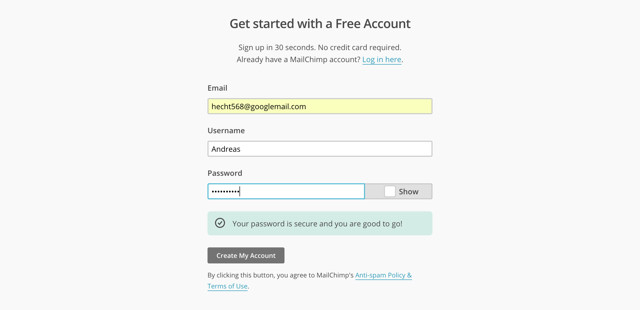
Before we get started, set up a free MailChimp account. Visit the MailChimp website and click the red "Signup Free" button. Afterwards, fill in the form, and when asked for the company, enter the blog name. Your address is also important, as it has to be placed in the end of the newsletter later on.
After confirming your email address, it becomes fit for use. Now, execute the remaining steps one by one.
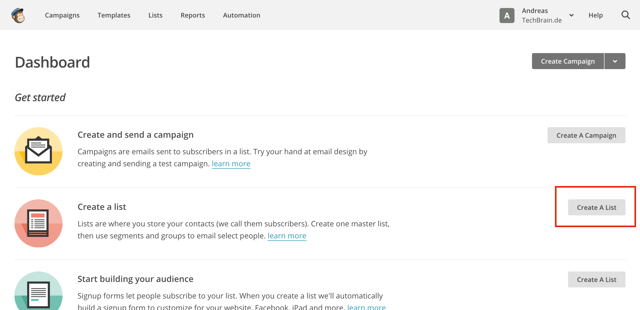
Step 1: Creating an Email List
The first step is the creation of an email list that stores all email addresses that you want to send the newsletter to. As you don't have a list yet, click "Create List" in the next window. Fill in the entire form. You'll be asked things like the name of the list, the email address, and the name that will be entered as the sender, as well as the reason why the recipients receive the newsletter, and so on.
Step 2: Creating the Signup Form
To create a subscription form for your newsletter, first click on Signup forms, and then on Select. You'll then be redirected to a page where you can choose between a couple of options for a signup form. Choose a variant and then copy the displayed code.
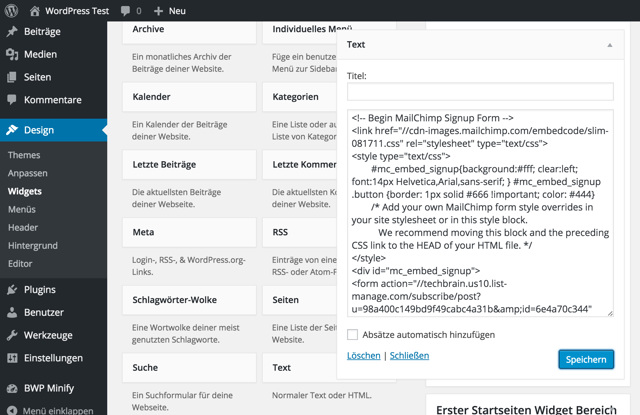
Step 3: Integrating the Signup Form Into the WordPress Website
Log into your WordPress site and go to the widget page. Choose a text widget and place it in the sidebar. Enter the copied code into the text widget and save it.
Now, you have a signup form for the newletter on your blog, which allows you to start collecting email addresses.
Of course, there are many different, and more successful integrations of a newsletter signup form, but considering all the variants would blow up this article. Thus, let's stick to the simple default signup form.
Step 4: Setting Up an RSS Feed Newsletter
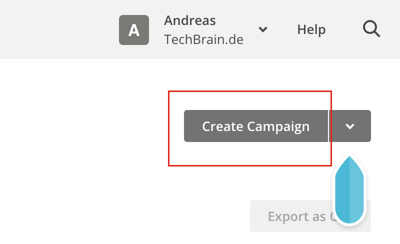
Once you collected a couple of email addresses, it's important to start sending newsletters. Of course, you can always log into your MailChimp account and manually send a newsletter. However, it seems much more useful to send automated campaigns. For that, we'll use the WordPress blog's RSS feed. To start an RSS newsletter campaign, log into your MailChimp account and click on "Campaigns => Create Campaign".
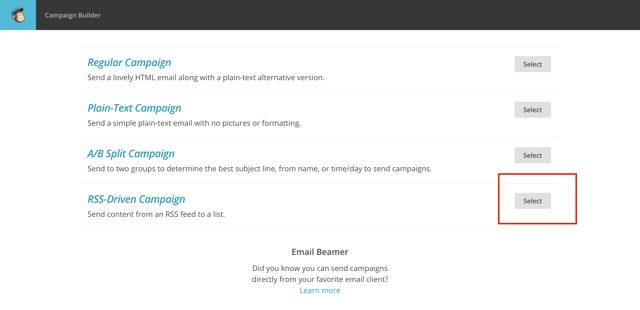
Then choose the "RSS-Driven Campaign" in the next window.
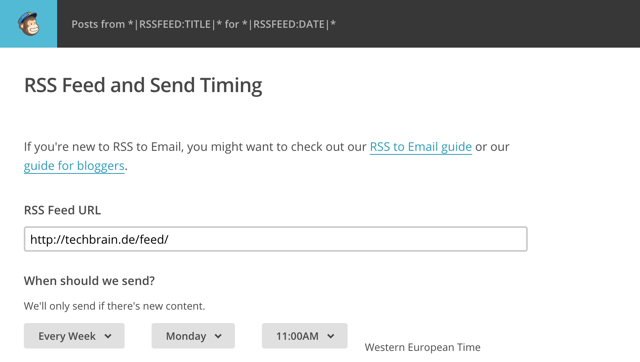
Enter your RSS feed adress in the opening window, choose which day of the week you want the newsletter to be sent out, and how frequent, as well as at which time you want it to be sent.
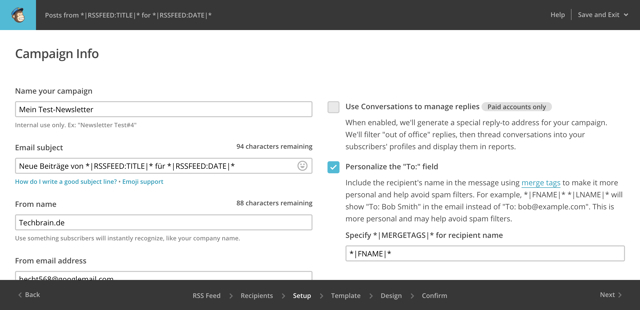
Now click on "Next" in the bottom right to continue. Then, MailChimp will ask for the email list that you want the newsletter to be sent to. Choose your list and click on "Next" once more.
In the following window, we'll assign a name to the campaign (this will only be used internally), and make some smaller adjustments. Them, click "Next" again.
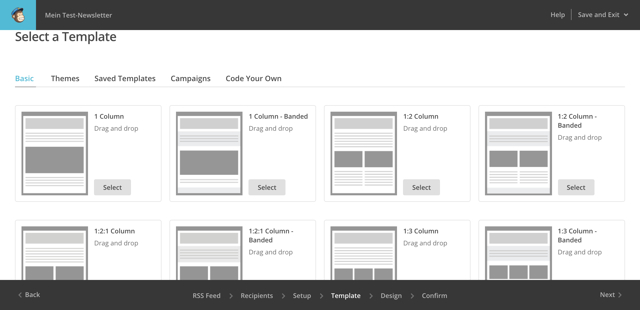
Step 5: Choosing a Template
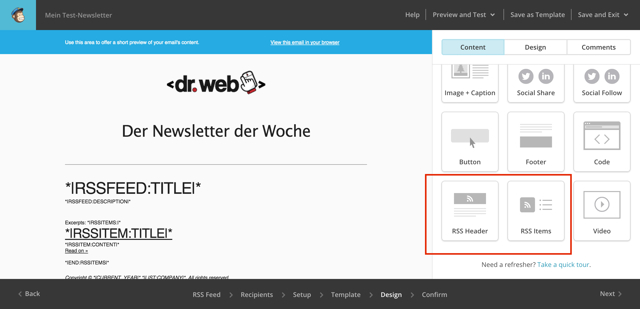
Choose one of the templates or themes and click "Select". MailChimp will then allow you to make some adjustments to your newsletter. You can place a logo, add content blocks, change text colors and fonts, and a lot more.
The important thing here is, that your newsletter has to contain the "RSS Header"- and "RSS Items"-content blocks, as empty emails will be sent out otherwise.
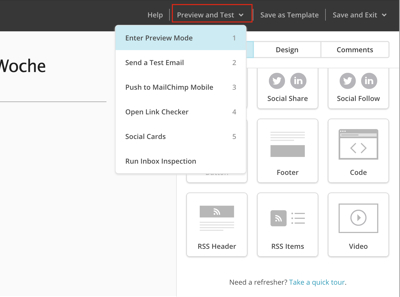
In the upper bar, there are multiple ways to test your newsletter before sending it. You can view an email preview under "Preview and Test".
If you feel like your newsletter is complete, you can send a test mail to yourself.
My advice to you: do some in-depth testing before sending your first newsletter. When everything looks or works the way you want it to, click on "Save and Exit" in the top right corner.
Further steps are not necessary, you've now successfully created an RSS feed newsletter with MailChimp.
Conclusion
We hope that this article was able to help you set up an automated email newsletter. Of course, MailChimp offers a lot more options for the creation of newsletters. Nonetheless, getting started is not too difficult.Related Links
- MailChimp Tutorial: Create an RSS-Driven Campaign
- MailChimp Guide: MailChimp for Bloggers